" /> Windows MDM Reference

Windows MDM Reference

August 2021

Windows MDM provides a management solution to help IT administrators to manage devices, enforce policies without compromising users' privacy on their devices.

The ZENworks Window MDM document includes information that is required to configure and use the Windows MDM feature in ZENworks. To use the Windows MDM features an MDM server should be configured. For more information, see Configuring MDM Server.

NOTE:Due to Microsoft limitations, MDM enrollment, MDM Sync, and Azure AD Join is supported only with IPv4 addresses.

1.0 Configuring Windows Notification Service

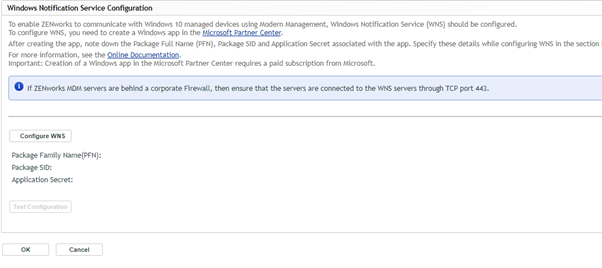
To enable ZENworks to send push notifications to Windows devices that are managed through Windows Modern Management, Windows Notification Service (WNS) should be configured.

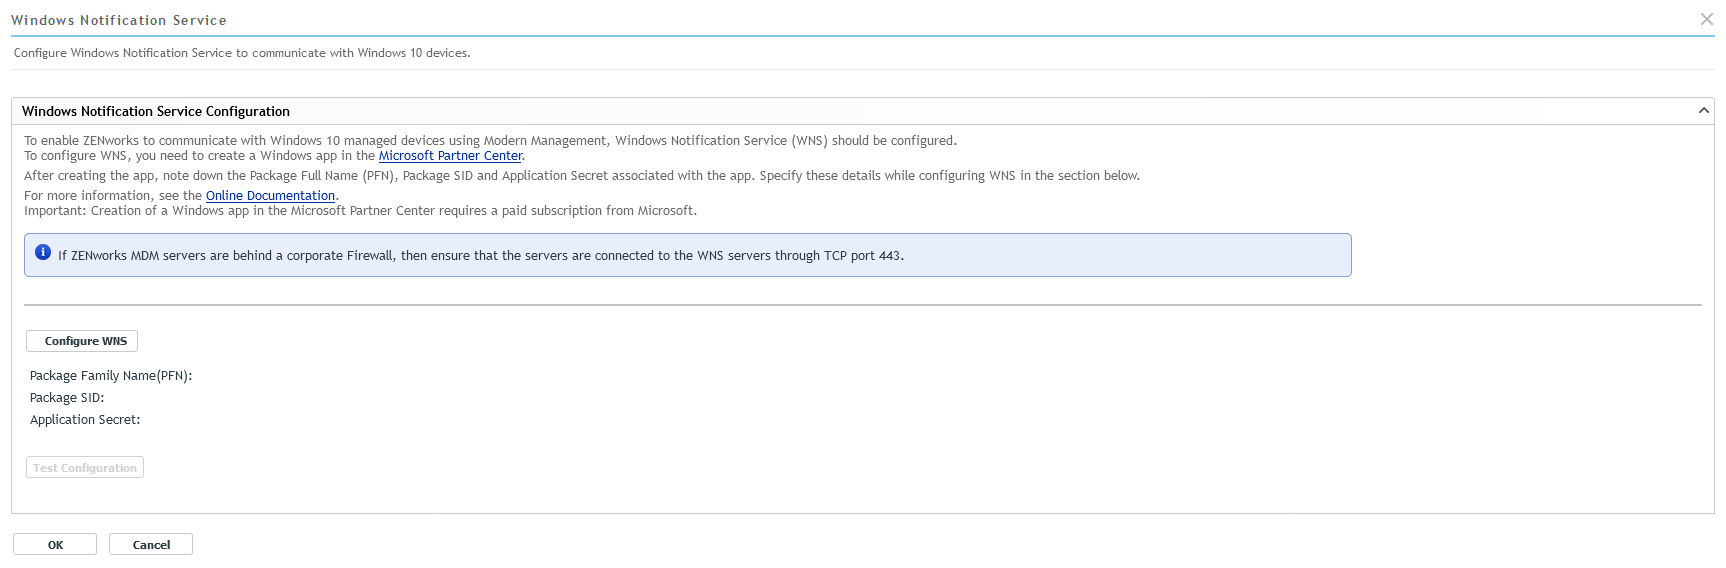
To configure WNS, you need to create a Microsoft Store app in the Microsoft Partner Center and to do this you require a paid Microsoft subscription.

NOTE:For Windows MDM enrollment, configuring WNS is mandatory. However, if for some reason, you do not want to configure or bypass it, it can be done via configuration file on the Primary Server.

Go to the following location:

On Linux: /etc/opt/microfocus/zenworks/WinMDM/winmdm-default-configuration.properties

On Windows: %ZENSERVER_HOME%\conf\WinMDM\winmdm-default-configuration.properties

Modify the following setting: AllowEnrollmentWithoutWNSConfigured=true

After modifying the settings, restart the ZENworks Services.

If WNS is not configured, then push notifications cannot be sent to Windows MDM devices. Refresh quick task for such devices will always fail.

For more information, see Reference documentation: https://docs.microsoft.com/en-us/previous-versions/windows/apps/hh913756(v=win.10)

1.1 Creating a Microsoft Store App

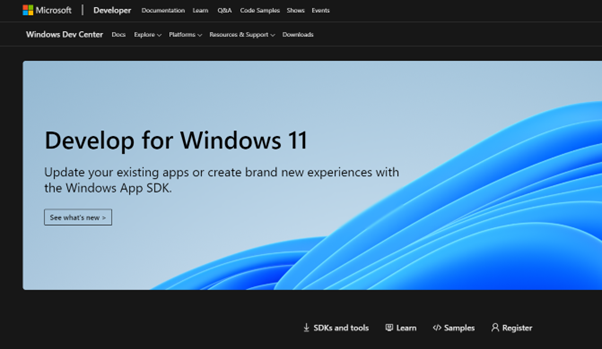
The Microsoft store app can be created in the Microsoft Dev Center.

NOTE:Ensure that you have a paid subscription (Microsoft Developer Account) from Microsoft to create a Windows app in the Microsoft Partner Center.

To create an app, perform the following steps:

  1. Open the Microsoft Dev Center.

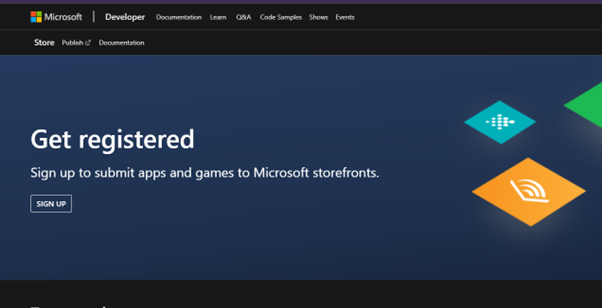
  2. Click Register, and then click Sign up.

  3. In the Sign in page, specify your Microsoft developer account.

  4. Click Apps and Games tile.

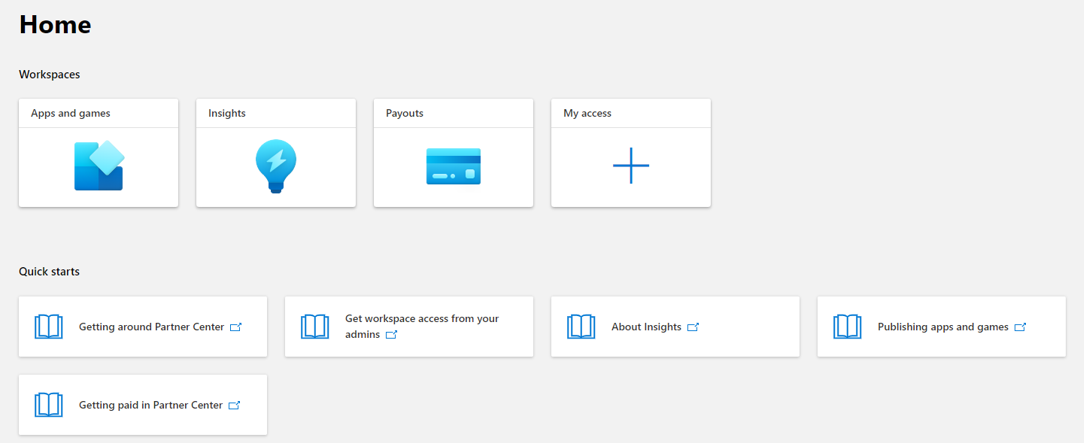
    In Microsoft Partner Center, ensure that you are able to view Apps and Games tile. If the tile is not visible, then contact Microsoft Support.

  5. Click New product.

  6. Specify a unique name for the app and then click Reserve product name.

    You will be redirected to the App Overview page.

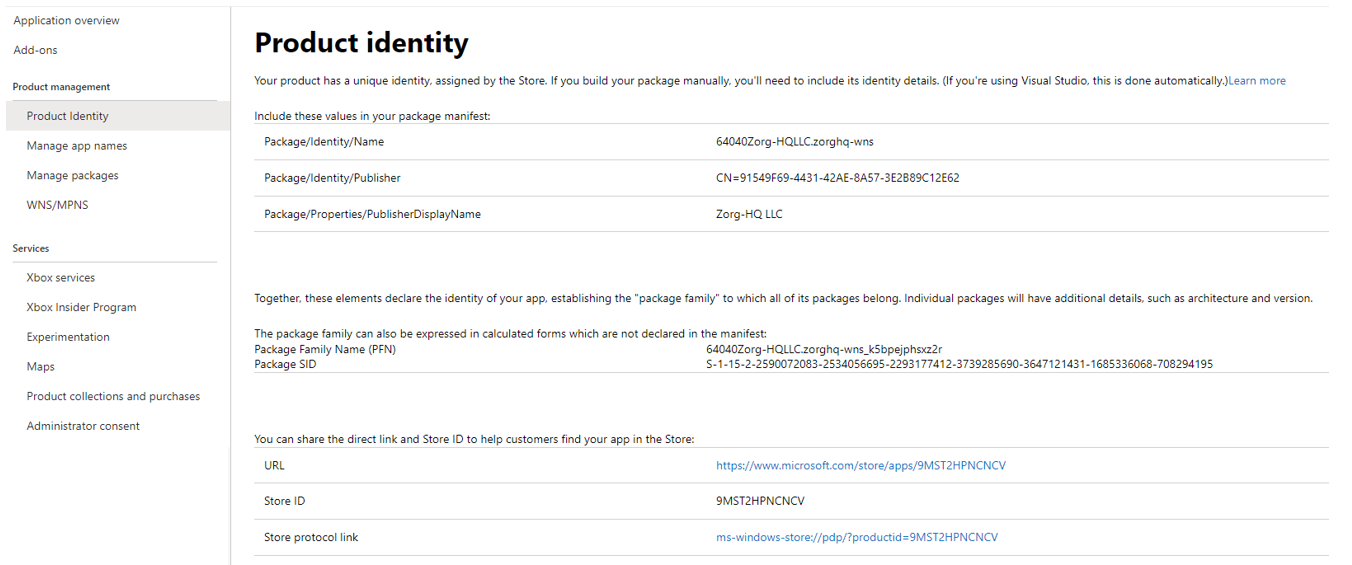
  7. On the left-hand side, click Product identity.

  8. Make a note of Package Family Name and Package SID.

  9. On the left-hand side, click WNS/MNPS and then click the App Registration link.

    You will be redirected to the Azure portal

  10. Log in with your Microsoft developer account, that was user earlier to log into Microsoft Dev Center.

  11. On the left-hand side, click Certificates & Secrets.

  12. Click New client secret.

  13. Specify a name and duration.

    A new secret will be created. Copy the Value data, which is the Application secret.

After creating the app, ensure that you have noted the following details to configure WNS:

  • Package Family Name (PFN)

  • Package SID

  • Application Secret

1.2 Configuring Windows Notification Service (WNS) in ZCC

To configure WNS, perform the following steps:

  1. In ZCC, click Configuration > Push Notification > Windows Notification Service.

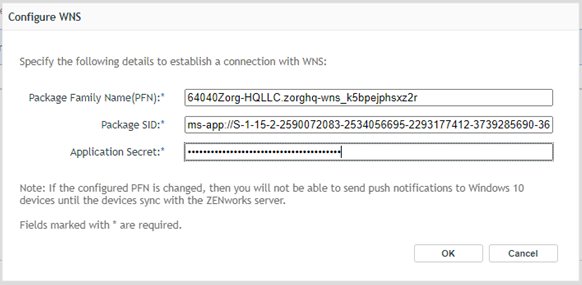
  2. In the Windows Notification Service page, click Configure WNS, and then specify the following details:

    • Package Family Name (PFN)

    • Package SID

    • Application Secret

  3. Click OK.

After clicking OK, Package SID and Application Secret are validated, and then ZENworks establishes a connection with WNS.

After successfully configuring WNS, you will be able to send push notifications to the enrolled devices.

2.0 Creating Provisioning Package

To bulk enroll Windows devices, you need to create a provisioning package using the Windows Imaging and Configuration Designer tool.

2.1 What is a Provisioning Package?

A provisioning package contains a collection of configuration settings. This file can be created using a Windows device, which can later be used for bulk enrollment.

2.2 Prerequisites for Creating the Provisioning Package

The prerequisites to create a Provisioning Package can be gathered from the ZENworks Configuration page.

To go to the Configuration page:

  1. In ZCC, click Configuration.

  2. In the Configuration page, in the Management Zone Settings panel, click Windows MDM.

  3. Click Enrollment using Provisioning Package.

NOTE:

The Prerequisites for Provisioning Package Creation page lists all the prerequisites that are required to create a Provisioning Package.

Following are some of the prerequisites that should be met before creating the provisioning package:

  1. Registration Key

    Create a Registration Key (Secret) in ZCC. The registration key can also be used to restrict the number of devices that gets registered with the Provisioning Package Ensure that you have zone Configure Registration rights to create the registration key. Ensure that you note down the registration key, as it will be used later to create the provisioning package. For more information, see Creating Registration Keys and Rules in the ZENworks Discovery, Deployment, and Retirement Reference.

  2. Authorization Key

    Create an Authorization Key (Secret) in ZCC. Using this Authorization Key, you can authorize the Windows devices that should be enrolled to your Management Zone. The authorization key ensures that only devices with authorization key will be able to register to the zone. Ensure that you note down the authorization key, as it will be used later to create the provisioning package. For more information, see Creating Authorization Key in ZENworks Discovery, Deployment, and Retirement Reference.

  3. MDM Server

    Select an MDM Server to which the Windows devices should be enrolled. The selected MDM will be used to manage the enrolled devices. You can use multiple MDM servers to manage the load on the server. Based on the selected server, the MDM Enrollment URL will be populated.

  4. MDM Enrollment URL

    Note down the URL, which will be used later while creating the provisioning package. The MDM enrollment URL will be auto populated after selecting the MDM server.

    By default, the MDM server and MDM Enrollment URL will be empty. If you navigate to other tabs after selecting the MDM server, then the MDM Server and MDM Enrollment URL will not be retained.

  5. Zone Certificate

    Download the zone certificate for secured communication between the Windows devices and the ZENworks server. This certificate will be installed on device to ensure SSL. Skip this step, if you are using the external public trusted certificate.

    For more information on ZENworks certificates, see the ZENworks SSL Management Reference.

2.3 Advantages of Enrolling with Provisioning Package

Advantages of enrolling Windows devices using provisioning packages (PPKG) are:

  • One click enrollment: By double clicking the provisioning package, a Windows device can be enrolled with ZENworks.

  • Bulk enrollment: Using the PPKG file, you can enroll large number of Windows devices.

2.4 Creating a Project in Windows Configuration Designer

To enroll a Windows device, you need to create the provisioning package on a Windows device. By default, Windows Configuration Designer will not be available on the device. Ensure that you install it from Microsoft Store. Before creating the provisioning package, ensure that all the prerequisites specified in the Prerequisites for Creating the Provisioning Package section are met.

To create a project in Windows Configuration Designer, perform the following steps:

  1. On a Windows device, Open Windows Configuration Designer.

    The Windows Configuration Designer can be downloaded from the Microsoft Store.

  2. Click File and then select New project.

  3. Perform the following steps, and then click Next:

    • Specify a name for the provisioning package.

    • Select a folder path for the package to be saved.

    • Specify a suitable description for the package.

  4. Select project workflow as Provisioning package, and then click Next.

  5. Select the type of Windows edition and then click Next.

  6. If required, you can import an existing provisional package to your project, or click Finish to create the project.

2.5 Customizing the Provisioning Package

After creating the project, perform the following steps to create a customized provisioning package:

  1. Open Windows Configuration Designer.

  2. Click File, select Open project and then select the project that you have created.

  3. Expand Runtime settings, select Workplace and then click Enrollments.

  4. In the UPN field, specify a name to identify the enrollment.

  5. Click the UPN that was created and perform the following:

    1. AuthPolicy Select On-Premise.

    2. DiscoveryServiceFullUrl: Provide the complete URL of the ZENworks in the format as shown below.

      https://<ZEN_Server>/zenworks-win-mdm/registration/discoveryservice

      Where ZEN_Server is the IP or hostname of ZENworks server.

    3. Secret: The ZENworks Registration Key and Authorization Key, as shown below:

      (regkey:<reg_key><space>authkey:<auth_key>).

      These keys were obtained from Prerequisites for Creating the Provisioning Package.

      Example: Registration Key: ec9f48d8-91e8-b60c-2842-7a5756bf6531, Authorization Key: bf84-e37c6

      Secret Key: regkey:ec9f48d8-91e8-b60c-2842-7a5756bf6531 authkey:bf84-e37c6

  6. In the Runtime settings, select Certificates.

  7. In Certificates, perform the following:

    1. Root Certificate: Specify a name for the root certificate.

    2. Certificate Path: Upload the certificate that should be used for the enrollment. Ensure that you upload the certificate that was downloaded from ZCC in Prerequisites for Creating the Provisioning Package. The certificate should be in the CER format.

    Certificates should be distributed out of band, and not part of the enrollment package.

  8. Click File, and then click Save the project.

    To create the provisioning package, see the Building the Provisioning Package section.

2.6 Building the Provisioning Package

After customizing the provisioning package, perform the following steps to build and create the provisioning package (PPKG) file:

  1. Click Export, and then select Provisioning package.

  2. Specify the following details, and then click Next:

    1. Name: Displays the Project Name. If required, you can rename the file.

    2. Version: Displays the default package version. If required, you can modify the version of the provisioning package.

    3. Owner: Select the package owner type.

    4. Rank: Select any value between 0 to 99. The default value is 0.

  3. Select the security details for the provisioning package. If the provisioning package has to be encrypted, then select any one of the following:

    1. Encrypt package: If you want to encrypt the provisioning package with a password, then select this option and specify a password.

    2. Sign package: If you want to sign the provisioning package with a certificate, then select this option, and then upload a valid certificate by clicking Browse.

  4. Select a folder in which the provisioning package should be saved, and then click Next.

  5. Review the displayed information, and then click Build.

    If the build is successful, then the location of the provisioning package is displayed.

  6. Click Finish.

2.7 Enrolling Windows Devices Using the Provisioning Package (PPKG)

After creating the PPKG file, you can use this file to enroll Windows devices with minimal user intervention.

The provisioning package can be deployed to the device using any of the following methods:

  • Through Group Policy

  • Directly upload the package on the device and enroll the device.

  • If the device is already enrolled with ZENworks, the PPKG can be deployed through a bundle.

  • Embedding the PPKG within an Image.

To enroll a Windows device, perform the following steps:

  1. Go to Settings > Accounts > Access work or school > Add or remove a provisioning package and click on Add a package.

  2. Browse and select the provisioning package. The device gets enrolled with ZENworks.

To verify whether the device is enrolled to ZENworks, perform the following steps:

  1. Log into ZCC.

  2. Click Devices > Workstations.

    If the device is successfully enrolled, then it will either be listed in the Workstations list or the Pending Enrollment Devices folder.

  3. Click the enrolled device and in the device Summary page, check the MDM Enrolled status.

NOTE:To remove the provisioning package, go to Settings > Accounts > Access work or school > Add or remove a provisioning package. By default, users are not allowed to unenroll their MDM devices. To allow users to unenroll their MDM devices, in ZCC, go to Configuration > Device Management > Windows MDM Device Settings, and then clear the Block User Initiated MDM Unenrollment checkbox.

3.0 Terms of Use Policy

In ZENworks, you can create a Terms of Use policy to display the terms of use content to end-users when they enroll their devices. The Terms of Use content can be either in the languages supported by ZENworks or preferred language.

Points to be Remembered:

  1. In this release, only one Terms of Use Policy can be created in the zone.

  2. Personal ownership is not supported.

3.1 Adding the Terms of Use

To add the Terms of Use, perform the following steps:

  1. Log into ZCC.

  2. Click Policies > New > Policy

    Or

    In the Policy Tasks, click New Policy.

  3. Select All > General > Terms of Use Policy.

  4. Specify Name and Administrator Note, and then click Next.

  5. In the Terms of Use Policy page, click Add.

  6. Specify the following information:

    1. Title: Specify a name for the Terms of Use policy.

    2. Language: Select the language for the Terms of Use content. The drop-down displays all the languages supported by ZENworks. If required, you can add an unsupported language by selecting Custom (Specify Language), and then specify the language name in the text box.

      If you are using a Custom language, then you need to specify the following information:

      NOTE:The following fields are displayed only when you select Custom (Specify Language) from the Language drop-down.

      • Text Displayed on Declining: In this field, enter text in the specified language that should be displayed when an end-user declines the Terms of Use.

      • Text for the Accept Button: In this field, enter text in the specified language that should be displayed for the Accept button.

      • Text for the Decline Button: In this field, specify the text in the specified language that should be displayed for the Decline button.

    3. Ownership: Select the ownership for the Terms of Use. Currently, ZENworks supports only Corporate ownership.

      The available options are:

      • Personal: To enroll in BYOD (Personal) devices.

      • Corporate: To enroll devices that are owned by the organization. Currently, ZENworks only supports Corporate ownership.

    4. Terms of Use Content: Specify the Terms of Use content that should be displayed when end-users enroll their device with ZENworks.

      NOTE:You can add multiple Terms of Use in a policy. However, only the latest Terms of Use that were edited or added will be displayed on the agent during enrollment and the language displayed in device will be based on the language in the request

  7. After adding the Terms of Use, click Next.

  8. In the Summary page, review the information and then click Finish.

4.0 Creating an Azure MDM Application

4.1 Pre-requisites:

Before creating an Azure MDM application, ensure that you have the following rights:

  • Device View rights on the MDM server.

  • Configure Azure App Management rights

  • User Modify rights. User rights are required only if Intune App protection is being configured.

4.2 Creating an Azure MDM Application

To enroll Windows MDM devices and enforce Intune App Protection Policies through Azure, you need to create an on-premise MDM Application. The MDM applications allow ZENworks to communicate with Azure to manage Windows MDM devices and Azure App access.

IMPORTANT:While adding Terms of Use, Discovery URL and Redirect URL, ensure that the URLs are from a verified domain.

For more information on adding and verifying the domain URLs, see Adding Domain URL to Azure AD.

To create an application in the Microsoft App Registration Portal, perform the following steps:

  1. In ZCC, click Modern Management > Create Azure MDM Application.

  2. In the Azure MDM Application page, click Add Application.

  3. In the pop-up window, select a Primary Server that should be used as an MDM Server.

  4. Log into the Azure Management portal using a user account.

  5. In the Azure Services section, click Azure Active Directory.

  6. In the left navigation panel, click Mobility (MDM and MAM), and then click Add application.

  7. Click On-premises MDM application, specify the name, URL, logo, and then click Add.

  8. Click Mobility (MDM and MAM), the application that you added will be listed in this page.

  9. Click the Application that you created.

  10. In the Configure page, specify the following details:

    • MDM user scope: Select user groups who can enroll their devices and should be managed through this app. The available options are:

      • None: Select this option, if you do not want any user to be managed through this app.

      • Some: The users group selected here will be managed through the MDM server that was selected in ZCC while creating this app. You can create multiple apps using different MDM servers and manage load on the servers.

      • All: Select this option if you want all users from all user groups should be managed through this app.

    • Groups: Add AD groups to which you want to enroll using Azure. You can select either all AD groups or specific AD groups.

      This option is available only if you have selected Some as the MDM user scope.

    • MDM Terms of use URL: Copy the Terms of use URL from ZCC and paste it here.

    • MDM discovery URL: Copy the Discovery URL from ZCC and paste it here.

  11. Click the On-premises MDM application settings link.

  12. In the Authentication page, click Add a platform, and on the right side of the window, select Web.

  13. Copy the Redirect URL from ZCC, paste the URL in the Callback URIs field.

  14. Click Configure.

  15. In the Overview page, click the Application ID URI and specify the Application ID URL.

  16. Copy the Application (Client) ID and Directory (tenant) ID.

  17. On the left side of the window, click Certificates & Secrets.

  18. In the Client secrets section, click New client secret.

  19. Specify the description and select the duration for which the Client Secret should be valid.

  20. Copy the Value.

    NOTE:Application (Client) ID, Directory (tenant) ID, and Client secret (Application password) is required to generate an access token in ZCC.

  21. On the left side of the window, click Authentication and ensure that you have single tenant in the Supported account types section.

  22. After configuring the application, click Save.

  23. In ZCC, click Generate Token and specify the following information that was gathered while creating the application in Azure:

    • Application ID (Client ID)

    • Tenant ID (Directory ID)

    • Application Password (Client Secret)

  24. After specifying the details, click OK.

    NOTE:Ensure that you always allow pop-ups for the ZCC page from which Microsoft Application is being configured.

  25. In the pop-up window, review the requested Permissions, and then click Accept. You will be redirected to ZCC.

  26. In ZCC, click OK. The Application will be added.

After adding the application, in the Azure MDM Application panel, you can view the status of the application.

NOTE:If you have multiple MDM servers in your zone, you can specify callback URLs for each of these MDM servers in the Azure portal. By specifying multiple URLs, you can renew your token from any of the MDM servers. To specify additional URLs in the Azure portal, select Authentication in the left navigation pane of the page that displays the details of the app. Under the Redirect URIs section, specify the callback URLs of the other servers in the zone.

5.0 Enrolling Windows Devices

Windows devices can be enrolled to ZENworks through various methods such as:

Prerequisites: Before enrolling any Windows device, ensure that you are ready with the following:

  • Windows Notification Service should be configured.

  • A Terms of Use policy should be created.

  • Azure MDM Application should be created (applicable only for Azure AD and Autopilot enrollment modes).

  • Zone certificate should be installed on the device.

  • For embedding a certificate, ensure that root certificate is available on the device.

IMPORTANT:

  • After enrolling, the data such as policies and other configuration settings will be enforced on the device only after a couple of minutes or the subsequent sync.

  • Due to Microsoft limitations, MDM enrollment, MDM Sync, and Azure AD Join is supported only with IPv4 addresses.

5.1 Enroll Windows Devices Using Azure AD

To enroll Windows devices using Azure AD Join, perform the following steps:

  1. Open Access Work or School app. Click Connect.

  2. Click Join this device to Azure Active Directory.

  3. Specify the Azure AD email ID and click Next.

  4. In the password prompt, specify the password and then click sign in.

  5. Read the displayed Terms of Use and then click Accept.

    If the Terms of Use is declined, then you cannot proceed with the device enrollment.

    Device enrollment might take some time depending on the network speed.

  6. After the device is enrolled, the Access School or Work app displays the enrollment information.

To verify whether the device is enrolled to ZENworks, perform the following steps:

  1. Log into ZCC.

  2. Click Devices > Workstations.

    If the device is successfully enrolled, then it will either be listed in the Workstations list, folder, folder specified in Registration rules or the Pending Enrollment Devices folder.

  3. Click the enrolled device and in the device Summary page, check the MDM Enrolled status.

    If the device is listed in the Pending Enrollment folder, then the device is not enrolled successfully.

5.2 Enroll Windows Devices Using AutoPilot

To enroll Windows devices using AutoPilot, perform the following steps:

IMPORTANT:If the device is enrolled using Autopilot, and the local administrator is not enabled on the device, then when you unenroll the device, you will not be able to log into the device again. Hence, the device becomes unusable.

For more information, see Windows Autopilot Deployment Resources.

Step 1: Create an AutoPilot Deployment Profile

To create an AutoPilot deployment profile in Azure, perform the following steps:

  1. Sign into the Microsoft Store for Business portal.

  2. In the portal, click Manage.

  3. Go to Devices > AutoPilot Deployment > Create new profile.

  4. Specify a profile name and configure settings to define the set of experiences for end-users.

  5. Click Create.

Step 2: Add Devices and Apply AutoPilot Deployment Profile

After creating the profile, assign the AutoPilot deployment profile to user groups in Azure to enable users to activate devices using Windows AutoPilot. The devices will be added either by resellers or OEM vendors.

Prerequisites:

Before adding/importing the devices, ensure that you go through the following:

The devices that are being imported using the CSV file should be added in the following order:

  • Device Serial Number

  • Product ID

  • Hardware Hash

The above details can be obtained from hardware vendors or For more information, see Device list CSV-file.

To import devices, perform the following steps:

  1. Sign into the Microsoft Store for Business portal.

  2. In the portal, click Manage.

  3. Click Add Devices.

  4. In the pop-up window, select a CSV file, in which the devices are listed.

  5. After the details are uploaded, a pop-up window is displayed.

  6. Either specify the name of the new group, or select an already existing group from the drop-down, and then click Add.

Step 3: Assigning the AutoPilot Profile to Devices

After creating the profile and importing devices, you can associate the profile with the devices.

To associate the AutoPilot profile to devices, perform the following steps:

  1. Sign into the Microsoft Store for Business portal.

  2. In the portal, click Manage.

  3. Click Add Devices.

  4. Select the required devices, click AutoPilot deployment, and then select a profile to which devices should be associated.

To verify whether the device is enrolled to ZENworks, perform the following steps:

  1. In ZCC, Click Devices > Workstations.

    If the device is successfully enrolled, then it will either be listed in the Workstations list or the Pending Enrollment Devices folder.

  2. Click the enrolled device and in the device Summary page, check the MDM Enrolled status.

Step 4: Enrolling the Devices

NOTE:For embedding the certificate, ensure that root certificate is available on the device. You can use any imaging solution to enroll a device. For more information, see Step 5: Embed Certificates using Imaging solution.

  1. Open Access Work or School app. Click Connect.

  2. Click Join this device to Azure Active Directory.

  3. Specify the Azure AD email ID and click Next.

  4. In the password prompt, specify the password and then click sign in.

  5. Read the displayed Terms of Use and then click Accept.

    If the Terms of Use is declined, then you cannot proceed with the device enrollment.

    Device enrollment might take some time depending on the network speed.

  6. After the device is enrolled, the Access School or Work app displays the enrollment information.

To verify whether the device is enrolled to ZENworks, perform the following steps:

  1. Log into ZCC.

  2. Click Devices > Workstations.

    If the device is successfully enrolled, then it will either be listed in the Workstations list or the Pending Enrollment Devices folder.

  3. Click the enrolled device and in the device Summary page, check the MDM Enrolled status.

Step 5: Embed Certificates using Imaging solution

When enrolling Windows devices, if you are not using a well-known CA issued certificate, then you have to perform any one of the following use cases using any imaging solution. We recommend using the ZENworks Imaging solution.

Use Case 1: A server certificate is already installed on a device where an image needs to be created

You can perform the following steps when a server certificate is installed on the device where you want to create an image.

Prerequisites for creating an image on Windows:

  • Ensure that the file system is clean by running the chkdsk /f command.

    • Enter Y when the chkdsk program promotes a file system check during the next boot.

    • After the disk checking is complete, ensure that there are no errors in the drive and log in to Windows.

  • Run the below Sysprep command by navigating to Windows\System32\Sysprep.

    • Sysprep/oobe/generalize/shutdown

  • Have a Windows machine with desired server certificate (ca.cer) installed in the trust store.

To create an image, perform the following steps:

  1. Log in to ZENworks Control Center (ZCC) as an Administrator user.

  2. Click Configuration.

  3. In the Management Zone Settings panel, click Device Management > Preboot Services > Third-Party Performance NTFS Driver Integration Settings.

  4. Click the here hyperlink to download the latest Tuxera High-Performance NTFS driver zip file and save it on your local system.

  5. Click the browse icon to browse for and select the high-performance NTFS driver zip file.

  6. Click Ok to upload to the ZENworks Server.

  7. Click Status to view the status of content replication across all Primary and Satellite Servers with an imaging role in the management zone. You must start the imaging operation only when the status is ‘Available’. The bootcd-tntfs.iso file will be created.

  8. Use the bootcd-tntfs.iso file to boot the machine to be imaged. The bootcd-tntfs.iso file is located in:

    • Windows: %ZENWORKS_HOME%\bin\preboot\

    • Linux: /opt/novell/zenworks/preboot/bin/winutils

      NOTE:It is recommended that you use a local machine.

  9. In the bootcd window, select ZENworks Imaging Maintenance.

  10. Specify the Imaging Server IP address and click Enter.

  11. Run the img -mp <image-name>.zmg command.

  12. ZENworks imaging engine builds the.zmg file and automatically saves the image files to the default images directory on the Imaging Server:

    • Windows: %ZENWORKS_HOME\work\content-repo\images

    • Linux: /var/opt/novell/zenworks/content-repo/images or /var/opt/microfocus/zenworks/content-repo/images

  13. Reboot the device.

Use Case 2: Embedding certificate using the Image Explorer utility (zmgexp) if the sysprep image already contains the unattend.xml file

If the existing image is already syspreped, you can replace the existing Unattend.xml file with a new one using the Image Explorer utility.

To replace the existing Unattend.xml file on an image, perform the following steps:

  1. Start Image Explorer by running the following file:

    Windows: %ZENWORKS_HOME%\bin\preboot\zmgexp.bat

    Linux: /opt/novell/zenworks/preboot/bin/zmgexp

  2. Click the Folder icon and select the base image.

  3. In a Windows system partition (C:), navigate to the Windows\System32\Sysprep folder.

  4. Add an Unattend.xml file that includes the PowerShell command to install the certificate.

  5. Create a folder in the partition where you have added the Unattend.xml file, name the folder as CA, and then copy ca.cer to that folder.

  6. Save the image.

  7. Boot the device using the bootcd-tntfs.iso file in maintenance mode.

  8. Specify the imaging server IP address and run the img -rp <image-name>.zmg command to restore the image.

    The certificate will be located in the trust store with the help of the PowerShell command specified in Unattend.xml run as part of the Sysprep process.

Use Case 3: Embedding certificate as part of the add-on image

To update or create an add-on image in the Unattend.xml file, perform the following steps:

  1. Start Image Explorer by running the following file:

    Windows: %ZENWORKS_HOME%\bin\preboot\zmgexp.bat

    Linux: /opt/novell/zenworks/preboot/bin/zmgexp

  2. Click the File menu and select New to create an add-on image.

  3. Click the Image menu and select Create Partition.

  4. Enter the target partition number and click OK. The number of Windows system partitions to be created depends on the Windows partition index in the base image.

  5. In a Windows system partition, duplicate the folder structure of C:\Windows\Panther.

  6. Select the Windows\Panther folder, click the Image menu, select Add files and upload the Unattend.xml file. The Unattend.xml file contains the PowerShell command to add ca.cer to the trust manager.

    NOTE:If the Unattened.xml file is already updated in the base image, ignore this step.

  7. Create a folder in the C:\ partition and name the folder as CA.

  8. Click the Image menu, select Add files, and upload ca.cer.

  9. Click Save. Specify a name with the.zmg extension (case-sensitive) and click OK.

    NOTE:

    • Ensure that the device is not linked to Azure where the image needs to be built.

    • Ensure that the Unattend.xml name is the same during the base image build, image explorer, and add-on image build process.

6.0 Unenrolling Windows 10 MDM Devices

To unenroll Windows MDM devices, as an admin you can assign a quick task or configure the Windows MDM device settings to allow or deny end-user initiated unenrollment.

6.1 Unenroll Device using Quick Task

A new Quick Task is introduced in ZENworks 2020 Update 2 to unenroll Windows MDM devices.

To unenroll Windows MDM devices, perform the following steps:

  1. In ZCC, click Devices > Workstations.

  2. Select the required Windows MDM enrolled devices, and then click Quick Task.

  3. Select the Unenroll MDM Device Now… option.

  4. In the Quick Start Status window, select Start.

    The device will be unenrolled after the Quick Task status is Done

NOTE:If the device is enrolled using Autopilot, and local administrator is not enabled on the device, then when you unenroll the device, you will not be able to log into the device again, hence, the device becomes unusable.

6.2 End-user initiated Unenrollment

From ZENworks 2020 Update 2 onwards, admin can configure whether an end-user can initiate the MDM device unenrollment by using Windows MDM Device Settings. By default, the setting will be disabled and end-user will not be able to initiate the unenrollment.

This is applicable only for the devices that are enrolled using the Provisioning Package.

To configure the Windows MDM Device Settings, perform the following steps:

  1. In ZCC, click Configuration > Management Zone Settings > Windows MDM Device Settings.

  2. In the Windows MDM Device Settings, select or clear the Block User Initiated MDM Unenrollment checkbox.

    By default, the Block User Initiated MDM Unenrollment checkbox will be selected. Hence, end-users are not allowed to initiate the unenrollment.

  3. After modifying the settings, click Apply.

    Any change in the setting will be applied on the device only during the next device refresh cycle.

6.3 Removing or Uninstalling a Provisioning Package

To remove or uninstall a provisioning package on a Windows device, perform the following steps:

  1. Log into the device using the local administrator credentials.

    NOTE:The provisioning package cannot be removed by domain users.

  2. Go Settings > Accounts > Access work or school > Add or remove a provisioning package.

    Remove the provisioning package.

6.4 Manually Disconnecting a Windows MDM Device

To manually disconnect a Windows device that is enrolled using MDM, perform the following steps on the device:

NOTE:To perform the following steps, you need administrator privileges.

  1. Run the following Powershell commands to unblock the disconnect option and to remove the PPKG:

    • Set-ItemProperty -Path Registry::HKEY_LOCAL_MACHINE\SOFTWARE\Microsoft\PolicyManager\current\device\Experience -Name AllowManualMDMUnenrollment -Value 1

    • Set-ItemProperty -Path Registry::HKEY_LOCAL_MACHINE\SOFTWARE\Microsoft\PolicyManager\current\device\Security -Name AllowRemoveProvisioningPackage -Value 1

  2. After running the script, disconnect the account.

    To disconnect the account, perform the following steps:

    1. Open the start menu and select the Windows Settings option, and then select Accounts.

    2. Select Access work or school.

    3. Select the MDM and click on the Disconnect button.

  3. After disconnecting, remove the provisioning package.

7.0 Deploying the ZENworks Agent on Windows Devices

To benefit from the additional features provided by the ZENworks agent, you can deploy the agent on Windows devices that are enrolled in the MDM mode. By deploying the ZENworks agent on these devices, you can also assign the existing Windows bundles that are documented in Creating Windows Bundle of the ZENworks Software Distribution Reference. Only device assignments are supported for this policy.

NOTE:To avoid high utilization of ZENworks services when the ZENworks agent is downloaded simultaneously on multiple devices, it is recommended that you do not assign this policy to folders or groups containing 100 or more devices.

To deploy the ZENworks Agent:

  1. On the Getting Started with Modern Management page, navigate to the Managing Windows Devices section. Navigate to Deploy ZENworks Agent and Applications> Deploy ZENworks Agent > Create Agent Deployment Policy. Alternatively, from the left hand side navigation pane of ZCC, navigate to Policies > New > Policy.

  2. On the Select Platform page, select All and click Next.

  3. On the Select Policy Category page, select General and then click Next.

  4. On the Select Policy Type page, select ZENworks Agent Deployment Policy and then click Next.

  5. On the Define Details page, specify a name for the policy, select the folder in which to place the policy, then click Next.

  6. On the Deployment Details page, specify the following and click Next:

    • Deployment Package: Deployment packages contain the files and information needed to install the ZENworks Agent on devices and register the devices in the Management Zone. Depending upon the processor architecture of the managed device, select the deployment package to be used for installing ZENworks Agent on the device. If you are not sure about the device's processor architecture, choose the package with target architecture as All, which applies to 32-bit and 64-bit platforms. There are various types of deployment packages available for Windows devices. For more information on the various deployment packages available for Windows, see Package Types and Architecture for Windows, in the ZENworks Download Page.

      If the selected package is deleted from the Primary Server, then the default agent package is deployed. You also have the option of customizing any of the default system packages to change the package or to create a new custom package. When you do so, you can modify the ZENworks Server address and registration key; you cannot modify, add, or remove the ZENworks Agent files. Also, the custom package should be created on the MDM Sync Server or it should be manually copied to this server. For more information on customizing the deployment package, see the Discovery, Deployment and Retirement Reference.

    • Agent Installation Folder: Specify the directory on the managed device where you want to install the ZENworks Agent. By default, the agent is installed to the directory specified in the %ZENWORKS_HOME% system environmental variable or to the %ProgramFiles%\novell\zenworks directory.

      You can also install the agent to a different location. Some examples of acceptable paths are:

      c:\

      c:\Program Files\Corporate\

      d:\Applications\Novell\ZENworks

    • Reboot Options: After the ZENworks Agent is deployed on the device, you must reboot the device to make the agent functional. Select from one of the following options to reboot the device:

      • Immediate: Reboots immediately after installation of the ZENworks Agent.

      • Manual: Allows the user to manually reboot the device at his or her convenience.

      • Do not prompt for reboot: Does not display the reboot prompt message to the user.

    • Start ZENworks with limited functionality: This is enabled only if you select Manual reboot option. Select this option to start the ZENworks Agent with limited functionality and without rebooting the device.

  7. In the Add Registration and Authorization Key page, you can either add a Registration Key or an Authorization Key or both. If the Security feature is enabled in the zone, then you need to specify both the Registration key and the Authorization key to enroll the ZENworks agent to the zone. If you do not specify the Authorization Key, then ZENworks agent will be installed but will not be enrolled to the zone. If the Security feature is disabled, you can proceed further without specifying any of the keys. For more information on Registration Keys, see Registration Keys and for information on Authorization Keys, see Authorization Keys.

  8. Click Finish to complete the activity.

You can now assign the policy to Windows MDM devices. For more information on assigning the policy, see ZENworks Configuration Policies Reference.

The status of the ZENworks Agent Deployment Policy is updated as soon as the MDM agent on the device syncs with the server. If the status of the policy is displayed as Pending for a considerable period of time, then it indicates that the policy has failed to deploy on the device. To re-deploy the policy, you can increment the version of the policy.

8.0 Deploying Applications

ZENworks lets you deploy and manage applications on Windows MDM devices using the existing Bundles feature. Only device assignments are supported for Windows MDM bundles. The following bundles can be deployed on Windows devices:

  • Windows MDM- Install MSI

  • Windows MDM CSP

NOTE:Support for these bundles is on an experimental basis and should be used for evaluation purposes only.

8.1 Deploying Windows MDM – Install MSI

This bundle enables you to deploy an application on Windows MDM devices that uses the Microsoft Installer (MSI) package. The MSI is deployed using the EnterpriseDesktopAppManagement Configuration Service Provider (CSP). The EnterpriseDesktopAppManagement configuration service provider is used to handle enterprise desktop application management tasks, such as installing applications. To deploy the bundle:

  1. On the Getting Started with Modern Management page, navigate to the Managing Windows Devices section. Navigate to Deploy ZENworks Agent and Applications > Deploy Applications > Create Bundles. Alternatively, from the left hand side navigation pane of ZCC, click Bundles > New > Bundle.

  2. On the Select Bundle Type page, click Windows MDM Bundle.

  3. On the Select Bundle Category page, click Windows MDM –Install MSI.

  4. On the Define Details page, specify a name for the bundle, select the folder in which to place the bundle, then click Next.

  5. On the Select .msi file page, either upload a .msi file or specify the .msi http or https URL that is to be deployed on Windows MDM devices. Specify the following details and click Next:

    • Upload .msi file for normal install: Use this option if you want the .msi file copied to the ZENworks Server and then distributed from the ZENworks Server to the assigned devices. This is referred to as normal install because the Windows MDM downloads .msi file to the managed device’s local drive and then the Microsoft Windows Installer program installs the application from the local .msi file. Click and allow the browser to launch ZCC Helper. If you have not installed the ZCC Helper on this device, you must do so before you can browse and upload files. Select .msi File dialog box is displayed. Click Browse to select the .msi file to upload.

    • Specify the .msi http or https URL: Specify a Uniform Resource Locator (URL) that will enable the Windows Installer to install packages, if these packages are hosted on a web server. Ensure that you specify a valid .msi URL that uses the http:// or https:// protocol.

    • MSI Product ID: Specify the MSI product code of the application. This field is auto populated if the option Upload .msi file for normal install is selected and can be edited. Ensure that you provide a valid Product ID or else the bundle will fail to deploy on the device.

    • MSI Version: Specify the MSI version number. This field is auto populated if the option Upload .msi file for normal install is selected and can be edited.

    • Install Parameters: Click to display the Install Parameters dialog box, then specify the desired restart options:

      • Do Not Restart (/norestart): Never restarts the workstation during the install process. The installation is not completed until the next time the workstation starts.

      • Always Restart (/forcerestart): Forces the device to restart without prompting users.

    • File hash: Specify the SHA256 hash value of file content. This field is auto populated if the option Upload .msi file for normal install is selected and can be edited. Ensure that you provide a file hash or else the bundle will fail to deploy on the device.

    • Timeout (in mins): The amount of time, in minutes, that the installation process can run before the installer considers the installation as failed. The default value is 30 minutes.

    • Retry Count: The number of times the download and installation operations will be retried before the installation is marked as failed. The default value is 3 and can be edited.

    • Retry Interval: The interval, in minutes, at which the retry operation should be performed. The default value is 5 minutes and can be edited.

    NOTE:If ZCC is accessed on a non-windows server, then the fields, MSI Product ID and MSI Version will not be auto populated.

  6. Click Finish to complete the activity.

You can now assign the bundle to Windows devices. For more information on assigning the bundle, see ZENworks Software Distribution Reference.

8.2 Deploying Windows MDM CSP

This bundle enables you to deploy a Configuration Service Provider (CSP) to set, modify, or delete various configuration settings such as wallpaper, language, and time zone settings, on Windows devices. A CSP also lets you grant native tool access permissions for programs such as the Action Center, limits access to certain applications and can also let you determine which setting the user can edit. The CSPs that can be deployed through this bundle, support SyncML. A SyncML message is a well-formed XML document that adheres to the document type definition (DTD), but does not require validation. While a SyncML message does not require validation, the XML in the document must adhere to the explicit order defined in the DTD.

NOTE:For additional information on using Windows MDM CSP, see Windows MDM CSP Repository.

  1. On the Getting Started with Modern Management page, navigate to the Managing Windows Devices section. Navigate to Deploy ZENworks Agent and Applications > Deploy Applications > Create Bundles. Alternatively, from the left hand side navigation pane of ZCC, click Bundles > New > Bundle.

  2. On the Select Bundle Type page, click Windows MDM Bundle.

  3. On the Select Bundle Category page, click Windows MDM CSP.

  4. On the Define Details page, specify a name for the bundle, select the folder in which to place the bundle, then click Next.

  5. On the Enter CSP Commands page, specify a set of SyncML commands to deploy a Configuration Service Provider (CSP) on a Windows MDM enrolled device. Using the Windows MDM CSP bundle, you can deploy any configuration settings available through CSPs on Windows MDM devices. For a list of all the available CSPs, see the Microsoft Download site. You can specify multiple CSPs within a bundle, that is, the SyncML can contain commands for multiple CSPs.

    For example, if you want to send a personalized desktop image, lock the screen image, and reboot the device, you can add the following SyncML commands for these multiple configuration settings in a single bundle:

    <Replace>
    <CmdID>ee1f6192-b4fe-4590-a1cf-3195437c9b96</CmdID>
    <Item>
    <Target>
    <LocURI>./Vendor/MSFT/Personalization/DesktopImageUrl</LocURI>
    </Target>
    <Meta>
    <Format xmlns="syncml:metinf">chr</Format>
    <Type>text/plain</Type>
    </Meta>
    <Data>https://upload.wikimedia.org/wikipedia/commons/3/38/Adorable-animal-cat-20787.jpg
    </Item>
    </Replace>
    <Replace>
    <CmdID>cfe31149-2a76-486d-a1ba-bb06b7771925</CmdID>
    <Item>
    <Target>
    <LocURI>./Vendor/MSFT/Personalization/LockScreenImageUrl</LocURI>
    </Target>
    <Meta>
    <Format xmlns="syncml:metinf">chr</Format>
    <Type>text/plain</Type>
    </Meta>
    <Data>https://upload.wikimedia.org/wikipedia/commons/3/38/Adorable-animal-cat-20787.jpg
    </Item>
    </Replace>
    <Exec>
    <CmdID>0644f0e8-c751-48e0-928d-f1ae8a1fa8c6</CmdID>
    <Item>
    <Target>
    <LocURI>./Device/Vendor/MSFT/Reboot/RebootNow</LocURI>
    </Target>
    <Meta>
    <Format xmlns="syncml:metinf">null</Format>
    <Type>text/plain</Type>
    </Meta>
    <Data></Data>
    </Item>
    </Exec>
  6. Click Finish to complete the activity.

You can now assign the bundle to Windows devices. For more information on assigning the bundle, see ZENworks Software Distribution Reference.

As support for Windows MDM bundles is experimental, following are some of the limitations of this feature:

  • The bundle status reporting will not detect the actual status of Installation or Distribution of the bundle. The distribution status does not identify whether the content of the bundle is installed or not.

  • During the bundle assignment, components like shortcut location and bundle schedule will be enabled, but will not be applicable for Windows MDM bundles.

  • The Install and Uninstall quick tasks are not applicable for Windows MDM bundles. However, you can uninstall an application by deploying the relevant CSP.

  • Content will replicate to other servers in the zone based on the replication settings. Windows MDM Install MSI bundle will download content only from Primary Servers; hence content replication to Satellite Servers needs to be explicitly disabled.

  • Bundle assignment status might not display the correct status for those enrolled devices on which the MDM agent or the ZENworks agent is installed subsequently. Consider a scenario, where both Windows and Windows MDM bundles are assigned to a Windows device enrolled in the MDM mode. As only the Windows MDM bundle will be effective on the device, to deploy the Windows bundle, the ZENworks Agent is installed subsequently. However, the assignment status of these Windows bundles will be updated only when the scheduled Effective Assignment computation is run.

  • The bundle assignment status might not display the correct status if the device that has been enrolled in both the MDM mode and ZENworks Agent, is subsequently unenrolled from one of these modes.

  • Ordering of bundles is not supported.

  • For a Windows MDM CSP bundle, you can increment the version of the bundle if the installation of the previous version has failed.

9.0 After Upgrading to ZENworks 2020 Update 2, Points To Consider Before Using Windows MDM

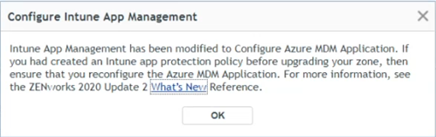
If Intune App Management was configured before upgrading to ZENworks 2020 Update 2, then after upgrading the zone to ZENworks 2020 Update 2, you can either reconfigure Intune App Management (referred to as Azure MDM Application from ZENworks 2020 onwards) or delete the previously installed version and configure Azure MDM Application, afresh.

If any Intune App Management policies were created before upgrading to ZENworks 2020, then you can either delete the policies that you had created, or you can perform the steps in the Reconfiguring the Azure MDM Application after Upgrading the Zone section to retain them. If reconfiguration is not performed, then the existing policies might work, but any updates made to the existing policies might not be applied.

9.1 Reconfiguring the Azure MDM Application after Upgrading the Zone

Before reconfiguring the Azure MDM Application, you need to ensure that the following prerequisites are met:

Prerequisites:

9.2 Procedure

To reconfigure the Azure MDM Application and to retain the policies, perform the following steps after upgrading to ZENworks 2020 Update 2:

  1. Log into ZENworks Control Center. Review the displayed message and click OK.

  2. (Conditional) If you have created any Intune App Protection policies before upgrading to ZENworks 2020 Update 2, then go to the Details page of the policy to view the related error messages.

    IMPORTANT:Based on the following changes, you might need to reconfigure the settings before using Windows MDM:

    • The policy that is supported from ZENworks 2020 Update 2 is a single tenant. Hence, if the policy that was created before upgrading to ZENworks 2020 Update 2 was configured with multi-tenants, reconfiguration will be required.

    • Reconfigure the application with additional URLs such as Terms of Use, Discovery URL and Application ID URL.

    • A user context was mandatory for Intune App management, but for Azure MDM Application (ZENworks 2020 Update 2 onwards) User Context is optional.

  3. To reconfigure the settings, navigate to Configuration > Windows MDM > Configure Azure MDM Application. The Tenant Name and Server Name fields are empty. However, after reconfiguring the application, the details will be populated.

  4. Click the Application that you want to reconfigure.

  5. In the MDM Server field, select an MDM Server from the drop-down.

  6. In the MDM Application section, click the Azure link. You will be redirected to the Microsoft Azure portal.

  7. Enter your login credentials.

  8. In the Microsoft Azure portal, click App Registrations, and then click the application that you want to reconfigure.

  9. In the application page, on the left side of the screen, click Authentication.

  10. In the Supported account types section, change the application from Multitenant to single-tenant by clicking the Account in this organizational directory only (xxxx only – Single tenant) option, and then click Save.

  11. Ensure that the URL specified in the Redirect URIs field in Azure and the Redirect URL field in ZCC are the same.

    If the URLs are not the same, then delete the existing redirect URI in the Microsoft Azure portal, and use the Redirect URL from ZCC as the new redirect URI.

  12. After modifying the URL, in the Azure MDM Application pop-up in ZCC, click the required Azure MDM Application, and then click Renew Token…

    You will be redirected to the Microsoft login screen. After successful authentication, the token will be renewed.

  13. The Tenant Name and Server Name are now displayed in ZCC.To confirm, go to the Policies page, open an Intune App Protection policy and verify the Tenant Name and the server name of the application in the Details page.

The reconfigured application will have limited features compared to a newly created Azure MDM Application. Following are some of the limitations of the reconfigured application:

  1. You will be able to manage the Intune App Management policies only after reconfiguring the existing applications.

  2. To manage Windows MDM devices, you need to create a new application. For more information on creating new application, see Creating an Azure MDM Application.

10.0 Appendix

10.1 Accessing Root Certificates for Windows MDM Enrolled Devices

PPKG Enrolled Devices

To get the details of device certificate for PPKG enrolled devices, perform the following:

  1. Go to Run, enter certmgr.msc

  2. Click Personal > Certificate.

Windows MDM Endpoint URLs

The following URLs must be accessible to use Windows MDM features:

URL

Port

Additional Information

https://partner.microsoft.com/en-us/dashboard/windows/overview

HTTP/HTTPS 80 or 443

URL to configure Windows Notification Service

https://login.live.com/accesstoken.srf

HTTP/HTTPS 80 or 443

URL to get access token for Windows Notification Service with which we can send notification.

https://portal.azure.com/#home

HTTP/HTTPS 80 or 443

URL to create Azure MDM Application

https://login.microsoftonline.com

HTTP/HTTPS 80 or 443

Get Microsoft Graph API configuration details

https://graph.microsoft.com/v1.0/deviceAppManagement/androidManagedAppProtections

HTTP/HTTPS 80 or 443

Test the validity of the access token.

https://graph.microsoft.com/v1.0/devices

HTTP/HTTPS 80 or 443

URL to get Azure device details from Azure to update few its property.

https://graph.microsoft.com/v1.0/organization/

HTTP/HTTPS 80 or 443

URL to get tenant name from the tenant ID.

https://*.notify.windows.com

HTTP/HTTPS 80 or 443

URL used to contact Windows Notification Service. * will be different for each device.

Example: https://wns2-sg2p.notify.windows.com

https://graph.microsoft.com/v1.0/organization/

HTTP/HTTPS 80 or 443

URL to get tenant name from the tenant ID

11.0 Troubleshooting

Unable to Update Application ID URI Application Property

Explanation: While creating an application in the Azure portal, an error message is displayed.
Possible Cause: The Application ID URI might not be from a verified domain.
Action: Ensure the domain URLs that you have used while creating the application are verified.

For more information on adding and verifying the domain URLs, see Adding Domain URL to Azure AD.

The Windows 10 MDM Device Fails to Initialize Sync and Enrollment Stuck in The Enrollment Pending Status

Explanation: The Windows 10 MDM device fails to initialize sync and displays an error message in application event logs. MDM Session: OMA-DM message failed to be sent. Result: (Unknown Win32 Error code: 0x80072f8f)
Action: Follow the below steps, Windows CAPI2 logs will help to troubleshoot the issue:
  1. Enable CAPI2 logging by opening the Microsoft Windows Event Viewer (Control Panel > Administrative Tools > Event Viewer)

    Go to: Applications and Services Logs > Microsoft > Windows > CAPI2 > Operational.

    Right-click the Operational view and click the “Enable Log” menu from the context menu.

    Right-click on the Operational view again and select Properties and change the Maximum log size to 4096 KB (Microsoft recommendation) for the logs tend to grow quickly and previous entries might get overwritten.

  2. Run the CertUtil command in the command line tool to confirm if a given certificate and CA certificate are valid. It can also verify the CRL (Certificate Revocation List) is valid or not by using the following command:

    certutil -verify <MDM server cert> <ca file>

  3. Inspect the CAPI2 logs and check for errors. One possible issue might be with the missing DNS Name in Subject Alt Names of the serverName in SSLAdditionalPolicyInfo of the certificate which is different from the CN of the Certificate subject.

  4. Disable the logging after the log is collected. To disable the log, right click and select “Disable Log” from the context menu.

The MDM device displays inconsistent status after upgrading to ZENworks 2020 Update 2

Source: ZENworks
Explanation: When you apply ZENworks 2020 Update 2 on an MDM device that was enrolled in ZENworks 2020 or 2020 Update 1 (MDM only), the System Update device status displays Update Not Applicable.
Action: None

After updating all the devices in the zone, you can ignore the MDM devices to baseline the update.

Failed to verify the Azure JWT Token

Explanation: In JWTSignatureValidator, the Azure JWT Token could not be verified with the cached public key. This issue might occur due to a mismatch between the current time and the device time.
Action: Ensure that the device time and the current time are the same.

Unable to re-enroll MDM device into the zone

Source: ZENworks 2020 Update 2
Explanation: If you have unenrolled an MDM device using the Unenroll MDM Device Now quick task or user-initiated unenrollment, then you will not be able to immediately re-enroll the device.
Action: Ensure that you wait for at least 5 minutes before re-enrolling the device.

Unable to register devices with Provisioning Package created in ZENworks 2020

Source: ZENworks 2020
Explanation: After upgrading to ZENworks 2020 Update 2, the device registration fails when you register devices using the Provisioning Package (PPKG) that was created in ZENworks 2020.
Action: Modify the existing PPKG by using the Registration and Authorization key in the secret field or create a new PPKG. For more information, see Customizing the Provisioning Package.

Enforcement status of the ZENworks Agent Deployment Policy is displayed as Success even after removing the agent from the device

Explanation: When the ZENworks Agent is removed from a Windows MDM Device, the Enforcement Status of the ZENworks Agent Deployment policy continues to remain successful. You will not be able to re-deploy the ZENworks Agent until the device is removed from the zone and enrolled again. However, the Windows MDM bundles that were earlier deployed to the device, will not be automatically assigned to the device after re-enrollment.
Action: None.

Modified Timeout Value in the deployed Windows MDM - Install MSI bundle does not reflect on the device

Explanation: If the Timeout value in a Windows MDM - Install MSI bundle is modified from the default value of 30 minutes to any other value, then the device to which this bundle is assigned, does not reflect the modified Timeout value.
Action: None.

Bundle assignment status might not display the correct status for those enrolled devices on which the MDM agent or the ZENworks agent is installed subsequently

Explanation: Consider a scenario, where both Windows and Windows MDM bundles are assigned to a Windows device enrolled in the MDM mode. As only the Windows MDM bundle will be effective on the device, to deploy the Windows bundle, the ZENworks Agent is installed subsequently. However, the assignment status of these Windows bundles will be updated only when the scheduled Effective Assignment computation is run.
Action: Wait for the Effective Assignment computation to run for the correct assignment status to be displayed.

Issue while deploying child bundle that is part of a parent-child bundle of different types (Windows and Windows MDM)

Explanation: Consider a scenario where a Windows MDM bundle is a child of a Windows bundle, then only the parent bundle is deployed, that is, only the Windows bundle is deployed. The child bundle is not deployed on the device, that is, the Windows MDM bundle is not deployed.
Action: None.

ObjectNotFoundException is logged when you unenroll an MDM device using the quick task

Explanation: When you unenroll a device using the Unenroll MDM Device Now quick task, ObjectNotFoundException is logged in the services-messages.log file, even if the device is unenrolled.
Action: None

The Windows MDM device fails to initialize sync

Explanation: The Windows MDM device fails to initialize sync and displays an error code.
Action: If you are using the external Certification Authority (CA) certificate in a zone, verify that the CRL Distribution Point (CDP) specified in the certificate is valid using the Windows CertUtil command-line tool.

The Windows MDM enrollment fails on Windows LTSB 2016 (version 1607)

Explanation: The Windows MDM enrollment fails on Windows LTSB 2016 (version 1607). The DMClient configuration service provider (CSP) returned a 404 error when users tried to send Get for EntDMID.
Action: None. The Windows supported versions from 1809 onwards, including version Windows Enterprise LTSC 2019.

Reconciliation fails if the hostname consists of more than 15 characters

Explanation: If the hostname consists of more than 15 characters, the reconciliation of a Windows MDM to a ZENworks Agent or ZENworks Agent to a Windows MDM fails.
Possible Cause: This issue occurs as the hostname is limited to a maximum of 15 characters and if you have chosen the Machine Name (hostname) device attribute for reconciliation.
Action: To resolve this issue for Windows MDM, in ZENworks Control Center, click Configuration > Registration. In the Registration Keys panel, choose a Registration Key. In Reconcile Settings, clear the Machine Name checkbox and click OK.

To resolve this issue for ZENworks Agent, in ZENworks Control Center, click Configuration > Device Management > Registration. In Reconcile Settings, clear the Machine Name checkbox and click OK.

The Serial Number device attribute will not work for devices having version lower than Windows 10 1809

Explanation: When you select the Serial Number as a device attribute for reconciliation of devices that have a version lower than Windows 10 1809, then two device objects will be created in ZCC.
Action: Choose either MAC Address or Machine Name as a device attribute for reconciliation of lower version devices.

Enrollment of a Windows MDM device fails if the channel URI is not returned by the device

Explanation: During the Windows MDM device enrollment if the channel URI is not returned by the device, the enrollment might fail, and the device will be listed in the Pending Enrollment Devices folder until the next sync.
Action: The Windows MDM device will be enrolled in the next scheduled MDM sync.

If the scep_policy_configuration.xml or winmdmProvisioningDoc.xml file becomes corrupt, then the default XML files are sent to the device

Explanation: During the Windows MDM enrollment, if an administrator user modifies the scep_policy_configuration.xml or winmdmProvisioningDoc.xml file and in the process corrupts the XML file, the application sends the default XML file to the device.
Action: After modifying the scep_policy_configuration.xml or winmdmProvisioningDoc.xml file, check the services-messages.log file to ensure that the XML files have not become corrupt and the latest XML files are used to enrollment.

12.0 Legal Notice

For information about legal notices, trademarks, disclaimers, warranties, export and other use restrictions, U.S. Government rights, patent policy, and FIPS compliance, see https://www.microfocus.com/about/legal/.

© Copyright 2021 Micro Focus or one of its affiliates.