19.1 Creating a Job
To create a new job:
-
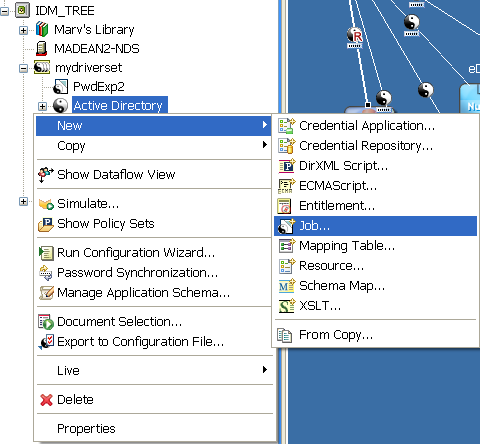
In the Outline view, right-click a driver and select .
-
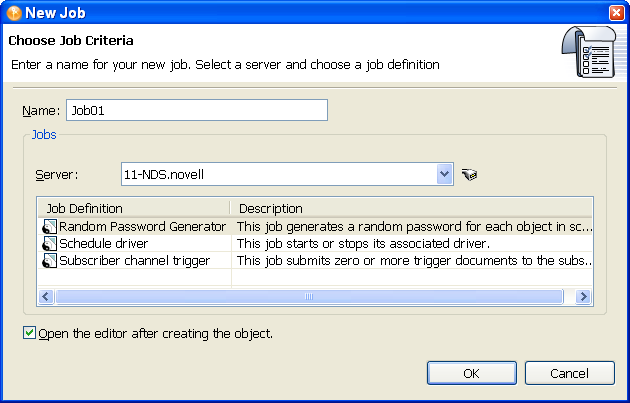
In the New Job window, give the job a descriptive name, or use the name provided.
-
In the field, select the server to perform the job execution. You can click the drop-down item to select a different server than the one listed.
-
If the administrator has created and installed any custom job definitions on the selected server, click the icon to the right of the server entry to read in a live list of available jobs from the server. Since Designer is an offline modeling tool, only the Identity Manager 3.5 job definitions show in the server’s list by default.
-
Choose a definition for the job. The New Job Wizard comes with three job definitions. Additional custom jobs might also be listed.
-
Random Password Generator: Generates a random password for each object in the job’s scope. The password is generated by NMAS to match Password Policy object that the job references. Generally these Password Policy objects are not the same as those used for eDirectory user password policies.
The job submits the generated password one at a time to the driver’s Subscriber channel. The Subscriber channel policies must do something useful with the passwords.
-
Schedule Driver: Starts or stops the associated driver. You can also toggle a driver to start the driver if it is stopped or to stop the driver if it is running.
-
Subscriber Channel Trigger: Submits zero or more trigger documents to the Subscriber channel. The submission can either be a document per object if a scope is defined, or it can be a single trigger event if no scope is defined.
Trigger event documents identify the job and the scope object. A trigger event can bypass the cache and “go to the head of the queue” if desired. You will likely use trigger jobs the most and they allow you to use driver policies that you can customize for your personal requirements.
-
-
Decide if you want to edit the job. The option opens the newly created job in the IDM Job Editor window after it first saves the job object. If you do not want to open the editor at this time, deselect the editor.
-
Click .
-
The File Conflict window gives you the option to save the job object and continue. If you want to create the job object and continue with the IDM Job Editor, click . Otherwise, click .
-
Continue with Job Editor Selections Under the Scheduler Tab.