17.1 Editing Driver Icons
-
In the Modeler, right-click a driver, then select .
-
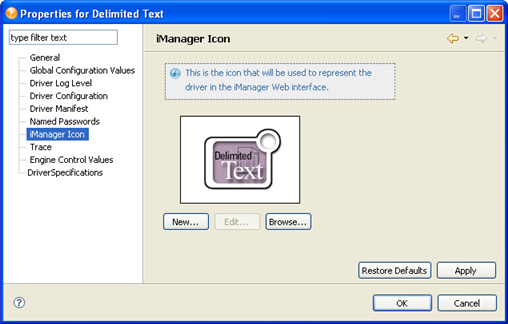
In Driver Properties, select the iManager Icon page.
The object properties dialog box displays the default icon.
-
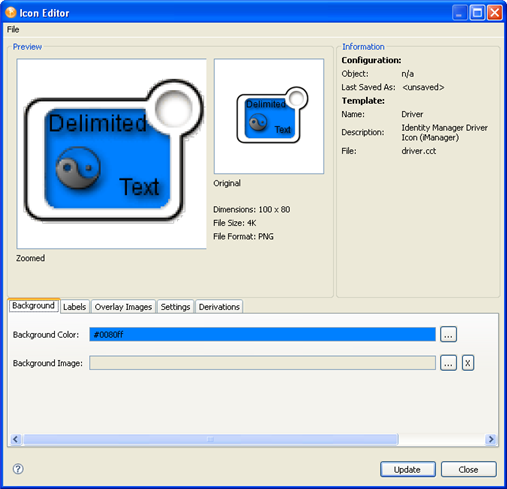
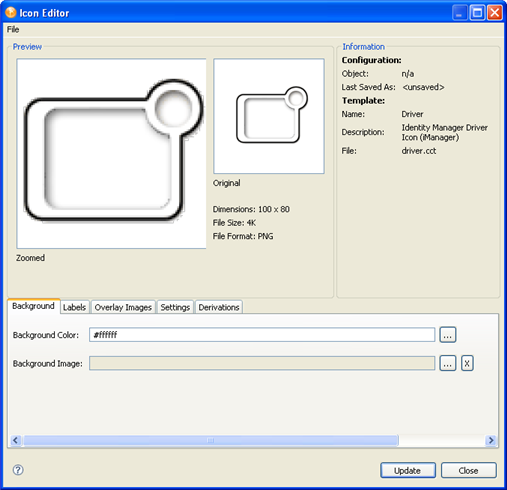
Click to open the Icon editor.
-
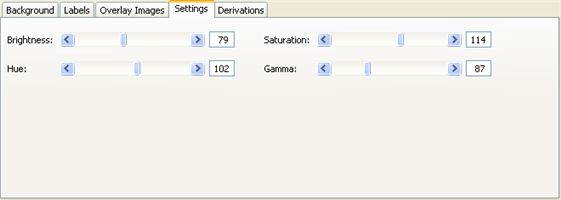
To add a background color or image to your icon, select the tab.
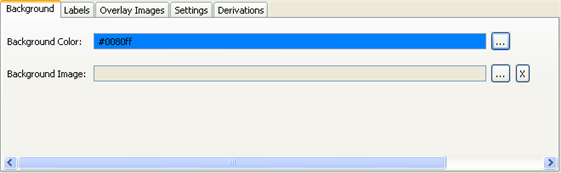
Background Color: Select a background color for the icon.
Background Image: Select a background image. If you select a background image, you can configure how the image displays by using the tab, which includes controls for , , , and . The Icon editor makes color changes in real time, so you can see the effect of your changes as you make them.
-
To specify icon text, select the tab, then click .
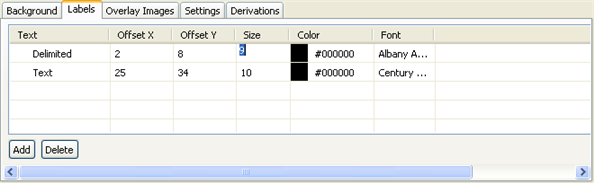
To add a label to the icon, type a new label in the column. Text does not automatically wrap around. To create multi-line text, create a separate text entry for each line.
You can also control label placement through the Offset X and Offset Y options, and edit font size, font type, and color for each text entry.
-
To add an overlay image to your icon, select the tab, then click .
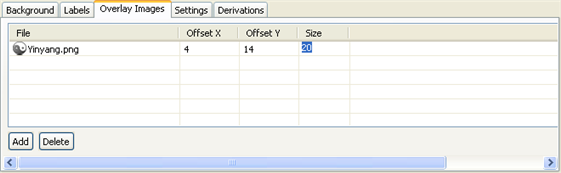
To select an image, select a cell in the column. A small icon appears to the right of the file name. Click the icon and browse to the image you want to use as an overlay image.
You can also control image placement through the Offset X and Offset Y options, and control the size of the image in pixels.
-
To create a similar icon for iManager, select the tab, then select .

This transfers the icon to the driver’s or application’s iManager properties. (See the iManager icon on the driver properties page.)
Some icons don’t convert cleanly between the Driver and Application icon formats, so you might need to clean it up after you create it.
-
When you are finished editing the icon, click .