4.10 The Tasks View
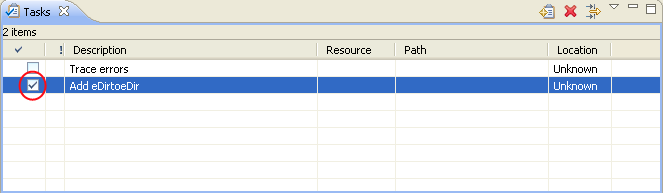
Figure 4-18 The Tasks View

The Tasks view enables you to make and prioritize notes while you manage identities. This view is for your convenience. It can contain whatever you want. It won’t affect the functionality of your solution.
This view enables you to do the following:
-
Add tasks
-
Delete task
-
Set task properties
-
Set filter properties
-
Mark if completed
-
Provide a description
-
Set a priority
-
Sort on all fields
To add a task:
-
Open the Tasks view by selecting > > .
-
Right-click in the Tasks view, then click .
-
Type a name in the field, select a priority, then click .
Or:
-
Click the icon
 located in the upper right corner of the tasks view.
To delete a task:
-
Right-click the task.
-
Click .
Or:
-
Select the task so that the entire task is highlighted.
-
Click the icon
 , located in the upper right corner of the tasks view.
NOTE:If you right-click the task description so only the task description is highlighted, then click , only the task description is deleted. This is helpful if you want to redefine your task description.
4.10.1 Task Properties
To open the Task Properties page, right-click a task, then select .
Table 4-9 Task Properties Functionality
4.10.2 Filtering Tasks
-
Click the filter icon
 .
.
-
Select filters, then click .

Table 4-10 Filters Window Functionality
4.10.3 Marking Tasks Completed
-
Right-click the task you want to mark completed.
-
Click .
Or
-
Click the check box in the left column of the Tasks view.
NOTE:When you mark a task as completed, the task automatically moves to the bottom of your list of tasks.
You can set a priority for your task when you add a new task to your list. However, this is not the only location where you can set a priority.
4.10.4 Right-Click Options
Table 4-11 Task Options
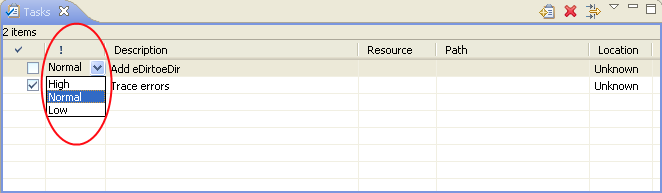
4.10.5 Setting Task Priorities
-
Right-click a task.
-
Select .
-
Select the new priority.
Or:
-
In the Tasks view, locate the column with the exclamation mark (!).
-
Go to the task on which you want to change the priority.
-
Click in this column.
-
The task’s current priority is displayed.
-
Click the drop-down arrow to the right of the current priority.
-
Select the desired priority.
4.10.6 Sorting Tasks
-
Click the icon located in the right corner of the Tasks view.
-
In the drop-down menu, click .
The Sorting window enables you to sort your tasks in different ways, in ascending or descending order. You can sort by completion, priority, description, resource, path, location, and creation time.
Click to restore the sorting defaults.