2.4 Using Loop Mode
Loop mode allows you to set up a list of tests or test groups in any order and to run the tests multiple times in a loop. You can specify loop counts for individual tests as well as groups of tests.
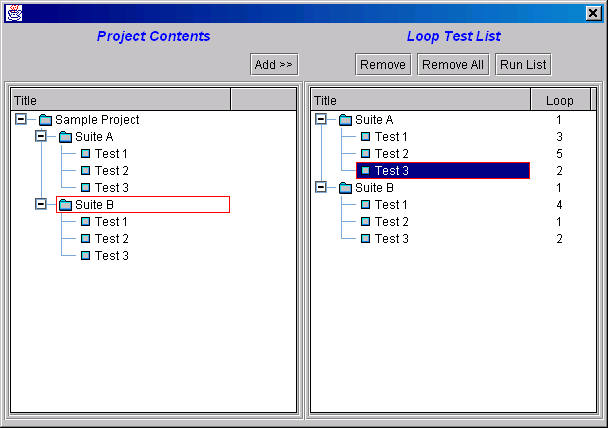
2.4.1 Editing the Loop Test List
-
To create or edit the Loop Test List, from the menu bar select. This displays a dialog box with two panes. The left pane displays the available . The right pane displays the .
-
In the pane, highlight the test or group that you want to add to the L and click . The selected items are added to the loop list. You can continue to add items in any order.
-
To delete a test or group, highlight the item in the pane and click .
-
To rearrange the order of the tests within a group, right-click the item in the pane and select or from the popup menu.
-
To edit the loop count for individual tests or test groups, right-click the test title and select . This displays a dialog that allows you to edit the loop count properties.
The Loop Test List is saved until the project is closed. You can close the Loop dialog at any time.
Figure 2-4 Shows the Loop dialog.
2.4.2 Running the Loop Test List
-
If the dialog is open, click .
-
If the dialog is closed, from the menu bar click .
NOTE:Currently, loop mode restricts the number of test instances that can be placed on the Run Queue to 100 maximum. For example, if you have 2 tests in a group that run 25 times each with the group itself running 2 times, then you have reached your maximum.