Installing the NDS Driver Shim
WARNING: Do not run dxagent.nlm with NDS maintenance tools (for example, dsrepair.nlm or dsmerge.nlm). Before running these tools, unload dxagent.nlm.
The driver installation consists of:
- Installing the driver shim on the Novell® eDirectory platform.
- Installing the Agent on the NDS platform.
The installation file (NDSInst.zip or NDSInst.jar) includes the following files:
- LegacyNDS.xml
- A license file (for example, dirxmllicense.txt or dirxmllicense_fr.txt)
- dxagent.cfg
- LegacyNDSDriverShim.jar
- Readme.html
- dsloadfx.nlm
- dxagent.nlm
- dxagent.nlm
Installing on Windows, Linux, Solarix, AIX, or NetWare 6.x
-
Run the installation program from the Identity Manger download image or CD.
Platform Installation Program Windows
NDSInstall_Windows.exe
Linux
NDSInstall_Linux.bin
Solaris
NDSInstall_Solaris.bin
AIX
NDSInstall_AIX.bin
NetWare 6.x
NDSInstall_NetWare.jar
Downloads are available from the Novell download Web site.
-
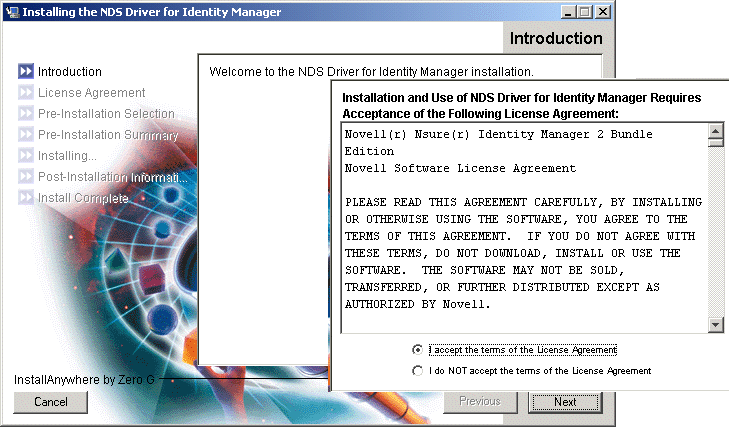
View the Welcome (Introduction) page, then accept the license agreement.
-
Select whether to install the NDS driver, the driver configuration file, or both.
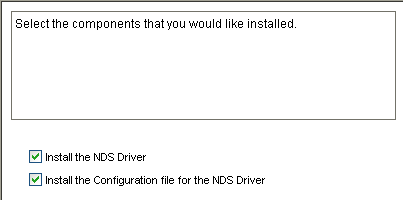
If you are installing on a server, select to install the NDS driver and the configuration file.
If you are installing on a connected system, select to install the NDS driver.
-
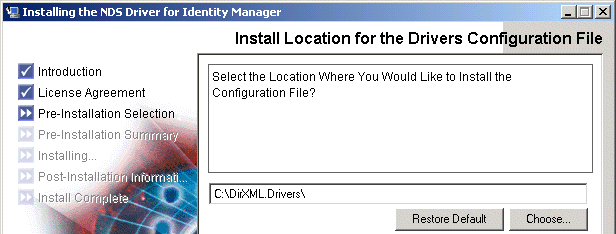
Select or create a path for installing the driver.
For example, type /usr/lib/dirxml/classes for Linux, or select c:\novell\nds\lib for Windows.
-
Select a path for installing the sample configuration file.
-
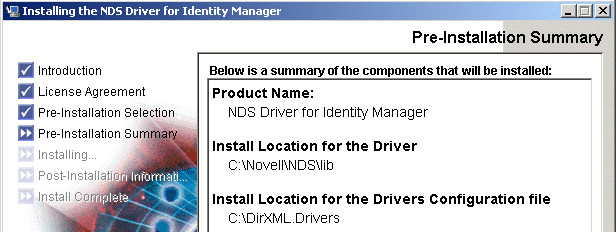
Review components that you selected.
-
Click Install.
-
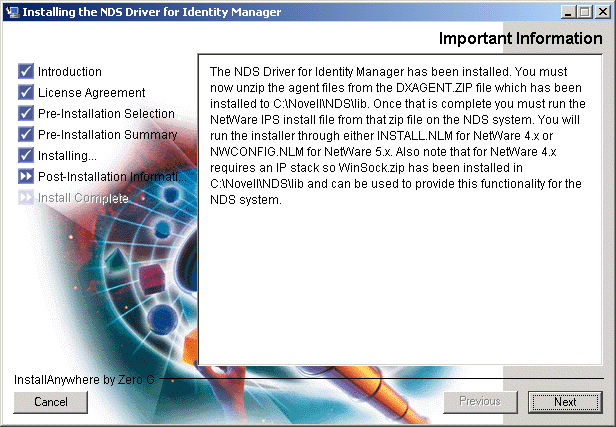
Review post-install information.
The installation program installs the NDS Agent component (dxagent.nlm) in a .zip file. Follow the prompts to install the components. See Installing the Driver Agent.
-
Select to restart eDirectory, then click Next.
eDirectory can't recognize the Driver for Legacy NDS until eDirectory is restarted. Of course, you can select No, then restart eDirectory later.
-
Click Done.