8.7 Giving Other People Access to Your Mailbox or Calendar
Use Proxy to manage another user's Mailbox and Calendar. Proxy lets you perform various actions, such as reading, accepting, and declining items on behalf of another user, within the restrictions the other user sets.
IMPORTANT:You can proxy for a user in a different post office or domain, as long as that person is in the same GroupWise system. You cannot proxy for a user in a different GroupWise system.
This section contains the following topics:
8.7.1 Receiving Proxy Rights
Two steps must be completed before you can act as someone's proxy. First, the person for whom you plan to act as proxy must grant you rights in the Proxy List in Preferences. Second, you must proxy to the user so you can access his or her Mailbox or Calendar.
8.7.2 Assigning Proxy Rights to Another User
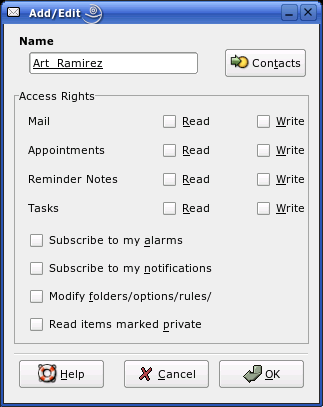
Use the Proxy List in the Preferences Account Editor to give other users rights to proxy for you. You can assign each user different rights to your calendaring and messaging information. If you want to let users view specific information about your appointments when they do a Busy Search on your Calendar, give them Read access for appointments. The following table describes the rights you can grant to users:
8.7.3 Adding and Removing Proxy Names and Rights in Your Proxy List
-
Click Edit > Preferences, then click Mail Accounts.
-
Select the GroupWise account to edit, then click Edit.
-
Click the Proxy tab, then click Add.
-
To add a user to the list, type the name in the Name box or import the contact from Contact list.
-
Select the rights you want to give to the user.
-
Repeat Step 4 and Step 5 to assign rights to each user in the Proxy List.
-
Click OK, then click Close.
To delete a user from the Proxy List, select the user, then click Remove User.
8.7.4 Managing Someone Else's Mailbox or Calendar
Before you can act as a proxy for someone, that person must give you proxy rights in his or her Proxy List in Preferences. The amount of access you have depends on the rights you have been given.
-
Right-click on the GroupWise account in the folder list.
-
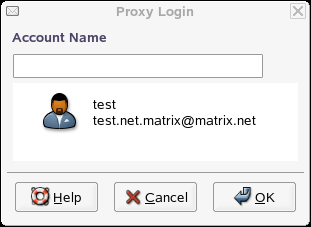
Click Proxy Login.
-
Type the user name of the person who has given you Proxy access, or select from the list.
-
Click OK.
The user's data appears in the respective components.
You can set different colors to each user to distinguish between each users' appointments. You can also select whether to display the appointments of a particular user or not.
8.7.5 Marking an Item Private
You can limit a proxy's access to individual items in your Mailbox or Calendar by marking items Private.
When you mark an item Private, you prevent unauthorized proxies from opening it. Proxies cannot access items marked Private unless you give them those rights in your Access List.
If you mark an item Private when you send it, neither your proxies nor the recipient's proxies can open the item without rights. If you mark an item Private when you receive it, it cannot be read by your unauthorized proxies, but it can be read by the sender's proxies. Appointments marked Private display in Busy Search according to the status you selected when you accepted the appointment.
-
In an open item, click Actions, then click Mark Private.
or
In your Calendar, click an item in the Appointments, Reminder Notes, or Tasks List, click Actions, then click Mark Private.