8.3 Adding your GroupWise Account to Evolution
8.3.1 Creating a New GroupWise Account
-
Click Edit > Preferences, then click Mail Accounts.
-
Click Add.
-
Create the account following the procedure in Section 2.1, Starting Evolution for the First Time.
8.3.2 Changing an Existing Account to Work with GroupWise
If you have an existing e-mail account, and want to convert it to use with GroupWise:
-
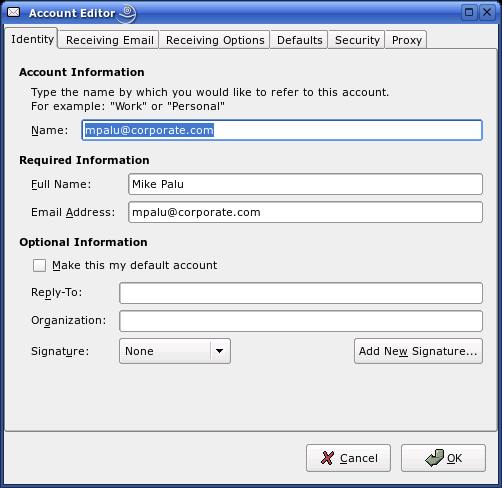
Click Edit > Preferences, then click Mail Accounts.
-
Select the account you want to convert, then click Edit.
-
Click the Identity tab.
-
Change your e-mail address as needed.
-
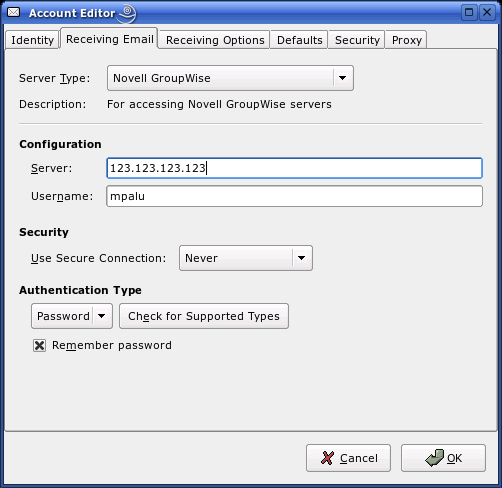
Click the Receiving Email tab, then select Novell GroupWise as your server type.
-
Type the name of your mail server, your user name, and select whether to use SSL.
NOTE:Select SSL for a highly secured connection between your client and server. Contact your administrator for further details.
-
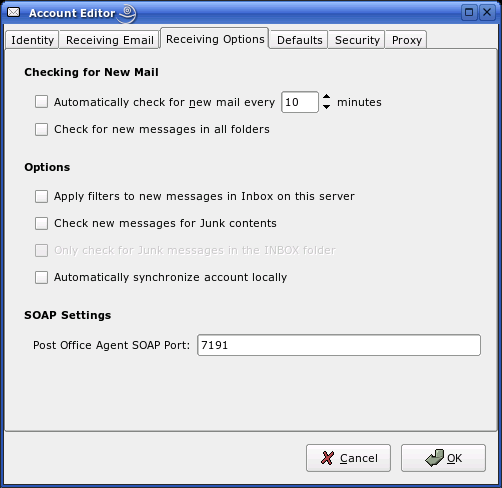
Click the Receiving Options tab, then select if you want Evolution to automatically check for new mail.
If you select this option, you need to specify how often Evolution should check for new messages.
-
Select if you want to check for new messages in all folders.
-
Select if you want to apply filters to new messages in the Inbox on the server.
For additional information on filtering, see Section 4.5.1, Creating New Filter Rules.
-
Select if you want to check new messages for junk content.
For additional information on junk content, see Section 9.4.5, Junk Mail Preferences.
-
Select if you want to only check for junk messages in the Inbox folder.
-
Select if you want to automatically synchronize your remote calendar and contacts locally.
It fetches the remote calendar and contact information and stores it on your local drive.
NOTE:Remote calendar and contacts are typically stored remotely on servers rather than on local hard disk.
-
Specify your Post Office Agent SOAP port in the Post Office Agent SOAP Port field.
If you are unsure what your Post Office Agent SOAP port is, contact your system administrator.
-
(Optional) Click the Proxy tab, then click Add to add any Proxy users to your account.
-
Click OK, then click Close.