4.10 Configuring the NFR Engine
When you finish installing the NFR Engine, the NFR Engine Configuration Utility page appears.
IMPORTANT:Even with the utility check box selected, the configuration utility does not automatically launch on servers running Windows Server 2008 R2. To launch the configuration utility in that environment, click Start > NFREngine-Config.
-
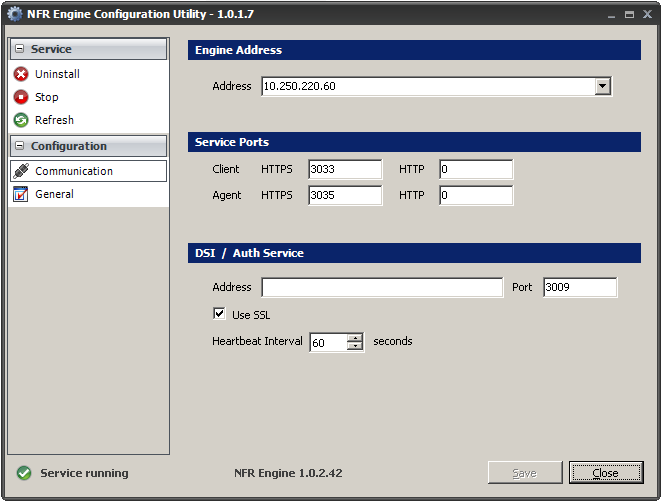
(Conditional) If your server has more than one NIC card, or the IP address 127.0.0.1 appears in the field, indicate the correct address by selecting it from the drop-down menu or entering it manually.
-
Verify that the settings are correct.
Although you can choose any ports you want, be sure to verify that there are no conflicts with other port assignments.
We strongly recommend using HTTPS ports.
HTTP port assignment capability is provided only for the rare case where some sort of compatibility issue requires their use.
-
Specify or accept the DSI address.
If you are installing into an Active Directory managed network that includes Novell Storage Manager, you must indicate the NSM Engine address. If you are installing an into an Active Directory managed network that does not include Novell Storage Manager, the IP address is the server where the DSI is installed. In many cases, this is the same machine where the NFR Engine is installed.
-
Unless there is a conflict, leave the default setting in the field as 3009.
-
Verify that the check box is selected.
-
Unless there is a need to change the setting, leave it at 60 seconds.
-
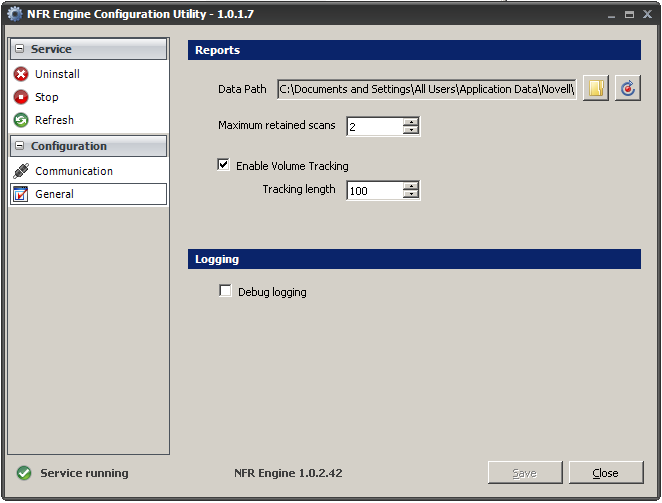
Click the button in the left pane of the dialog box.
The following page appears:
-
Accept the data path entered in the field or indicate a preferred path by using the browse folder button.
This path indicates where scans and reports will be stored on the server. Make sure there is adequate space at the destination you indicate.
-
If you want to have Novell Storage Manager perform volume trending (recommended), leave the check box selected.
-
Accept or modify the setting for the field.
This setting indicates the number of copies of trend data that Novell File Reporter will keep.
-
Leave the check box deselected.
You use debug logging only when directed by a Novell Support representative during a troubleshooting procedure.
-
Click to save your configuration settings.
A message appears notifying you that the new settings will not take effect until the Engine service has been restarted.
-
Click to restart the NFR Engine.
-
Close the NFR Engine Configuration Utility.
-
Verify that the necessary ports are open as part of your network firewall configuration.