5.10 Configuring the DSI (Conditional)
Configuration of the DSI takes place through a terminal console.
-
At the Open Enterprise Server 2 machine where you installed the DSI, launch a terminal session.
-
At the terminal console, type nfrdsi-edir-config and press Enter.
The console is updated and looks similar to the one below:
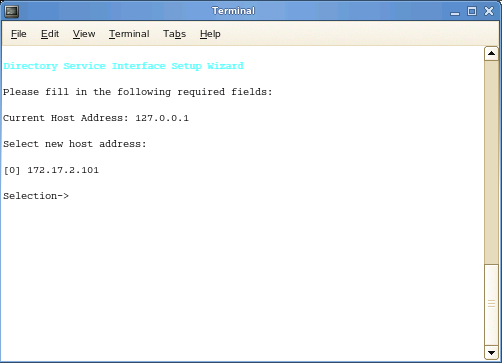
If your server has multiple NIC cards, multiple IP address options are listed.
-
Specify the IP address option you want (such as 0 in the example above) and press Enter.
-
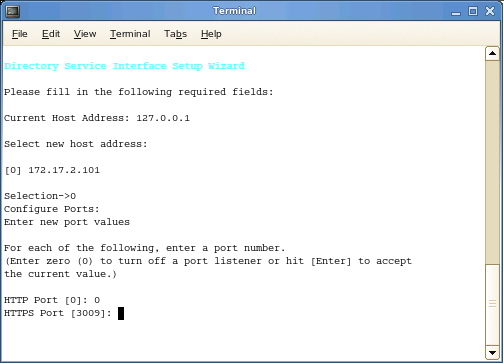
When the HTTP Port [0] option appears, type 0 and press Enter.
The console is updated and looks similar to the one below:
-
Unless there is a conflict, accept the default HTTPS port number of 3009 by pressing Enter. If you need to use another port number, provide the new port number.
If you change this setting, you also need to change it during the installation of the NFR Engine.
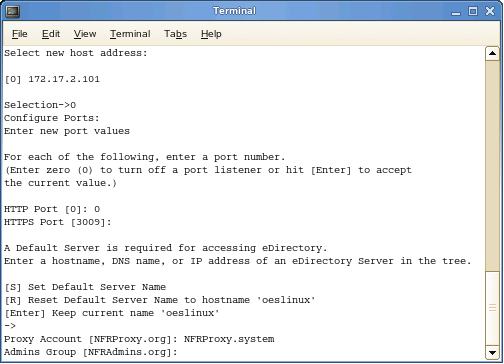
A message appears stating that A Default Server is required for accessing eDirectory. Enter a hostname, DNS name, or IP address of an eDirectory Server in the tree.
-
Press Enter to keep the current name of the host server.
-
When prompted to enter the Proxy Account, enter NFRProxy.container_name, which is the proxy account name that you set up previously, and press Enter.
The console is updated and looks similar to the one below:
-
Enter NFRAdmins.container_name (the container where those IDs reside), or if you have an eDirectory group whose members will have full administrative rights, specify the name of that group followed by the container name, and press Enter.
-
When you are prompted for the NFRUsers name, enter NFRUsers.container_name, or if you have an eDirectory group whose members will have partial administrative rights, specify the name of that group followed by the container name, and press Enter.
-
When you are prompted, specify the admin’s fully distinguished name and password and press Enter.
-
When you are asked if you want to copy the license file, type Y for Yes and press Enter.
-
When you are prompted, enter the path to the license file. When the license has copied successfully, press Enter to continue.
-
Do one of the following:
-
If you are installing Novell File Reporter in an eDirectory managed network environment, type A for Automatic Storage Resource Management and press Enter.
-
If you are installing Novell File Reporter in a network not managed by eDirectory, type M for Manual Storage Resource Management and press Enter.
A Novell File Reporter deployment configured with the Manual Storage Resource Management option cannot be upgraded to Automatic.
-
-
When you are asked if you want to start the DSI service, type Y for Yes and press Enter.
-
When you are prompted, press Enter to continue.
The console is updated with menu options for changing any of the configuration settings you just made.
-
Proceed with Section 5.11, Installing the NFR Engine.