8.5 Installing and Configuring the NFR Agent
NOTE:As a courtesy for those users that might already be running an NFR Agent on a Windows Server 2003 R2 or a 32-bit Windows Server 2008, Novell is providing an updated 32-bit NFR Agent. With the exception of a critical bug fix, no further 32-bit NFR Agent development is planned for the future. All new NFR Agent enhancements will be offered only in updates to the 64-bit version of the NFR Agent.
-
At the root of the NFR_2_6_0.iso image, double-click the Windows folder.
-
Do one of the following:
-
If you are installing on a 64-bit computer, from the x86_64 folder, double-click NFRAgent-Installer-2.6.x64-xxxx.
-
If you are installing on a 32-bit computer, from the x86 folder, double-click NFRAgent-Installer-2.6-x86-xxxx.
-
-
When you are asked if you want to run this file, click .
-
Agree to the license terms and conditions and click .
-
When you are notified that the setup was successful, click .
-
From the wizard page, read the overview of what will be installed and configured and click .

This page lets you confirm or change basic NFR Agent configuration settings.
HTTP Listener: Communication parameters for the NFR Agent.
Host Address: Unless you want the NFR Agent to only listen on a certain IP address, leave this setting as it is.
SSL Port: Unless there is a port conflict, leave the setting at 3037.
SSL Certificate: Details for an SSL certificate that will be generated.
Subject Name: The name of the certificate that will be generated. The server name is listed by default.
Expiration Days: The life span of the security certificate, which is set at 10 years by default.
Key Length: The SSL certificate encryption setting, which is set at 2048 by default.
Details: Click the button to view the certificate data.
Generate: If you modify any of the settings in the SSL Certificate region, click this button to generate a new certificate.
Data Folder: The default location of the Data folder. The Data folder is used for a variety of tasks, including the storage of temporary scan data.
-
Edit any needed parameters settings and click .
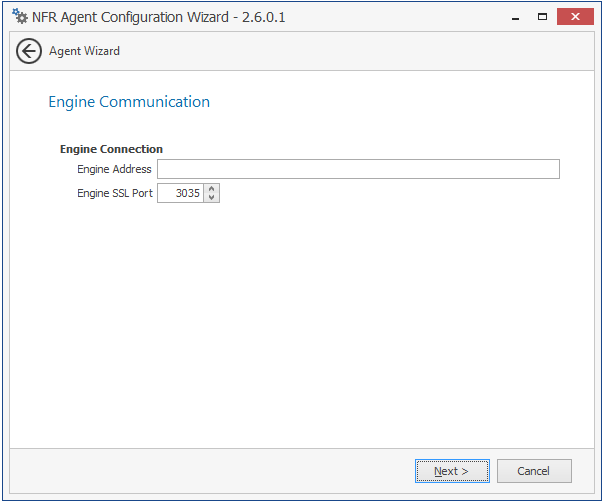
This page lets you set parameters for the NFR Agent to communicate with the NFR Engine.
Engine Address: Specify the DNS name or IP address to the server hosting the NFR Engine here.
Engine SSL Port: Specify the SSL port for the NFR Engine here.
-
Enter the NFR Engine connection settings and click .
-
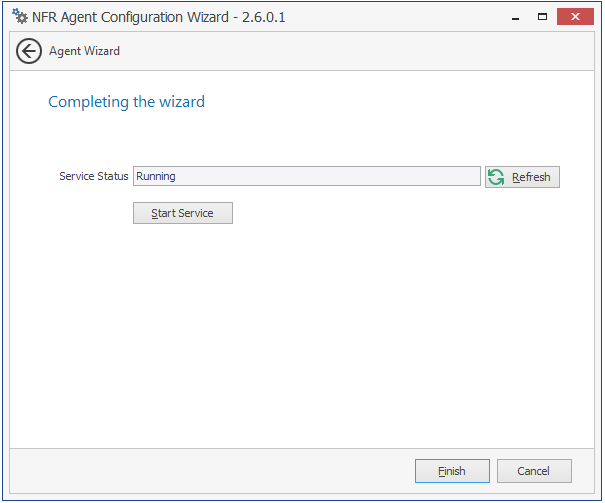
Click .
The NFR Agent is now installed, configured, and running.