5.3 Performing File System Scans
Data Access Governance relies on data from file system scans in File Reporter to define Target Paths and to process the aggregated file system access data.
Preparing File Reporter for Data Access Governance Target Paths management and processing includes:
-
Adding required scan targets.
-
Defining appropriate scan policies.
-
Executing scans based on those scan policies.
Details on each of these steps can be found in the tMicro Focus File Reporter 3.6 Administration Guide.
The following sections provide a quick-setup guide to configure File Reporter for Data Access Governance.
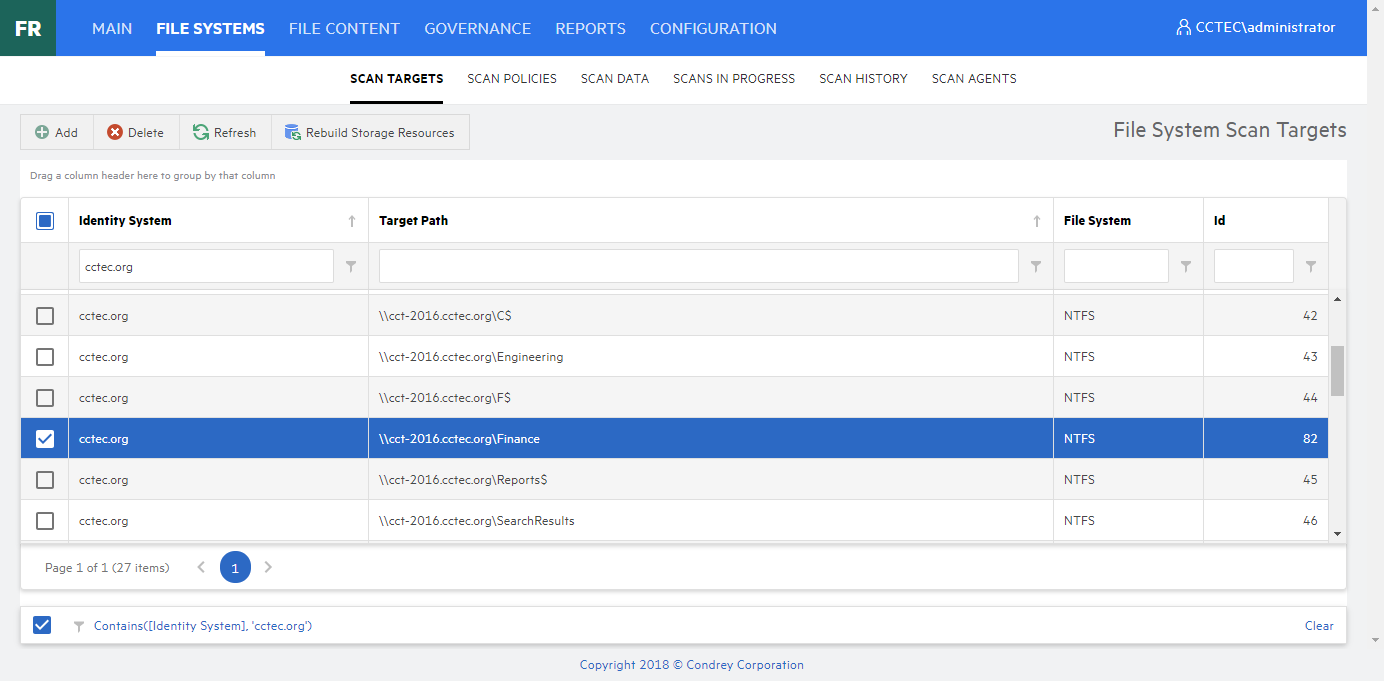
5.3.1 Adding Scan Targets
-
In the File Reporter web application, select > .
-
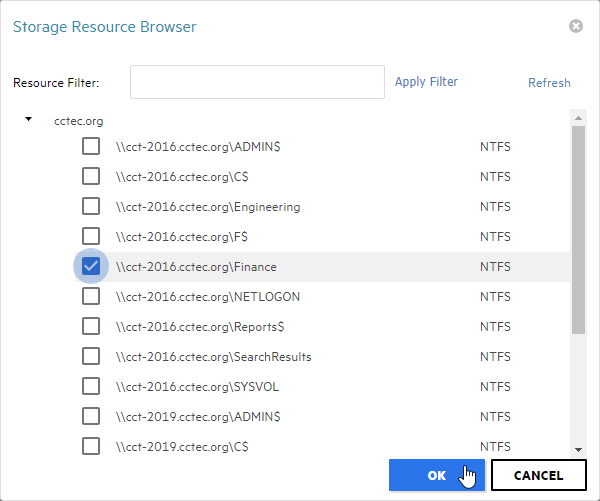
Click to display the Storage Resource Browser.
-
Select the Windows file shares to add as scan targets.
Each file share containing a Target Path for Data Access Governance should be added to File Reporter's scan targets list.
File system scans are performed for an entire share, but any path under the share may later be defined for Data Access Governance review.
If you do not see a file share you are looking for, you might need to perform a Rebuild Storage Resources operation or verify File Reporter proxy user rights. For details, refer to the Micro Focus File Reporter 3.6 Administration Guide.
-
Click to add the selected file shares to the list of scan targets.
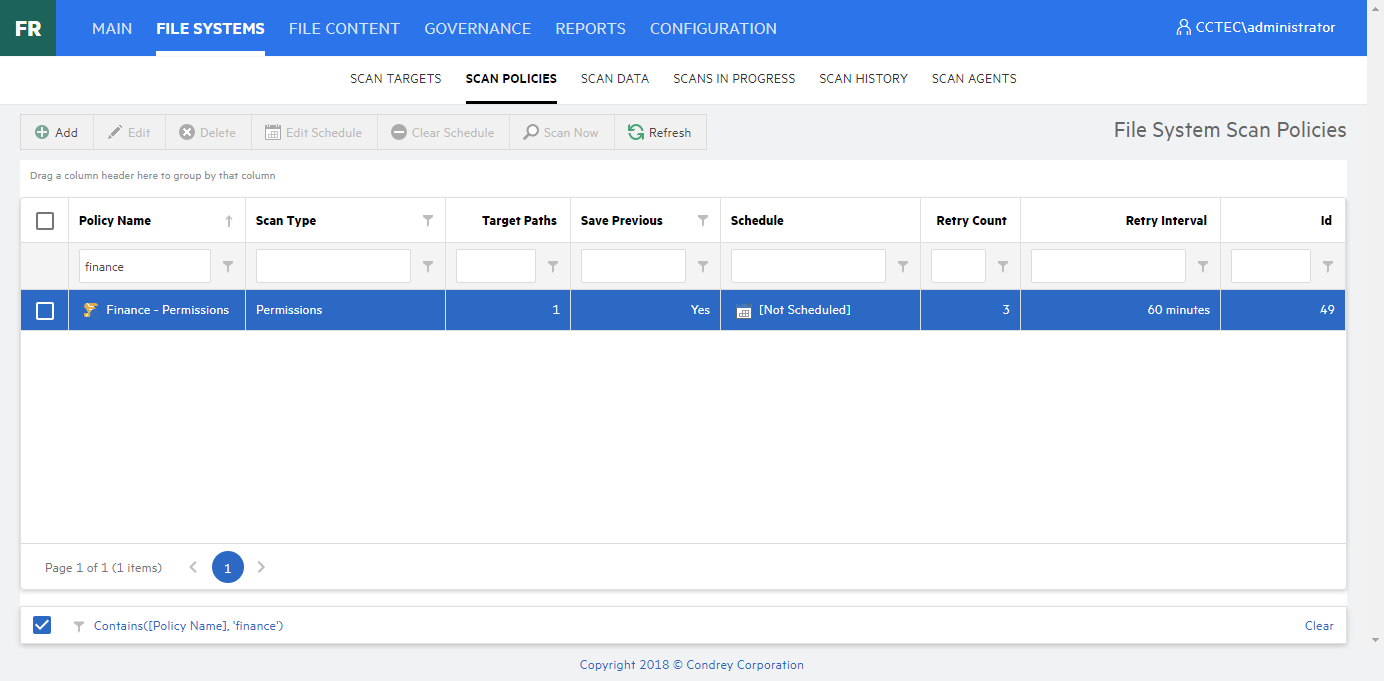
5.3.2 Defining Scan Policies
-
In the File Reporter web application, select > .
-
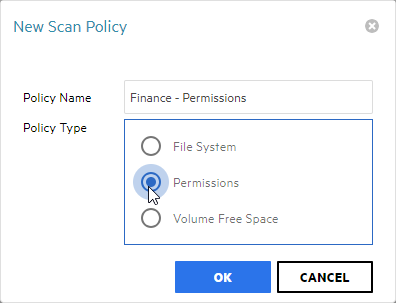
Click to display the New Scan Policy dialog.
-
Fill in the required fields.
-
Policy Name: Provide a name for the scan policy.
-
Policy Type: Select to configure the scan policy for collecting file system access data.
-
-
Click to save the scan policy and display the Scan Policy Editor dialog.
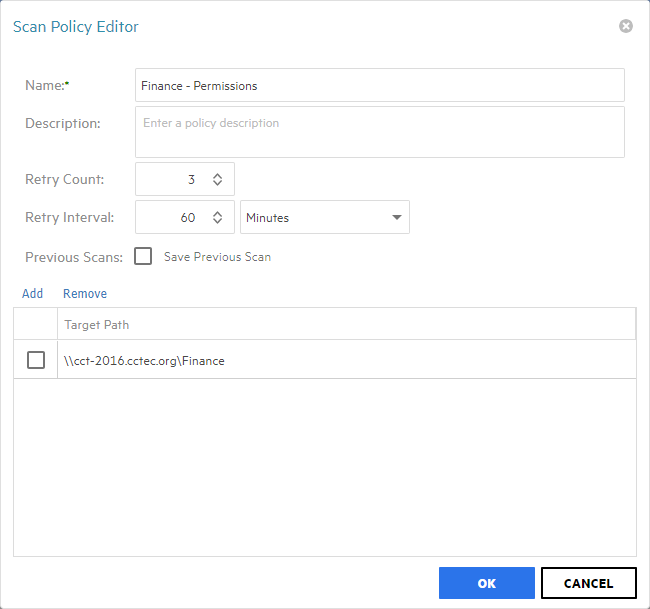
-
Complete the fields:
-
Name: Optionally change the name of the scan policy.
-
Description: Provide an optional description for the scan policy.
-
Retry Count: Specify the number of times to retry on scan failure.
-
Retry Interval: Specify the time to wait between retries.
-
Previous Scans: Check to save the previous scan when a new scan completes.
-
-
In the list, click to display the Scan Target Browser dialog.
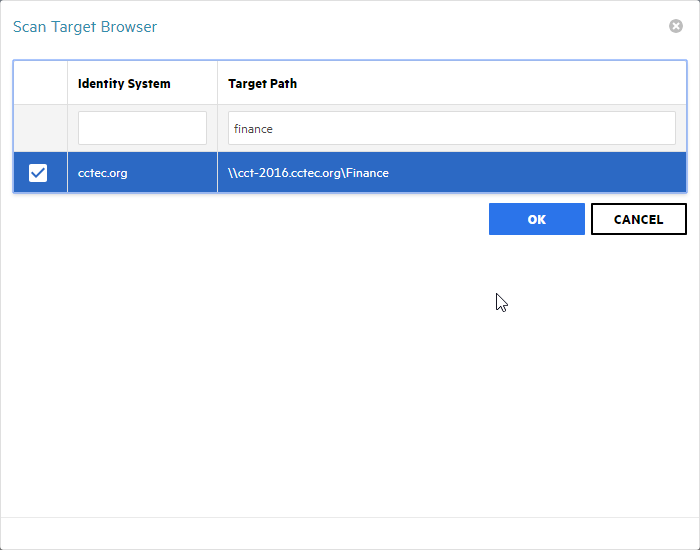
-
Select each scan target to scan in the list.
-
Click to save the list of scan targets.
-
Click to save the scan policy.