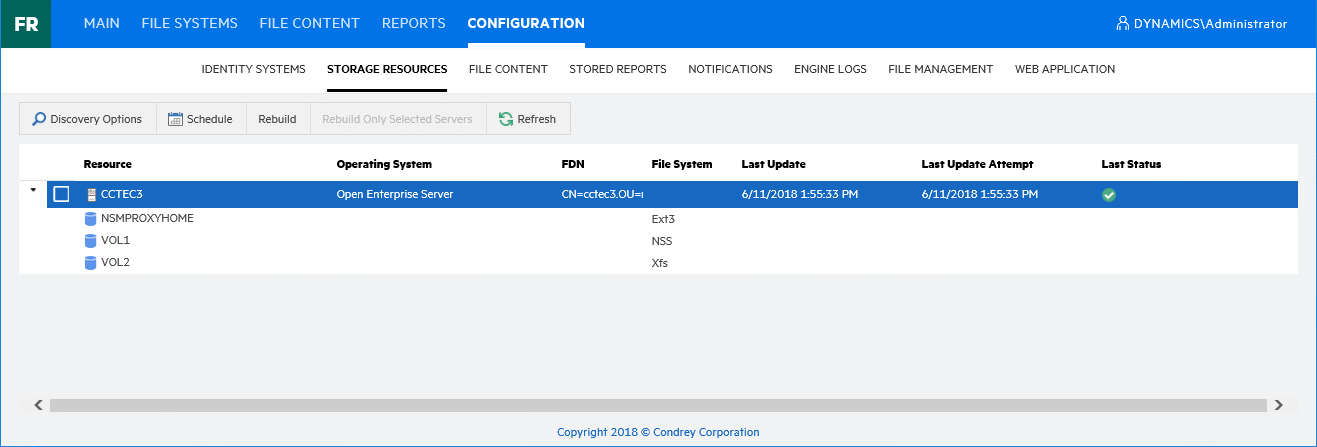
4.2 Viewing Storage Resources
When an identity system has been enabled, the associated storage resources, which include Micro Focus volumes and Microsoft shares, are available for scanning and reporting.
File Reporter cannot see a Windows network disk drive that is not shared.
-
Select > .

-
Select a check box pertaining to one of the listed eDirectory trees or Active Directory forests.
The button is enabled, allowing you to rebuild the storage resources for the selected eDirectory tree or Active Directory forest. You should rebuild the storage resources whenever you add a new server.
-
(Optional) Click to rebuild the storage resources for the eDirectory tree or Active Directory forest.
-
Click one of the listed eDirectory trees or Active Directory forests.

All of the servers in the selected eDirectory tree or Active Directory forest are displayed.
-
Click each button to view options.
Discovery Options: For large organizations with eDirectory trees or Active Directory forests spanning multiple geographic areas, rebuilding the storage resources can take many hours. Rather than rebuilding the storage resources for the identity system, you can select this to create a scope that specifies just those new containers or servers that need added.
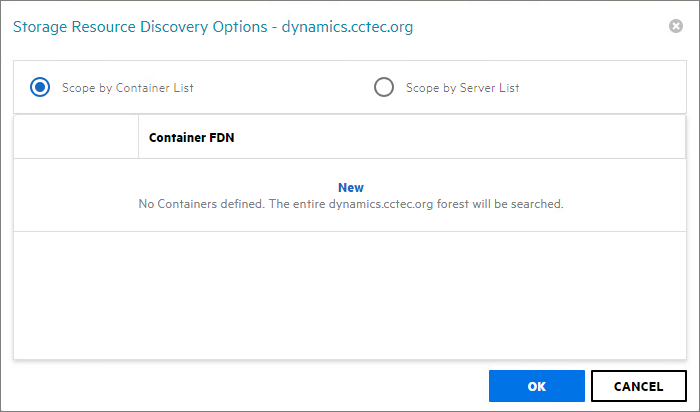
Select whether to specify the servers through a container FDN or server FDN, then click to enter the paths. Specify the FDN path and click . When all of the paths you want to be searched are listed, click .
Schedule: By default, File Reporter rebuilds the identity system’s storage resources at 12:00 AM each day. Larger sites might want change this setting to weekly or on a specific day of the month. To do so, click this option and modify the settings in the dialog box.
Rebuild: Clicking this button automatically rebuilds the identity system’s storage resources.
Rebuild Only Selected Servers: Use this option to rebuild the selected servers.
Refresh: Refreshes the resource list.
-
Click the > for each server to browse the storage resources.