10.3 Using the Tree Map
The Tree Map lets you view graphical representations of hierarchical file system data and in the process, gain insight very quickly.
-
From the Dashboard, click .
-
Browse to select the file system scan you want and double-click it.
-
Click .
-
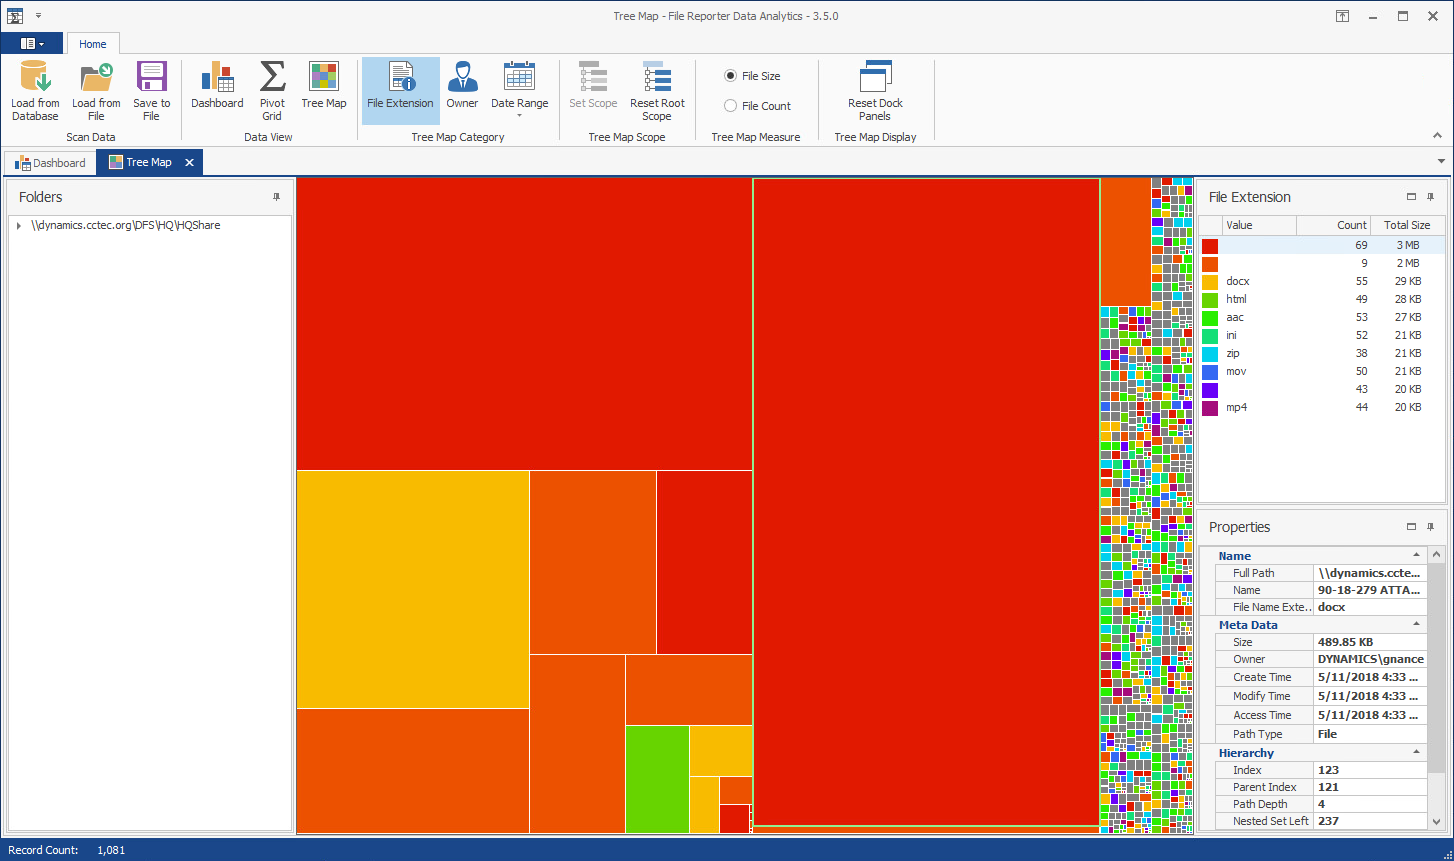
Observe how the Tree Map is presented according to file extension type with the specific color assignments detailed in the region.
Each of the squares in the Tree Map represents a single file in the scanned storage resource. The squares are represented according to the file size, relative to all of the other files in the scan.
-
Click one of the larger squares to view the details of the file in the region.
-
Right-click the file and select to open the folder where the file resides.
This gives you the ability to easily access any files you might want to know more about.
-
Expand the file system so it is displayed in the region.
-
Click one of the folders to see the group of files that reside in that folder.
The files belonging to a selected folder are outlined by a magenta colored outline.
-
Right-click a folder and select to drill down and view the contents of the folder in the Tree Map.
-
In the region, right click the listed scan and select .
-
Click .
The Tree Map now displays files according to owners.
-
Using the color classifications in the region, observe which users are storing the largest files.
-
Click > .
-
Observe how the data in the Tree Map is now classified according to when files were last accessed.
This is one of the most powerful means in File Reporter of quickly determining the relevance of data being stored on network storage resources.