11.1 Preparing the Microsoft 365 Cloud Tenant
-
In web browser, go to https://admin.microsoft.com.
This will automatically redirect you to the Microsoft 365 Admin Center for your tenant.
If you are not already authenticated, you will have to do so before being redirected.
-
From the menu, select .
-
Under , select .
This launches the Azure Active Directory admin center.
-
From the menu, click .
-
From the menu, select .
-
Click the tab.
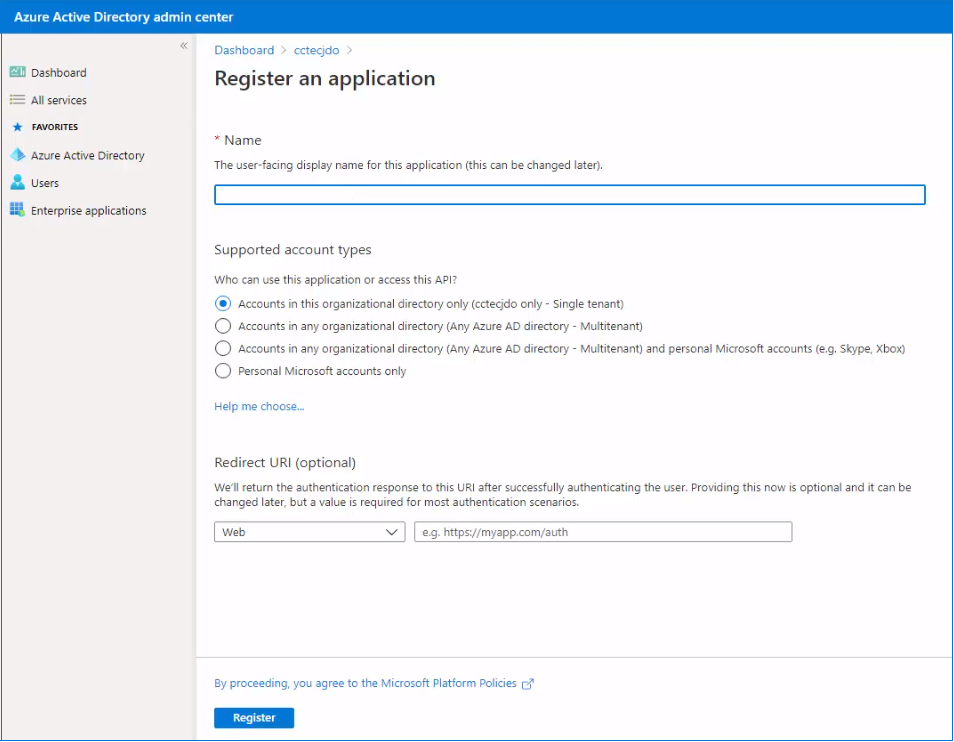
-
In the field, enter a descriptive name for the application registration.
For example: FR Reporting
-
In the region, select the option (the first option).
-
Leave the default settings of the region and click .
The application is registered and the settings are displayed.
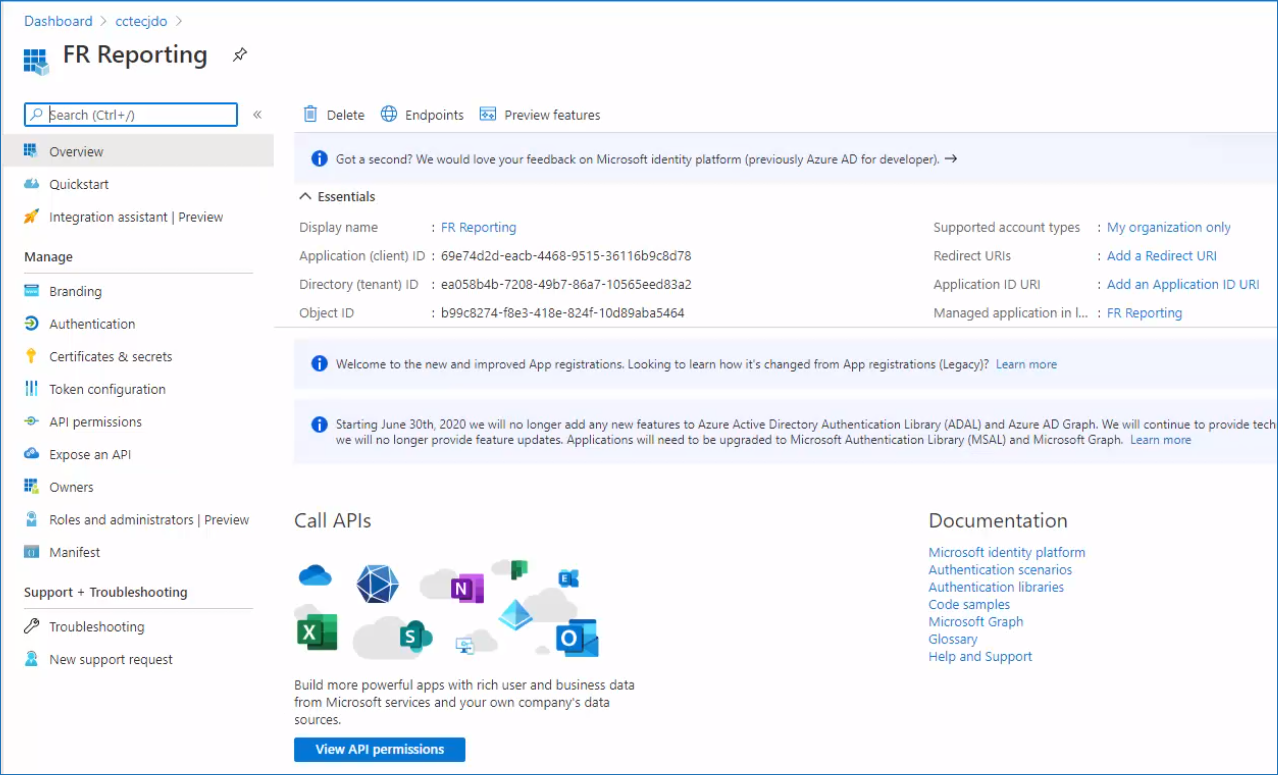
-
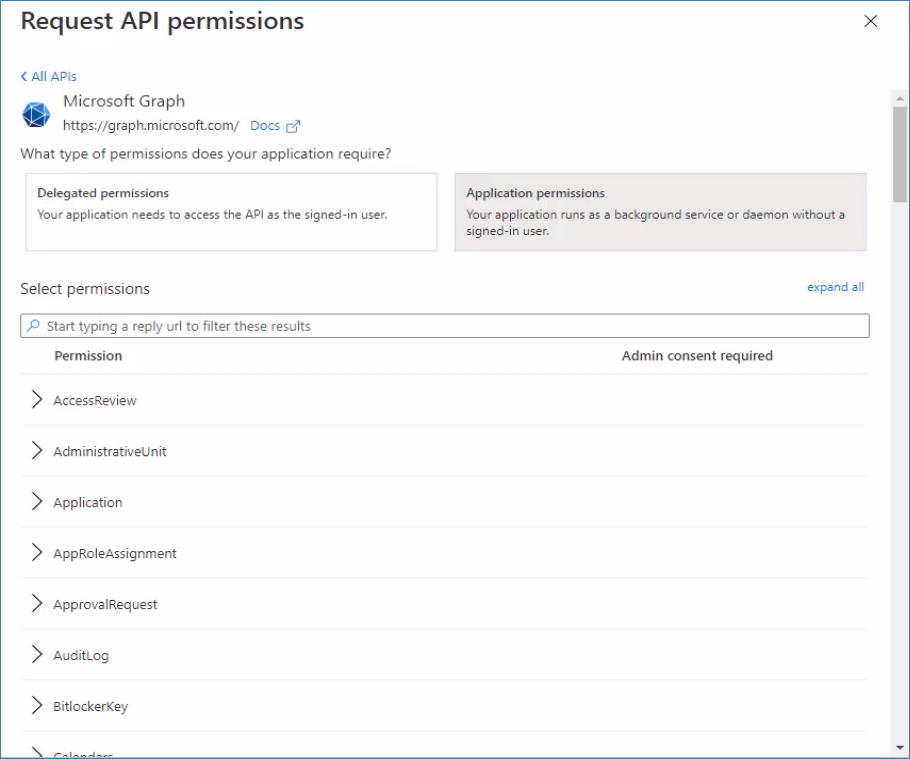
From the menu, select .
-
Set the application permissions.
-
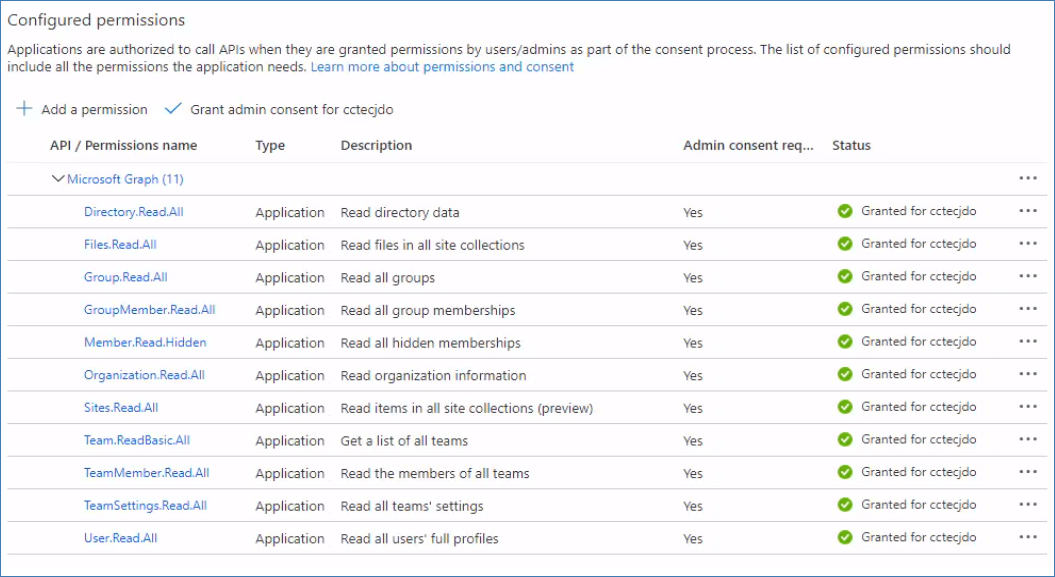
Refer to the following table as you establish application permissions:
API / Permissions Name
Description
Microsoft Graph
Directory.Read.All
Read directory data
Files.Read.All
Read files in all site collections
Group.Read.All
Read all groups
GroupMember.Read.All
Read all group memberships
Member.Read.Hidden
Read all hidden memberships
Organization.Read.All
Read organization information
Sites.Read.All
Read items in all site collections (previews)
Team.ReadBasic.All
Get a list of all teams
TeamMember.Read.All
Read the members of all teams
TeamSettings.Read.All
Read all teams’ settings
User.Read.All
Read all users’ full profiles
-
Click the tab.
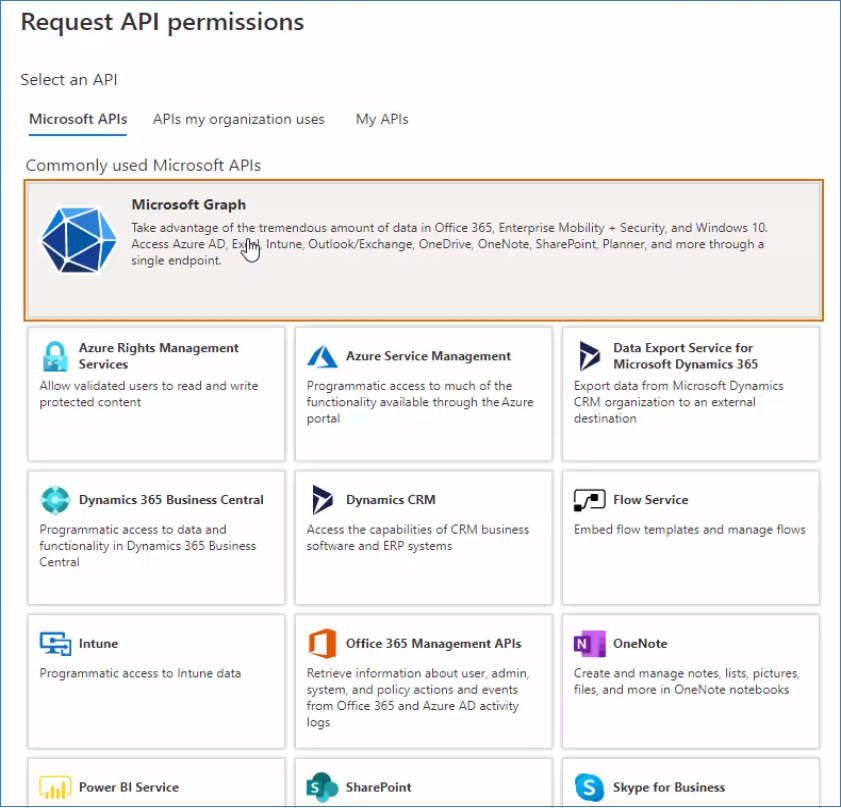
-
Click the API.
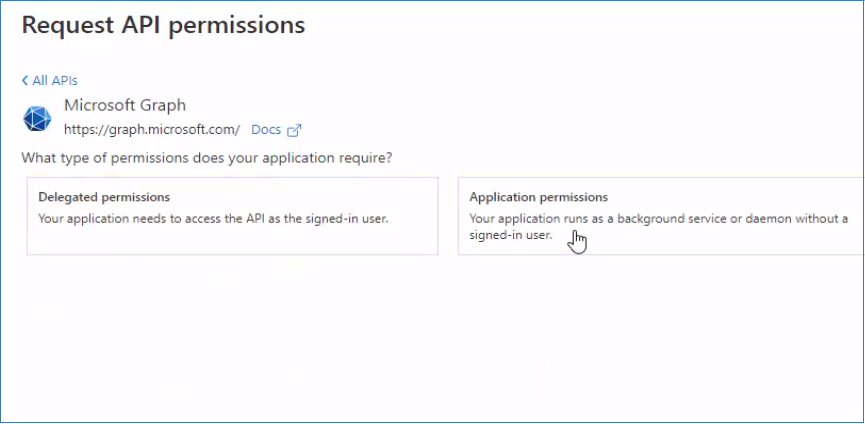
-
Click .
-
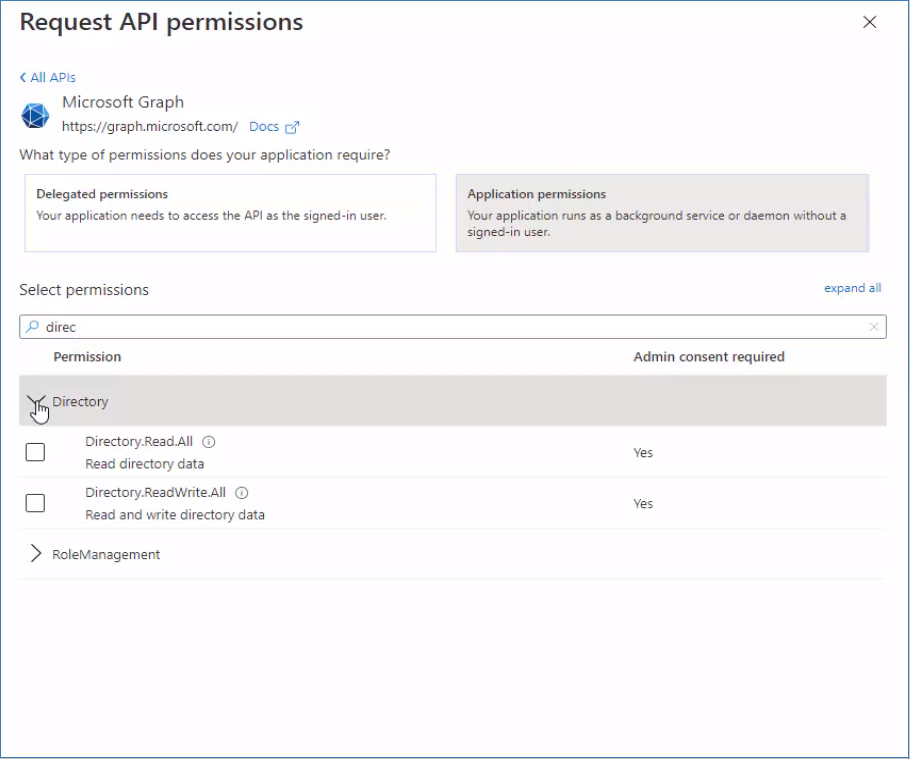
Referring to the table in Substep 8a, begin typing directory so that the permission shows up below.
-
Expand the permission to display the options.
-
From the table in Substep 8a, verify that the permissions to select are , then select that specific check box.
-
Click .
The Directory.Read.All permission is added to the Configured permissions table.
-
Repeat Substeps 8b-8h to add all of the permissions specified in the table in Substep 8a.
-
When finished, remove the permission by selecting it and then in the Remove permission dialog box, click .
-
-
Grant admin consent for the tenant.
-
Above the list of permissions that you just established, click .
-
When asked if you want to grant consent for the requested permissions for all accounts in tenant_name, click .
The status for each of the permissions is changed to .
-