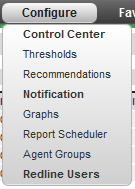
4.7 Configure
The Configure menu provides base configuration for the entire Redline system. (Configuration of individual agents, graphs, and sections are found in the individual agents configure tab.) The different tabs listed under configuration deal with system-wide control and general information.
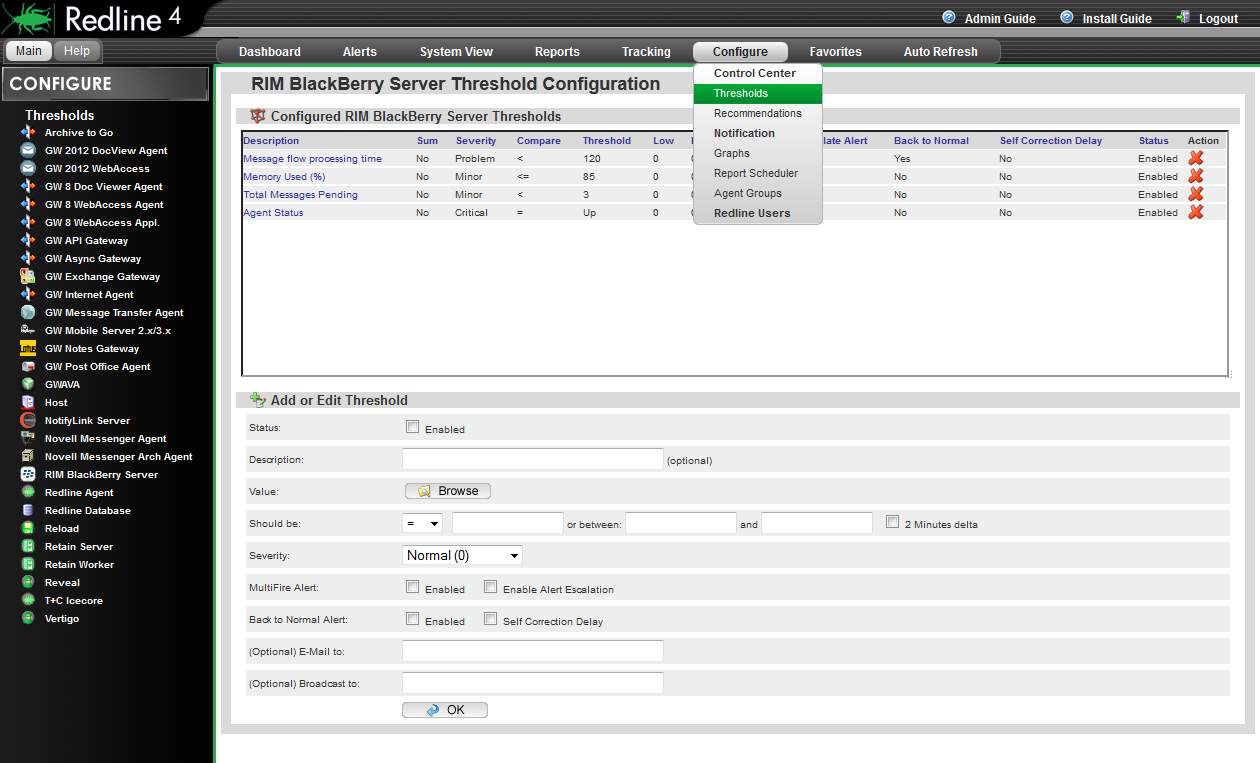
4.7.1 Control Center
The Control Center submenu contains configuration for the Redline Control Center, connection, database, maintenance, updating, licensing are contained here.
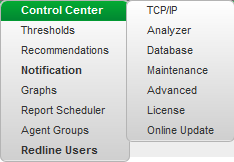
TCP/IP
The IP address which the Redline Control Center is bound to, what port it listens on, and how many listening threads is controlled through this page, for agent and web interface connections.
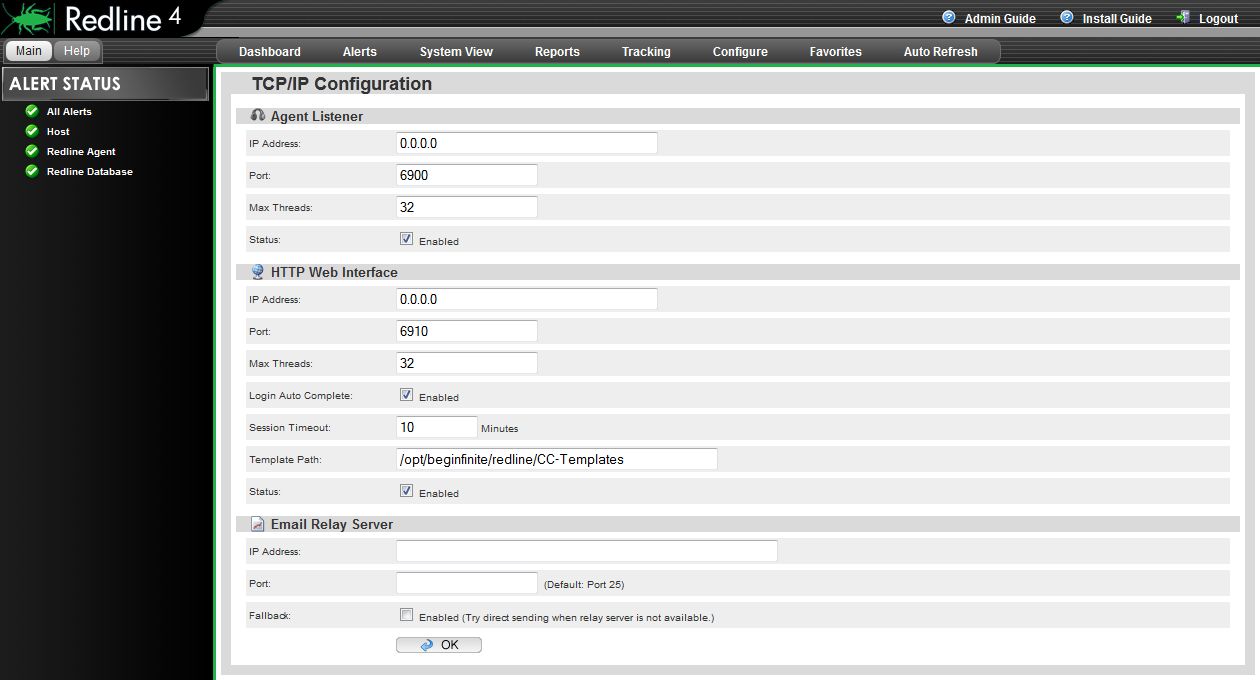
By default, the address settings are all 0.0.0.0. If multiple addresses and interfaces are present on the host server and a single address is desired, or perhaps a different port, this is where it is specified. After any changes have been made, clicking 'OK' saves changed settings. The E-mail alert server is utilized if Redline is to email reports to a recipient. The server must have all the required information to function. See the help section for more detail.
4.7.2 Analyzer
Part of the core of the Redline system is the analyzer. The analyzer settings control the module of Redline which analyzes and interprets the incoming data from registered agents. Changing settings here modifies how notifications and alerts through the system are defined and triggered. For instance, if a lower trend setting is desired to notice smaller bumps and dips in traffic, activity, or inactivity.
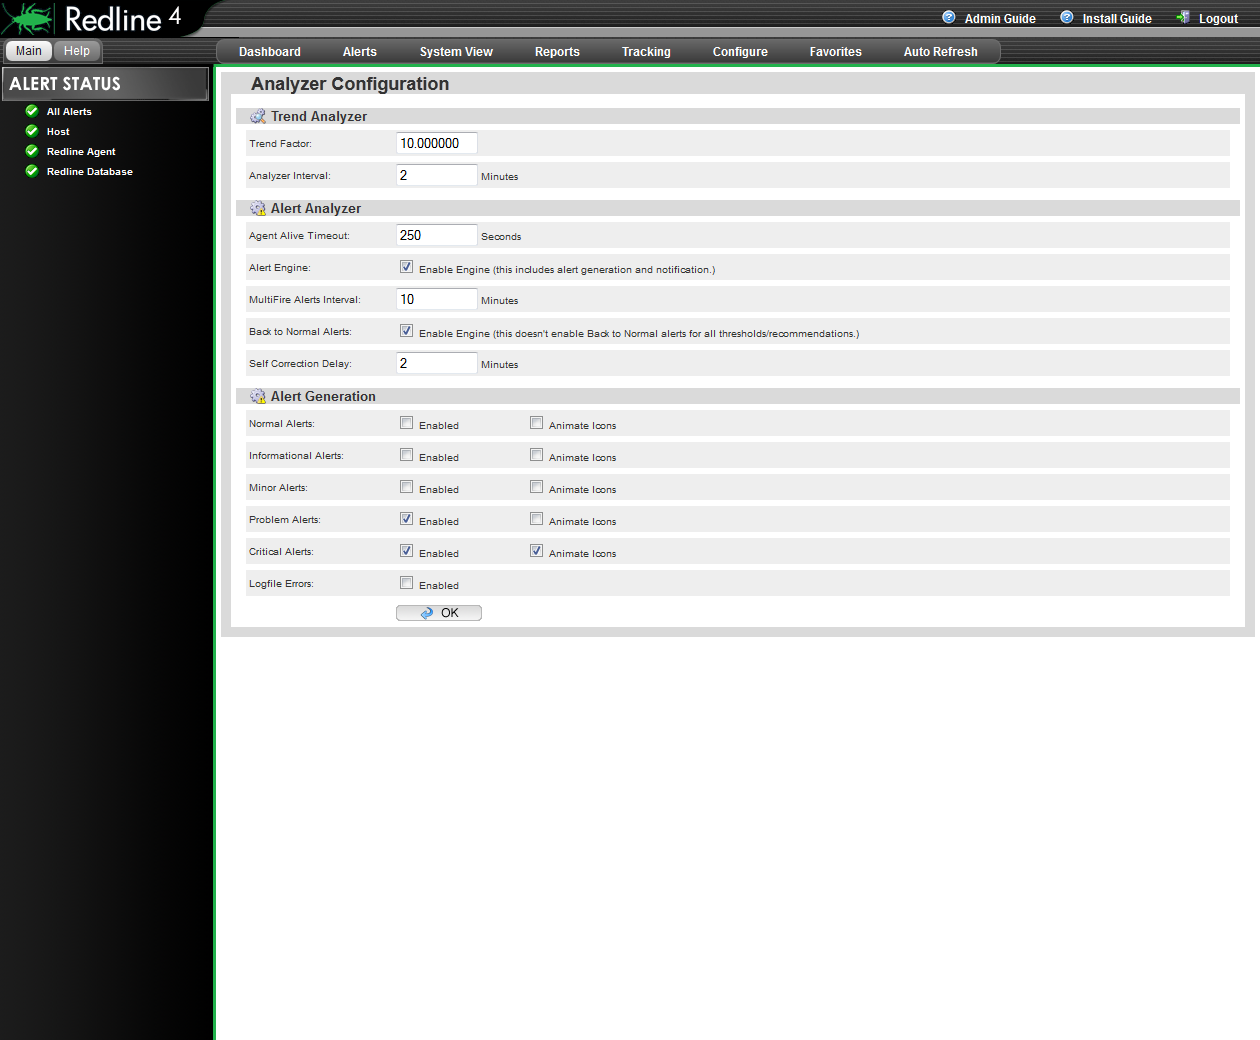
Select the 'help' informational button for individual breakout and explanation of different settings. Default settings are shown.
4.7.3 Database
Access to information about, and cleaning and re-indexing of the Redline database is provided here. In certain large environments, the Redline database may become slow or bogged down when used to generate reports. If a report is taking an inordinately long time in generation, it may be necessary to clean and index the database tables sourced in the report. This does become critical in large systems.
Different tables are listed, and may be sorted simply by clicking on the headings. Sorting the databases by heading may be done in ascending or descending order simply by clicking on the heading name a second time. Once the desired table has been located, it may be selected for cleaning and indexing by clicking on the description column.
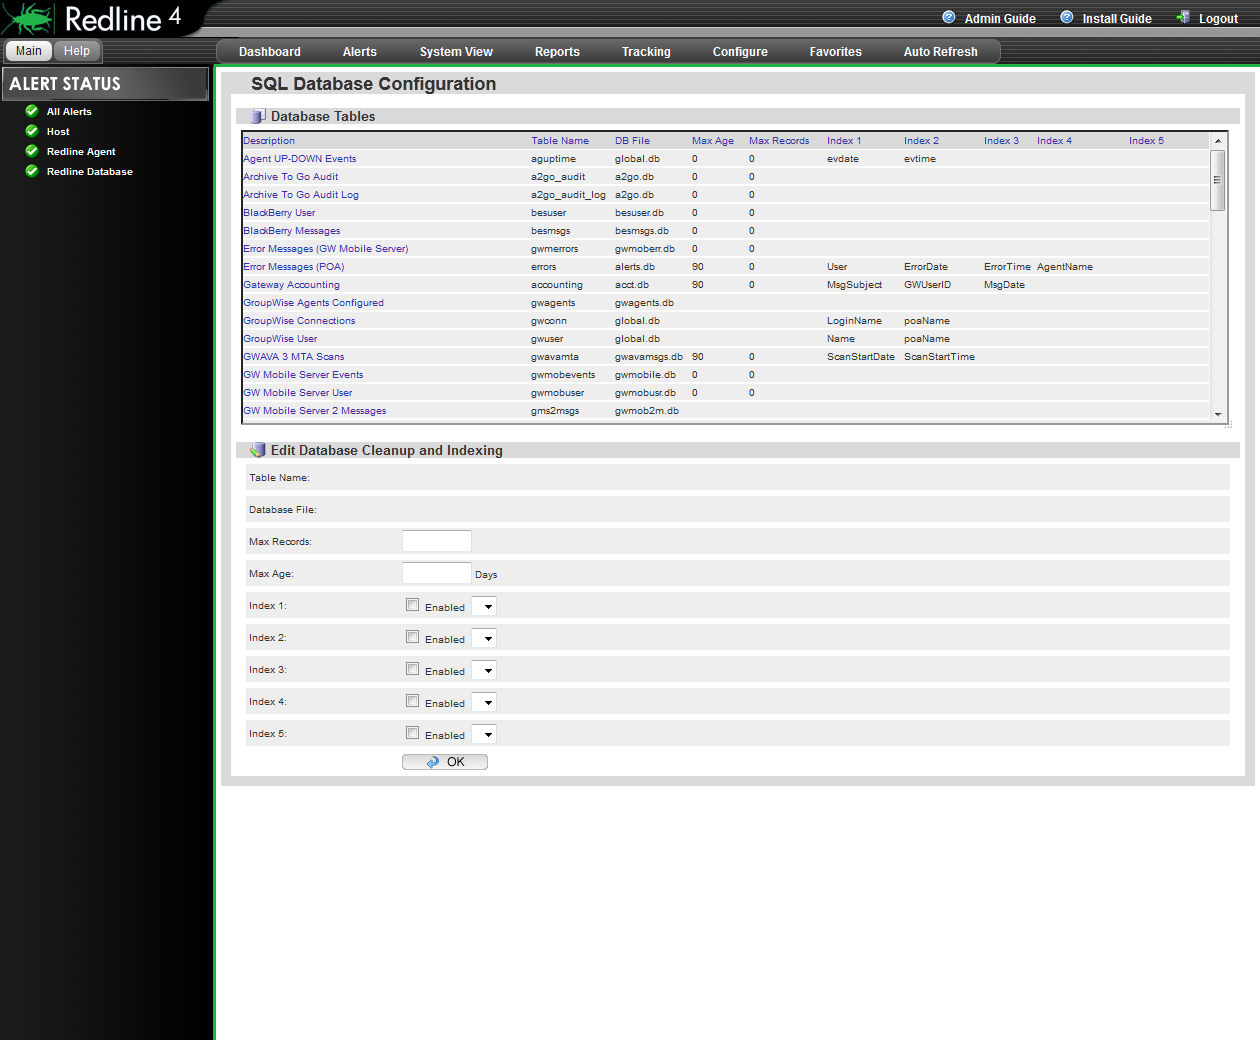
Once selected, a table's information is loaded into the cleanup and indexing section; where default cleaning options are propagated.
4.7.4 Maintenance
The Maintenance page grants access to the basic cleaning and up-keep operations that maintain the speed and usability of the Redline system and interface. Maintenance runs nightly, and should not need to be triggered manually unless the Redline Control Center was not running at the specified maintenance time.
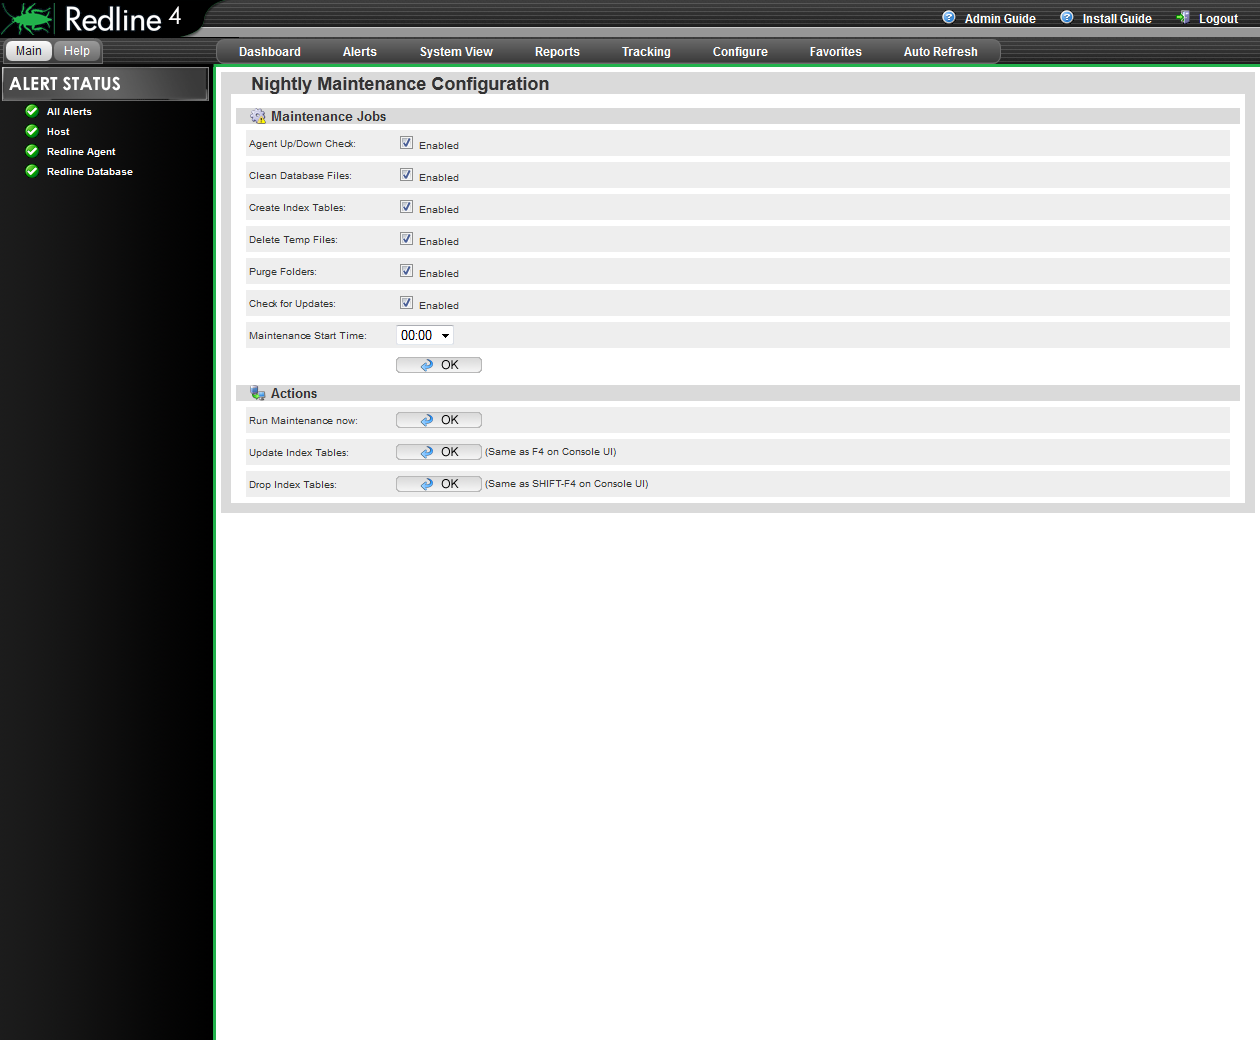
Most of these settings do not need to be modified from default, but can be adjusted to suit the needs of every system.
Nightly maintenance jobs include: generating table indexes and, cleaning the database files and index tables, deleting temporary files, and purging folders. These steps are usually enough to keep Redline from becoming bloated or bogged-down in all but the largest system implementations. If more than usual maintenance is needed, maintenance can be triggered immediately from this page.
Nightly maintenance may be configured to exclude or include specific parts of the default procedures. To enable or disable the procedures, place or remove a check in the appropriate 'Enabled' checkbox for the desired procedure.
The maintenance start time is set in a 24-hour clock, and is a time-sensitive event that does not queue. If the Redline Control Center is not running at the specified maintenance time, the maintenance job will not be run until the next maintenance cycle. If the default time of '0' is not an appropriate time to have the maintenance cycle run, select an appropriate time when system load is low and no reports or other system maintenance which might interfere is scheduled.
Changed settings must be saved before maintenance is manually triggered. Click the 'OK' button above the Actions menu to save changes before triggering manual maintenance or browsing away from the page, or the changes will not be implemented.
If the host server needs to be shut down during the set maintenance time, manually triggering a maintenance cycle will become necessary, especially if the shutdown is routine.
The Actions menu allows for the manual triggering of a maintenance job, as well as specific maintenance jobs not regularly scheduled. Redline can become bogged with information in the database which is no longer current, or pertinent information to the system. Dropping indexes and updating indexes will clean out the system and allow Redline to pull all new information. However; these actions will not be beneficial if the information removed from the system will simply be repopulated back in by monitored agents. This should ONLY be used under the advisement of Support, and if the system becomes bloated or the DB becomes stuck.
4.7.5 Advanced
The Advanced page contains a database vacuum, which can be set to clean through the database on a recurring schedule, as well as automatic restarting and log level settings.
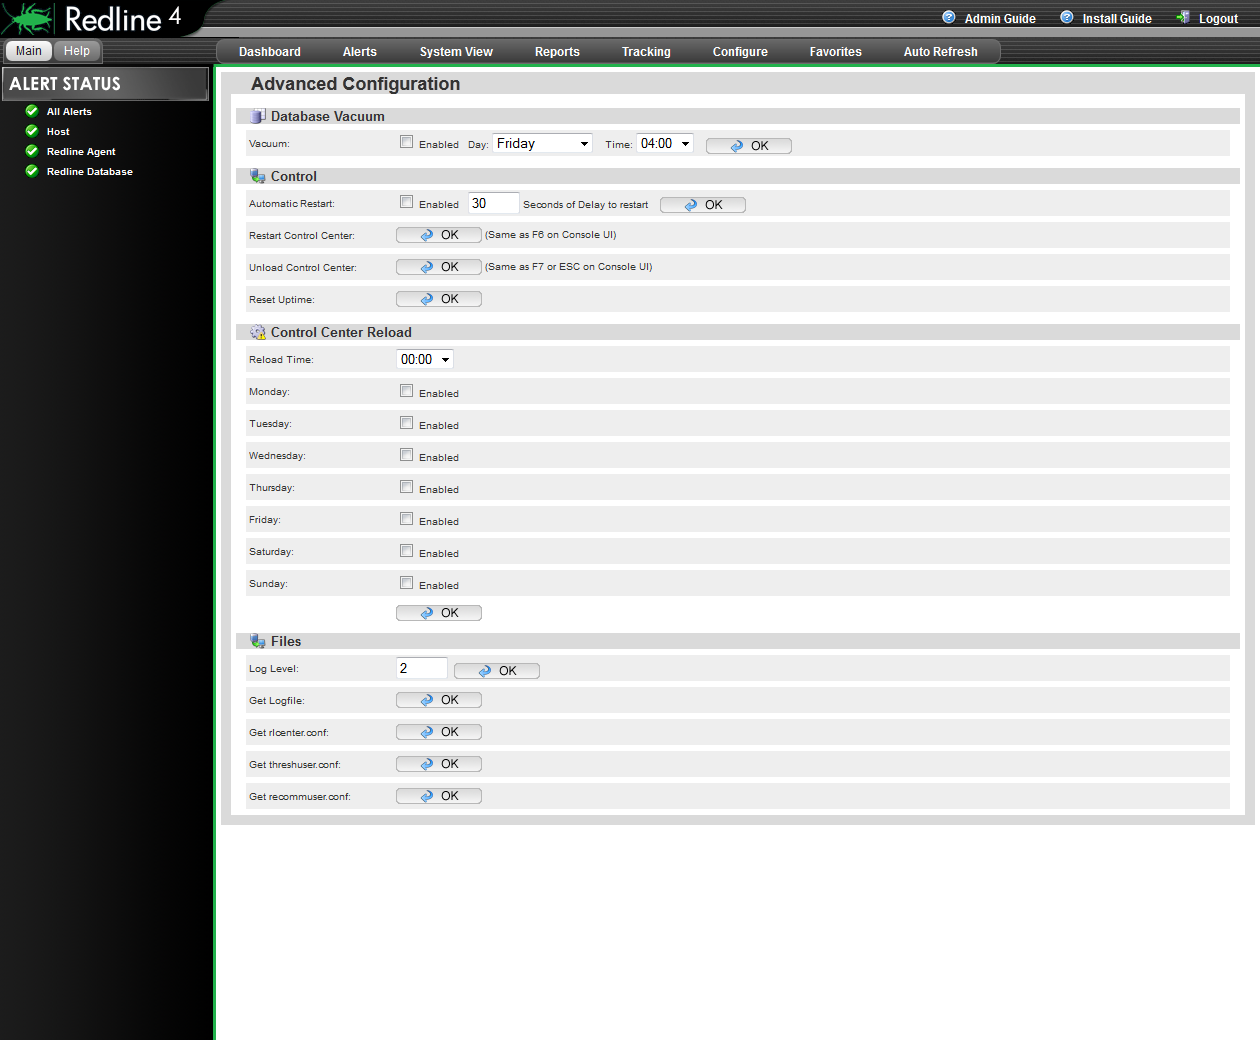
The Advanced page contains a database vacuum, which can be set to clean through the database on a recurring schedule, as well as automatic restarting and log level settings.
By default, there is no need to utilize the database vacuum unless the Redline system is monitoring a large system, or you are instructed to activate the database vacuum by Support.
Automatic restart of the Control Center should not be used unless in coordination with Support as part of a
troubleshooting measure. Restart of the Control Center is helpful if the configuration has changed and a
re-load of the Control Center is desired. Unloading the Control Center will shut down Redline.
The Log Level determines the amount of information in the log file. Acceptable settings are 0 - 6.
(Additional levels are available to Support, but should not be attempted without support's instruction.)
Default is '2', and all practical use in a production environment are the settings: 0, 2, 6. A setting of '6' is for debugging purposes, '2' is for normal work, and '0' is minimalist. Selecting 'OK' saves changes or begins the indicated action.
4.7.6 License
The Redline registration name, code, and license files are controlled and listed here. The Registration name and code are used for verification and as a data encryption key for communication between Redline Agents and the Control Center. The registration name and code must be manually specified in the configuration file for each Redline Agent. Changing the registration information would prohibit any agent from connecting to the Control Center until each agent's configuration file had been modified to reflect the new information.
The registration information does not need to be anything in particular and is not connected to the license file; it may be anything desired. Though the registration code is recommended to be a mixture of numbers and letters, for security reasons.
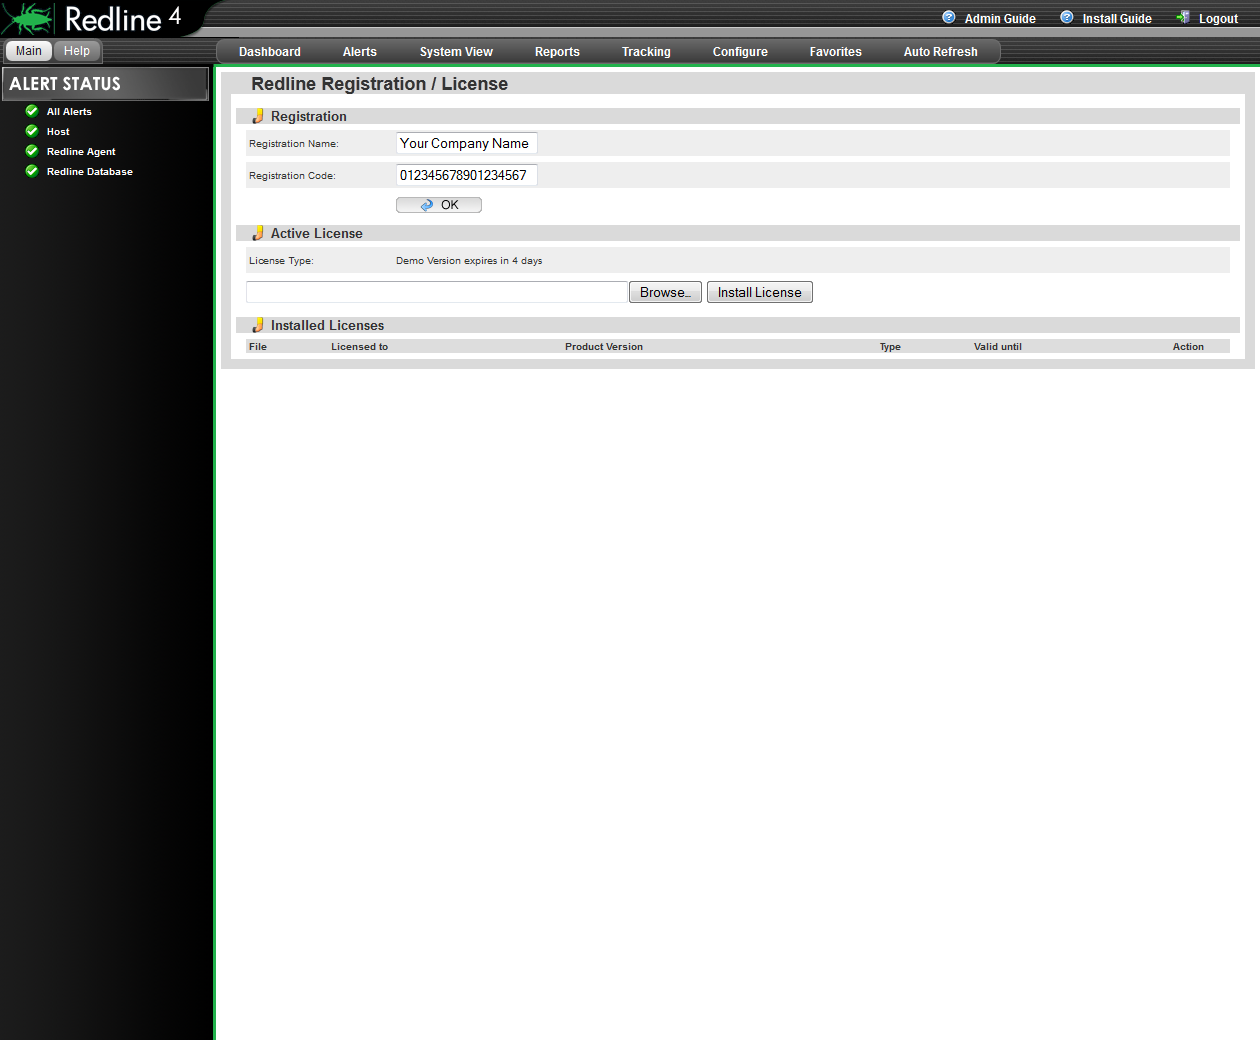
Installed licenses are listed along with their expiration date and type. Licenses may be added or removed from this location.
To obtain a license contact the GWAVA sales representative in your area, or visit https://licenses.gwava.com/ to use a Validation key and claim a license for your system and find contact information for sales representatives in your area.
4.7.7 Online Update
The Online Update system connects to either the GWAVA download server or a specified server and checks for updated software. The current version the system is running and the available versions for download and update are listed. New updates are listed in black while downloaded updates are grayed out.
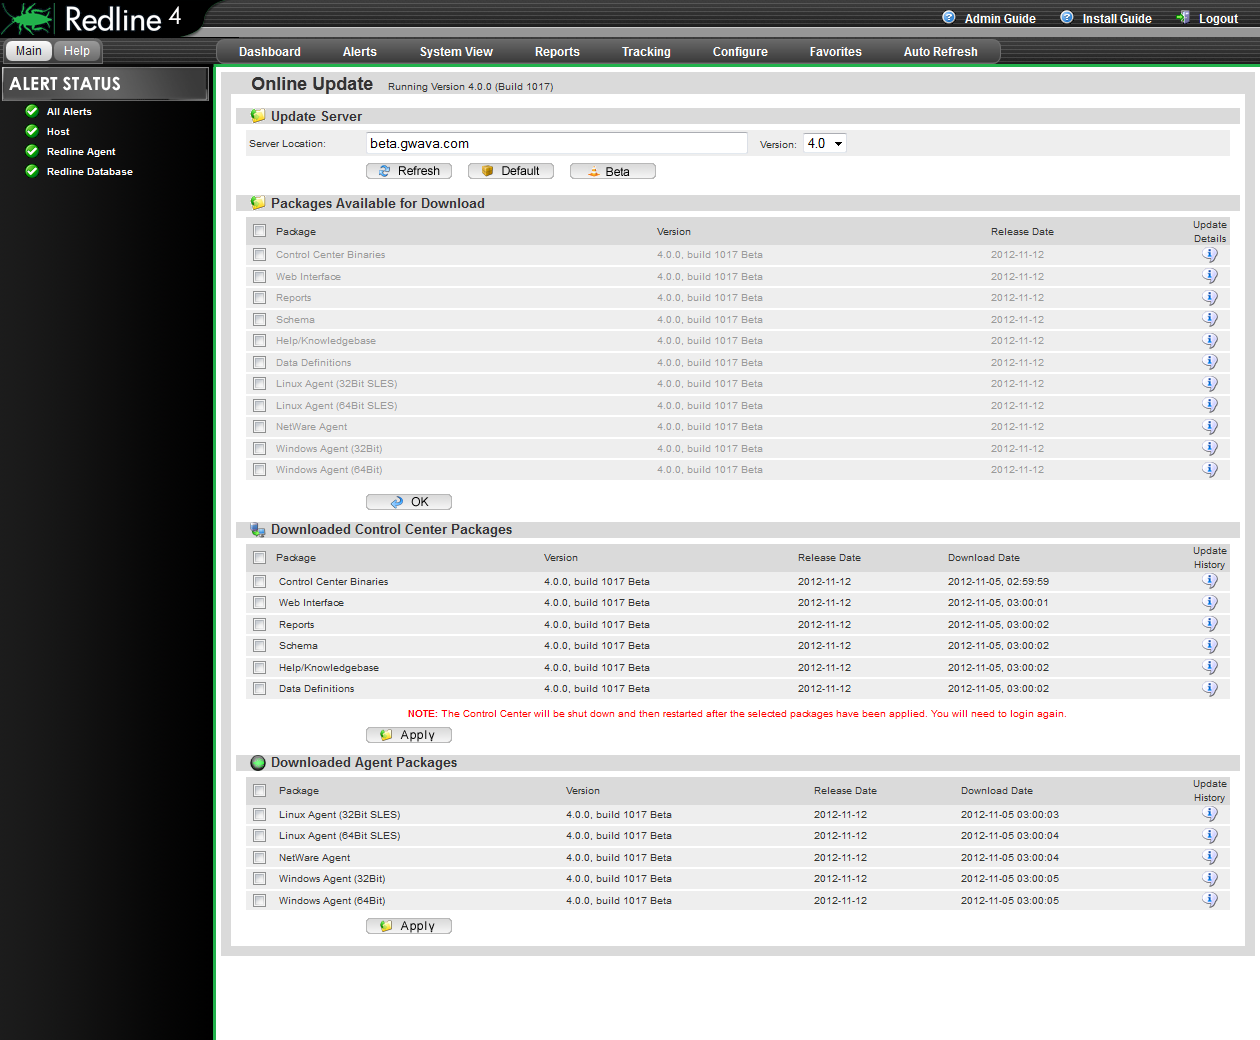
Before packages can be installed, they must be downloaded from the download server. The default download server points to the official GWAVA download server, and will carry the appropriate available version. If a separate server is required or desired for download, it may be specified in the 'Server Location' option. After specifying the new download server, click 'Refresh' to check for available versions. Clicking the 'Default' button will return the download server to the GWAVA default.
The Control Center must always be updated first. Select the appropriate, desired, or globally select the packages for download from the top, packages available, section, then select 'OK' to have the system automatically connect and download the specified version. After the packages have been downloaded to the Control Center, they are then available to be installed by the system. Select, either globally or separately, the desired systems to update, and then click on the 'Update Now' button to update the specified modules. Any update to the Control Center requires the Control Center to restart. After clicking the ‘Apply' button, allow sufficient time for the system to restart before attempting to login.
For Agents, the update is a little different, as the agents must connect to the Control Center and copy the appropriate binary package for each platform. Agents do not maintain constant contact with the Control Center, and as such, the update may not be immediate. The default contact cycle for the Agents is every 2 minutes, and as such, several minutes may pass before the system is updated. Agents copy the new binary down, install it, and then restart and reconnect with the Control Center.
The update history information icon will provide further details about the updates applied.
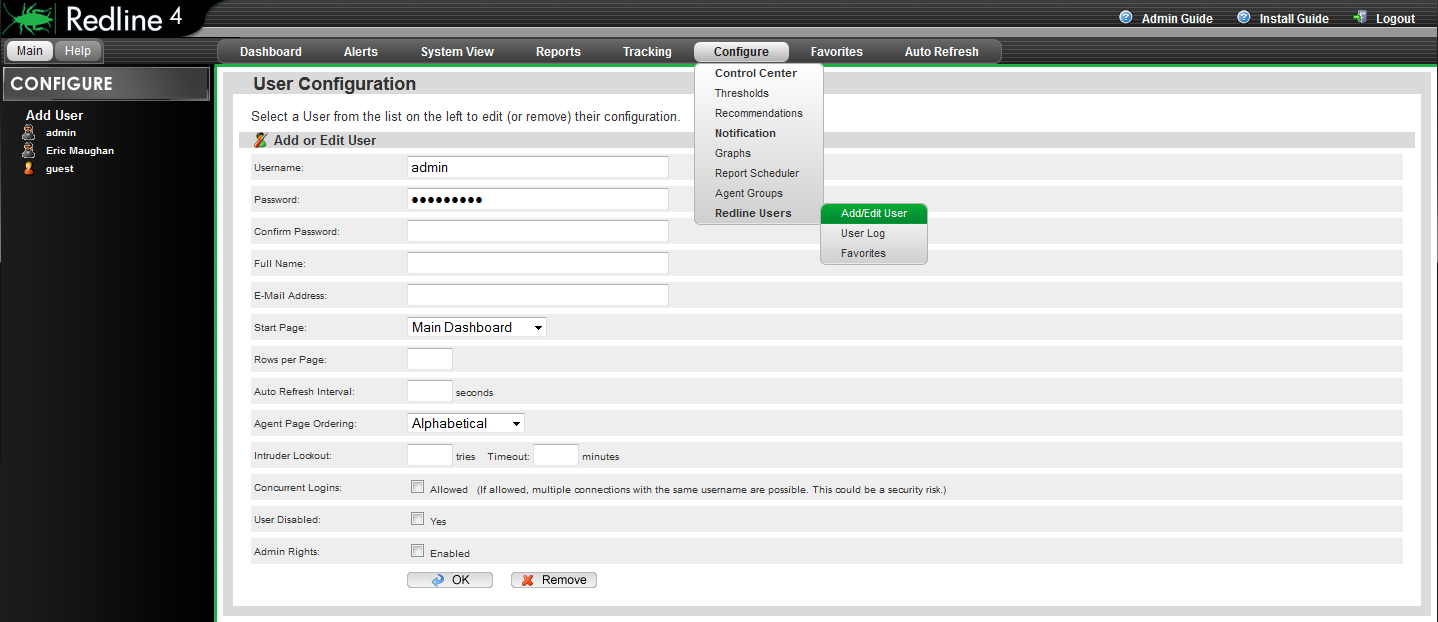
4.7.8 User Configuration
The User Configuration page allows administrators to add extra accounts to the Redline system. Basic information is required along with contact information for reports and notifications. Each user can set their own start page, manage their password, set their refresh interval, and manage their favorites. Users granted administrator rights in this dialog will have rights to modify and view everything in the Redline system.
4.7.9 User Log
The User Log is a listing of the top 500 actions of any selected user in the system. User selection is accomplished through clicking on one of the users listed in the left-hand menu. Once selected, the user log will be displayed.

4.7.10 User Favorites
It is through the user favorites page that the user can specify their favorites list, adding and removing pages.
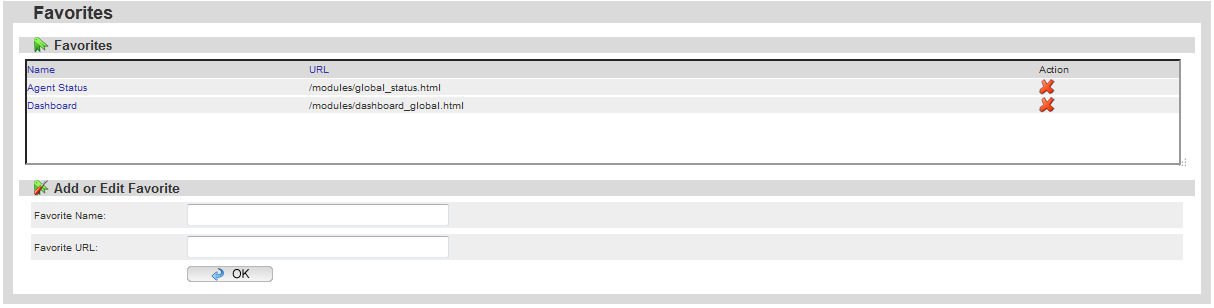
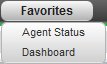
4.7.11 Favorites
The Favorites menu provides quick links to access the most frequently visited pages in the system. It is provided as a convenience. Redline maintains a separate favorites page for each individual user. To add to the menu, users should go to the Configure | Redline Users | Favorites page. Each user can manage their favorites page.
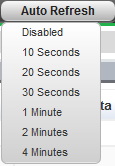
4.7.12 Auto Refresh
Redline can automatically refresh the Dashboard, or main page, for status and general update of system information on the selected interval. This allows the Dashboard to be left up on the desktop and maintain updated information on the system statistics and trends. As each agent updates every 2 minutes by default, the '2 minutes' option makes the most sense, yet agents may be set for higher refresh rates.