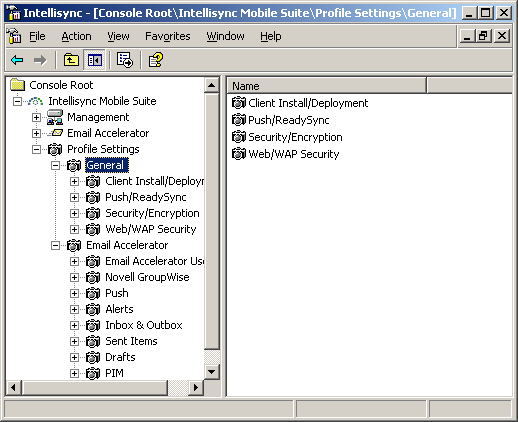
4.2 General Settings
The General control includes settings that are not application specific, but apply to the entire suite. Profile settings for Client Install/Deployment, ReadySync, Security/Encryption, and Web/WAP security are in the General control.
Figure 4-4 Intellisync Mobile Suite Control: General Settings
4.2.1 Client Install/Deployment Settings
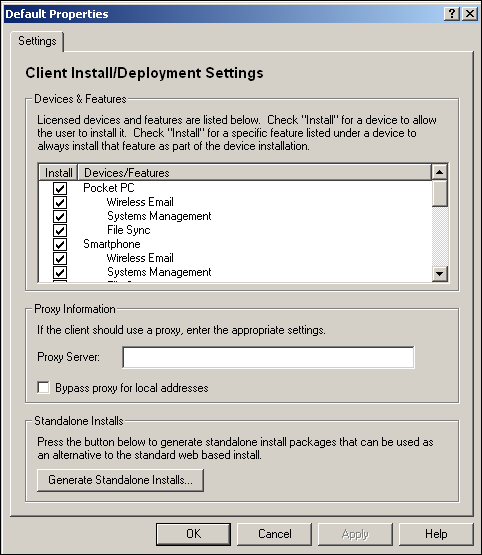
Use Client Install/Deployment to create a set of Intellisync Mobile Suite applications for various installation and deployment profiles. The applications you specify become part of every device installation for users assigned to a particular profile.
-
From the console tree, click .
-
Expand > , then click .
-
In the details pane, select the profile you want to view.
-
Click > .
-
On the Settings page, specify the applications you want to install for each user in this profile. Complete the proxy information if necessary.
-
Click when you are ready to complete an installation package to distribute to your users. With a standalone installation, users are not required to use the Web site to install software.
For more information on creating and assigning these profiles, refer to the online Help.
4.2.2 Push/ReadySync Settings
Use this panel to create and edit profile settings for Push (both network push and SMS push) and ReadySync. ReadySync is a feature that allows you to synchronize data automatically at intervals you define. Push is a feature that allows users to receive e-mail messages on their devices soon after the e-mail arrives on the server. The available settings are similar to those shown in the following figure:
Figure 4-5 Push/ReadySync Settings
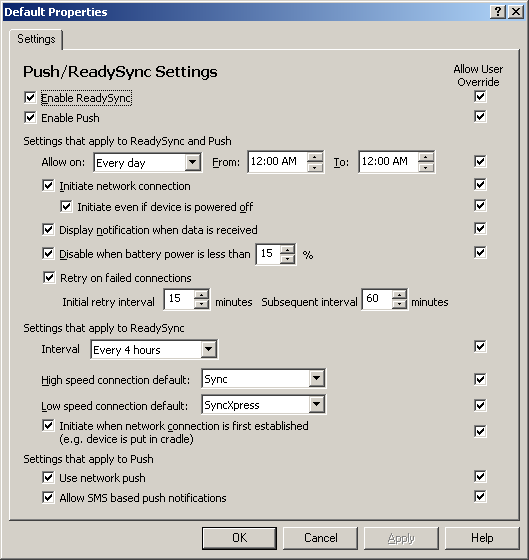
You can create different profile settings by varying the values for the options. The list of available Push/ReadySync settings includes the following:
-
Enable ReadySync: Select or deselect the check box to enable or disable the feature.
-
Enable Push: Select or deselect the check box to enable or disable the feature.
NOTE:You can use ReadySync and Push together; they are not mutually exclusive.
ReadySync and Push Settings
-
Allow on: Select whether to allow ReadySync sessions and Push to take place every day or weekdays only.
From: starttime To: stoptime: Use these fields to set the hour range for Push and ReadySync sessions.
-
Initiate network connection: If you enable this feature, the device dials for a connection when a ReadySync session begins. Select or deselect the check box to enable or disable the feature.
-
Initiate even if device is powered off: This option is only available if you select . This feature allows the device to dial for a connection even if the device is turned off. Select or deselect the check box to enable or disable the feature.
-
-
Display notification when data is received: Select this option to have the device notify the user when it receives data.
-
Disable when battery power is less than x %: Select this option to disable the ReadySync feature if battery power falls below a specific percentage.
-
Retry on failed connections: Select this option to specify the intervals between initial retry and subsequent interval retries. Intervals are measured in minutes.
ReadySync Settings
-
Interval: Select the frequency with which you want ReadySync to connect. Options range from every 10 minutes to every 24 hours.
-
High-speed connection default: Select Sync or SyncXpress. With this option, you can define whether Sync or SyncXpress items synchronize when the device has a high-speed connection for a ReadySync session. Sync sessions usually contain items that require more transfer time or faster connections, and therefore are set up for high-speed connections.
-
Low-speed connection default: Select Sync or SyncXpress from the list. SyncXpress sessions are usually optimized for low-speed connections and therefore contain limited information.
-
Initiate when network connect is first established: If you enable this option, a ReadySync session begins as soon as the user places the device in the cradle.
Push Settings
-
Use network push: Select this option to enable network (IP) push for devices you support.
-
Allow SMS-based push notifications: Select this option to have SMS-based push send any new e‐mail messages to devices upon receipt.
4.2.3 Security/Encryption Settings
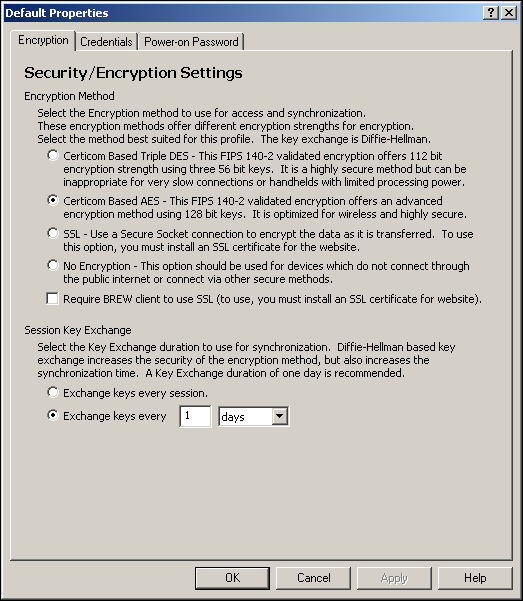
With Security/Encryption profile settings, you can define the encryption method you want to use for access to the server and data synchronization. You can also select storage options for the client authentication credentials.
The available settings are similar to those shown in the following example:
Figure 4-6 Security/Encryption Settings
Encryption Method
This is the encryption method used to access the server and synchronize information. The methods have varying levels of security, which allows you to select the method best suited for a particular user or group. The key exchange is Diffie-Hellman.
-
Certicom Based Triple DES: FIPS 140-2 validated encryption. This highly secure method has 112-bit encryption strength using three 56-bit keys. Novell® does not recommend this option for slow connections or devices with limited processing power.
-
Certicom Based AES: FIPS 140-2 validated encryption. This advanced encryption method uses 128-bit keys. It provides a highly secure connection and is optimized for wireless connectivity.
-
SSL: Secure Sockets Layer (SSL) encrypts data as it is transferred. Clients and servers authenticate each other and establish a secure link, or “pipe,” across the Internet or intranet to protect the information you are transmitting.
-
No Encryption: Select this option if a device does not connect through the Internet or if the device connects through other secure methods.
-
Require Symbian client to use SSL: Select this option to require Symbian devices to use SSL. If you enable this option, your Web site must have an SSL certificate.
Session Key Exchange
This settings specifies the duration of the key exchange between server and devices. A key exchange based on Diffie-Hellman increases the security of the encryption method, but also increases the synchronization time.
-
Exchange keys every session: Select this option to exchange keys every session. However, exchanging keys every session slows down the synchronization process.
-
Exchange keys every x: Select this option to exchange keys at the specified interval.
Credentials Management
Intellisync Mobile Suite does not store users’ passwords on the device. However, you can use the Password page to have authentication credentials cached on the device. These authentication credentials are created when the user connects by entering a password.
Figure 4-7 Security/Encryption Settings: Credentials

-
Allow authentication credentials to be stored on the device: Select or deselect the check box to enable or disable this feature.
-
Client authentication credentials on the device never expire: This option is only available if you select . Select this option to indefinitely store authentication credentials on the user’s device.
-
Client authentication credentials expire after x: This option is only available if you select . Select this option to set how long authentication credentials remain valid on the user’s device.
NOTE:The option is only for Pocket PC and Palm devices.
-
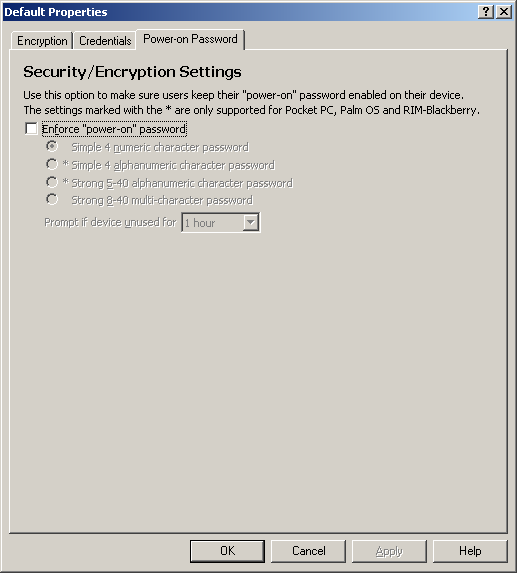
Power-On Password Management
Use this option to make sure users keep their power-on password enabled on their devices.
Figure 4-8 Security/Encryption Settings: Power-On Password
-
Enforce “power-on” password: If you select this option, you require users to enter a password when the device is powered on. If the user enters an incorrect password, the dialog box does not close and the user cannot exit the screen until the correct password is entered. Select the type of password you want to require.
- Simple 4-digit password
- Simple 4-digit alphanumeric password
- Strong password (more than 4 digits, alpha or numeric, no change in case)
- Strong alphanumeric password
-
Prompt if device unused for x: Set the amount of inactive time that must pass before the user must enter the password again.
4.2.4 Web/WAP Security Settings
You can create and edit profile settings for Web/WAP security. The available settings are similar to the ones shown in the following figure:
Figure 4-9 Web/WAP Security Settings
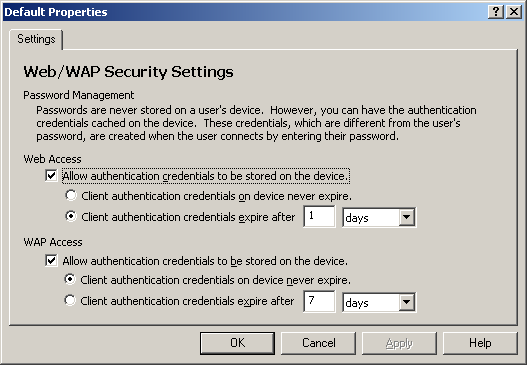
Intellisync Mobile Suite does not store users’ passwords on the device. However, you can use the Web/WAP Security Settings to cache authentication credentials on the device. These authentication credentials are created when the user connects by entering a password.
-
Allow authentication credentials to be stored on the device: Select or deselect the check box to enable or disable this feature.
-
Client authentication credentials on the device never expire: This option is only available if you select . Select this option to store authentication credentials on user devices indefinitely.
-
Client authentication credentials expire after x: This option is only available if you select . Select this option to set how long authentication credentials should remain on the user’s device.
-
You can set these values separately for Web and WAP access.