15.3 Creating a New Resource
-
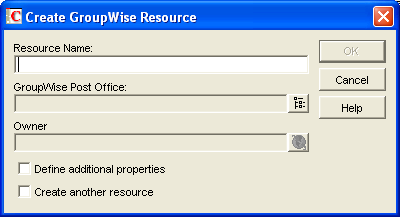
In ConsoleOne®, right-click the container where you want to create the Resource object, then click > to display the Create GroupWise Resource dialog box.
-
Fill in the following fields:
Resource Name: Specify a descriptive name. Because the name is used as part of the resource’s GroupWise address, do not use any of the following invalid characters in the resource name:
GroupWise Post Office: Select the post office where the resource will be located.
Owner: Select the user who will be responsible for accepting or declining requests to use the resource. The owner must have a GroupWise account on the same post office as the resource.
-
Select , then click .

-
On the Identification page, fill in the following fields:
Description: Specify a description to help users identify the use of the resource. The description will be displayed if the user chooses to view information about the resource in the Address Book.
If you define the resource type as a place, the description is automatically added to the field in the appointment. A good description can help users locate the place more easily.
Visibility: Select the level at which the resource will be visible in the Address Book. System causes the resource to be visible to all users in your GroupWise system. Domain causes the resource to be visible to all users in the same domain as the resource. Post Office causes the resource to be visible to all users on the same post office as the resource. None causes the resource to not be visible at any level. However, even if the resource is not displayed in a user’s Address Book, he or she can schedule the resource by typing the resource name in an appointment’s field.
Type: You can identify the resource as a general resource or as a place. When a user schedules a resource that is defined as a place, the resource name is automatically added to the field in the appointment.
Phone: If the resource has a telephone number associated with it, such as a conference room with a telephone number, specify the phone number.
-
Click to save the resource information.