23.2 Managing workflows
This section includes procedures for managing provisioning workflows using the Workflow Administration plug-in.
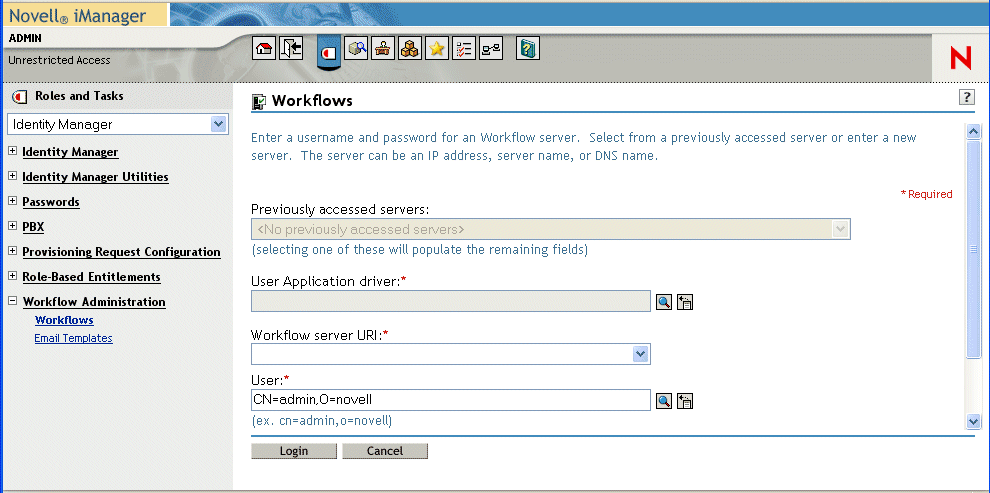
23.2.1 Connecting to a workflow server
Before you can begin managing workflows, you need to connect to a workflow server. If the user application driver is bound to a single workflow server, you can simply specify the name of the driver to use. If the driver is associated with multiple workflow servers, you need to select the target workflow server.
To connect to a workflow server:
-
Select the Identity Manager category in iManager.
-
Open the Workflow Administration role.
-
Click on the Workflows task.
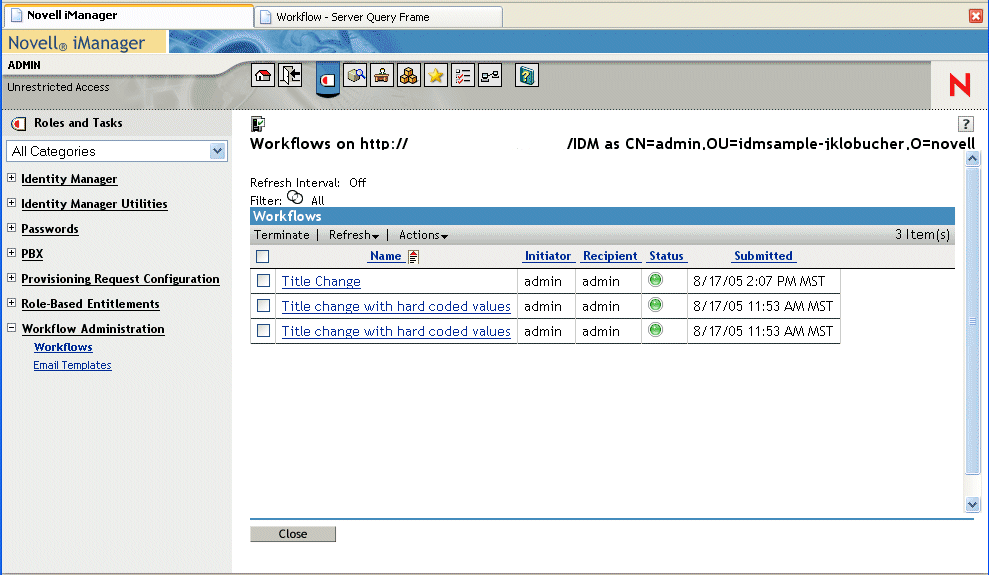
iManager displays the Workflows screen.
-
If you accessed the target workflow server previously, you can select the server from the Previously accessed servers dropdown list.
iManager fills in the remaining fields on the screen for you.
-
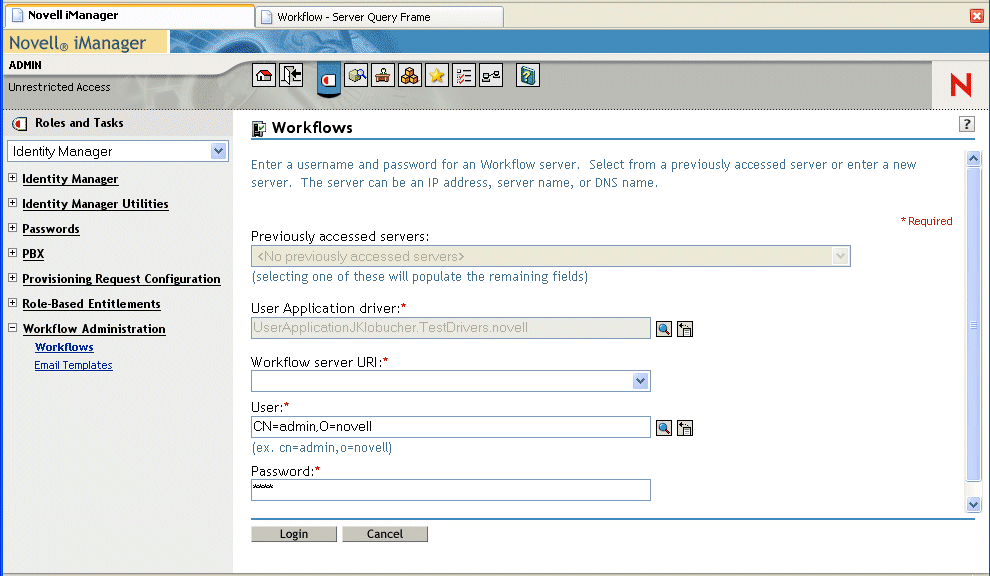
If you have yet not accessed a workflow server, specify the driver name in the User Application Driver field and click OK.
iManager fills in the remaining fields on the screen for you.
-
If the driver is associated with multiple workflow servers, select the target server in the Workflow server URI field.
-
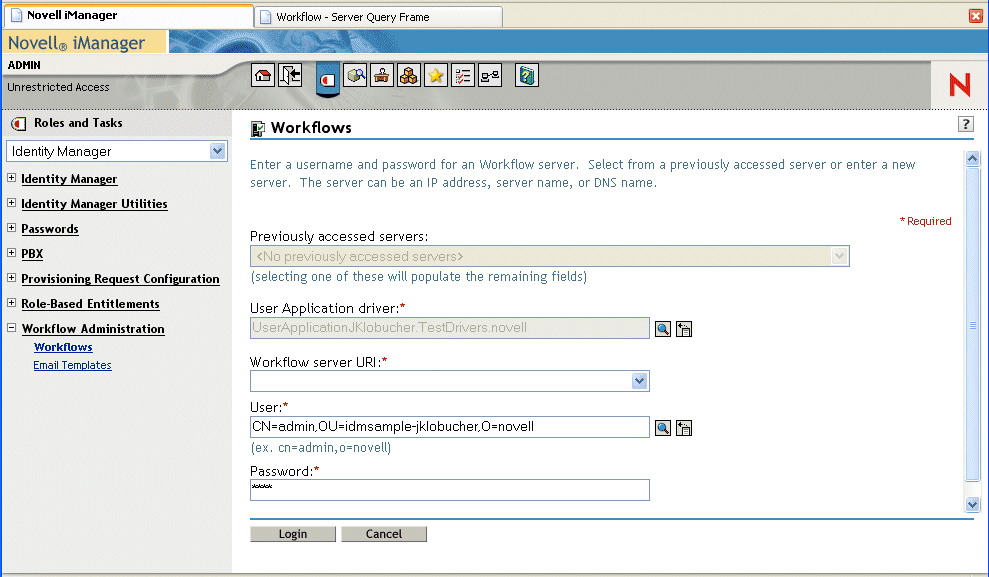
Optionally override the user name in the User field and the password in the Password field.
The user must be the User Application Administrator. By default, the user name is set to the user who is currently logged in to iManager. If this user is not the administrator, you need to change the user name. For example, you might want to modify the user to point to the User Application Administrator for the idmsample test OU, as shown below:
-
Click Login.
The Workflow Administration plug-in displays a page that allows you to specify a filter for finding workflows:

23.2.2 Finding workflows that match search criteria
If the target workflow server is running a large number of workflow processes, you may want to filter the list of workflows you see in iManager. To do this, you can specify search criteria.
To specify search criteria for filtering the list of workflows:
-
Select the Show Workflows with radio button.
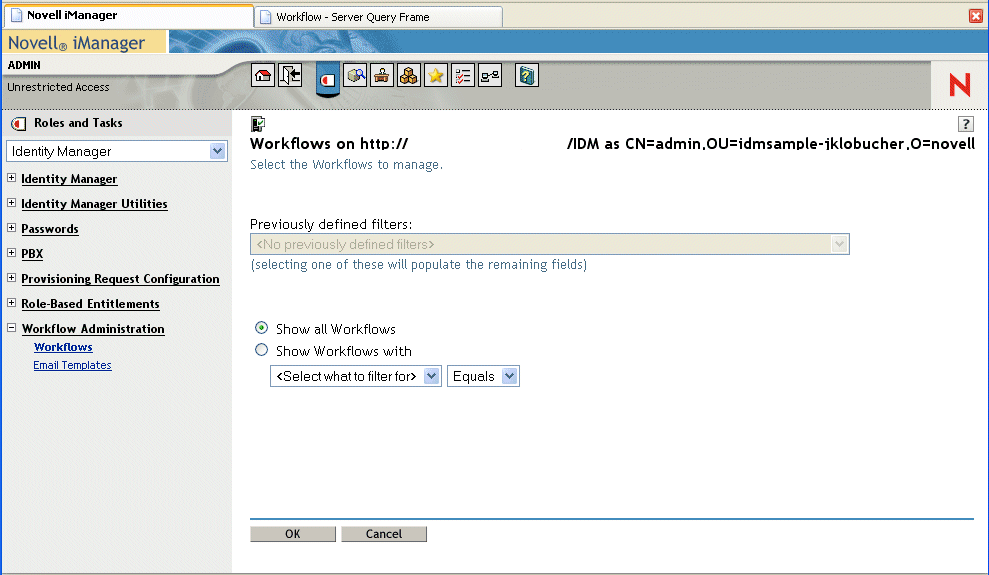
NOTE:By default, the Show all Workflows radio button is selected. Do not change the default if you want to see the complete list of workflows on the server.
-
Select the attribute for which you want to specify criteria.
-
Select an operator:
-
Specify a value in the field below the attribute and operator.
For Creation time, you can use the Date and time control to select the value. For Initiator and Recipient, you can use the Object History or the Object Selector to specify a value. For all other attributes, select the value from the dropdown list.
-
Click OK.
iManager displays the workflows you’ve selected on the Workflows panel.
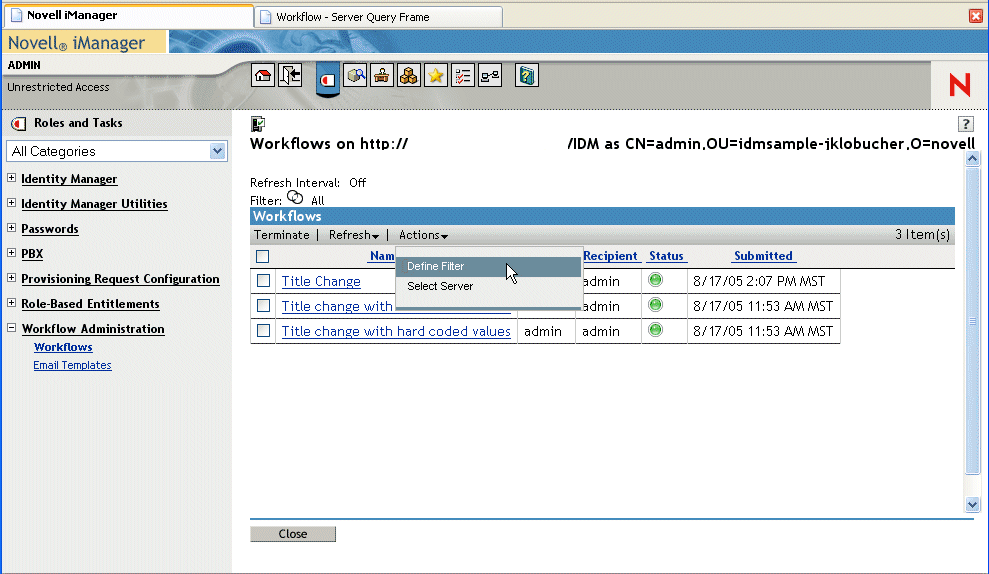
Changing the target server and filter Once you’ve selected a workflow server, this selection remains in effect for the duration of your iManager session, unless you select a new server. To select a new server, click the Actions command and choose Select Server from the Actions menu.
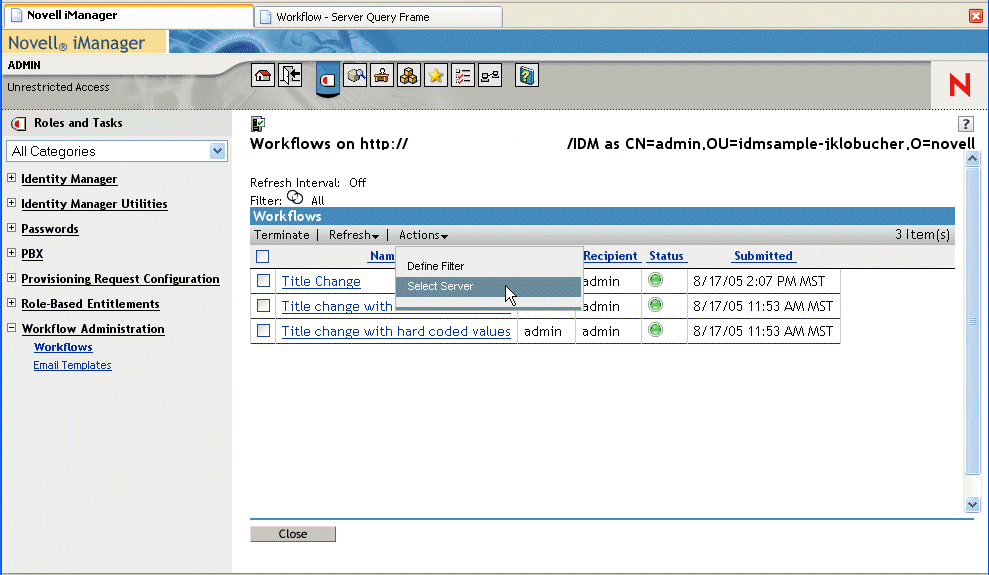
To specify different search criteria, choose Define Filter on the Actions menu.
23.2.3 Controlling the active workflows display
The Workflows panel lists the workflows that match the search criteria you specified. In addition to filtering the list, you can control the display. For example, you can specify how often to refresh the list and sort the list on a particular column.
Refreshing the list of workflows
When the workflow server is very busy, the list of active workflows can change very frequently. In this case, you will want to refresh the list of active workflows running on the server.
To refresh the list of workflows:
-
Click the Refresh command in the Workflows panel.
-
Specify the refresh interval you want to use by selecting one of these options from the Refresh menu:
-
Refresh Off
-
Refresh Now
-
10 seconds
-
30 seconds
-
60 seconds
-
5 minutes
-
Sorting the list of workflows
If you have a large number of request definitions, you may want to sort the list by a particular column, such as the Name or Description.
To sort the list of workflows:
-
Click on the heading for the sort column.
23.2.4 Terminating a workflow instance
In the event that you do not want a workflow instance to continue its processing, you can terminate the workflow.
To terminate a workflow process instance:
-
Select the workflow in the Workflows panel by clicking the check box next to the workflow name.
-
Click the Terminate command in the Workflows panel.
23.2.5 Viewing details about a workflow instance
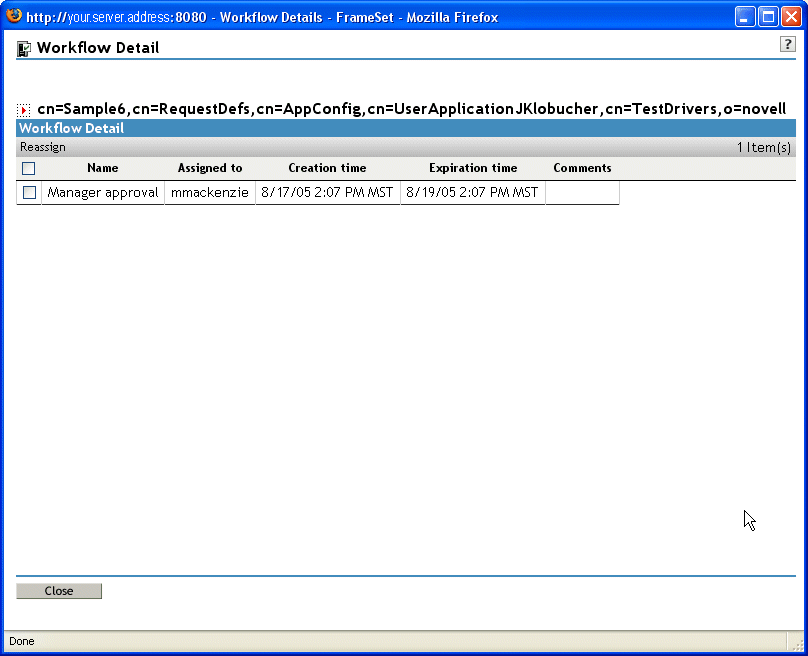
Once you’ve displayed a set of running workflows on a particular server, you can select a workflow instance to see more details about the running process.
NOTE:If a workflow instance uses a serial processing design pattern, the display will show a single activity as current, since only one user can act on the workitem at any point in time. However, if the workflow handles parallel processing and branching, there may be multiple current activities for a workflow instance.
To view details about a particular workflow instance:
-
Click the name of the workflow instance in the Workflows panel.
iManager displays the Workflow Detail panel.
23.2.6 Reassigning a workflow instance
In the event that a workflow instance is stuck, you can reassign the workitem to another user or group.
To reassign a workflow instance:
-
Select the current activity associated with the workflow by clicking the check box next to the name in the Workflow Detail panel.
-
Click the Reassign command in the Workflow Detail panel.
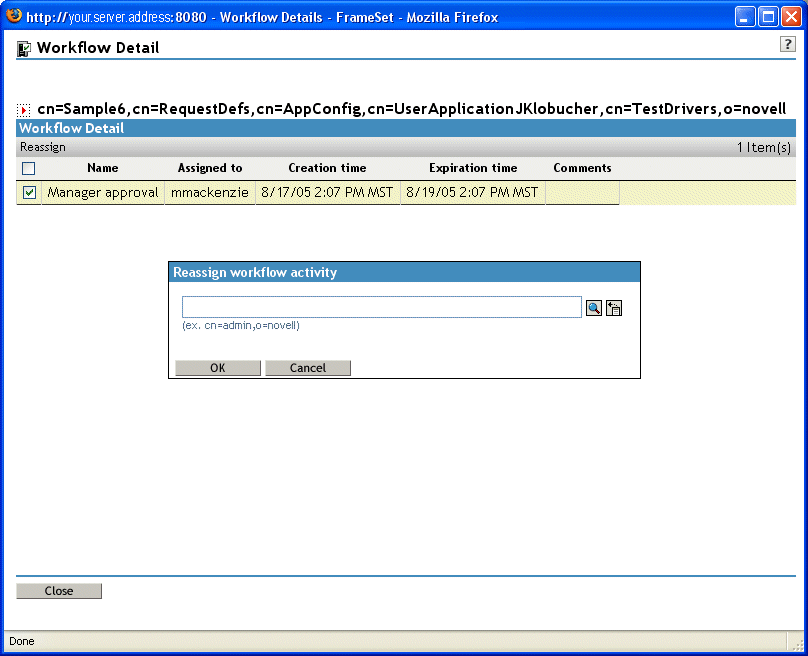
-
Select the user or group to which you want to reassign the workitem.