4.5 Installing the Connected System Option on Windows
Section 4.4, Installing Identity Manager on Windows covered the installation of the Metadirectory Server, Web Components, and Utilities for Windows. Because Windows servers can use the Connected System option, installing the Connected System option is covered here.
Use the Connected System option when you don’t want to put the overhead of eDirectory services and the Metadirectory engine on an application server. The Remote Loader gives you desired synchronization through Identity Manager without the need to load applications that can be accessed elsewhere.
Before you begin, make sure your system meets the requirements listed in Section 4.2, Identity Manager Components and System Requirements.
-
Download and extract the Identity Manager installation file.
You can download the Identity Manager installation file from Novell's Download site
-
Run install.exe from the NT directory.
-
Read the Welcome information, then click Next.
-
Read the License Agreement, then click I Accept.
-
Review the Overview pages about the various systems and components, then click Next to begin the installation.
-
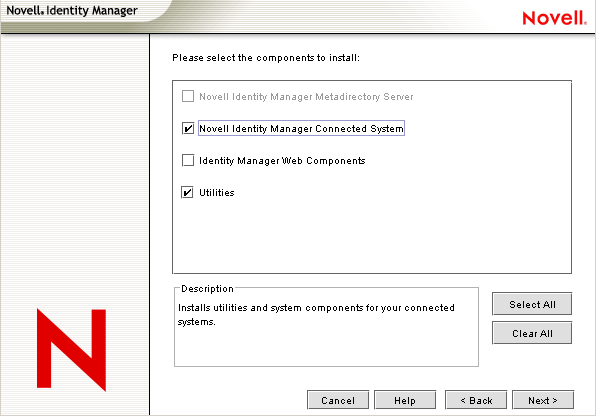
From the Identity Manager Install page, select the components Connected System and Utilities:
-
Connected System: Installs the Remote Loader that allows you to establish a link between a connected system and a server running the Metadirectory engine. This option can install the following drivers: Active Directory, Delimited Text, Exchange, GroupWise, JDBC, LDAP, Lotus Notes, NT Domain, PeopleSoft, Composer, Remedy, Avaya, Soap, SAP and SIF, or just the drivers you select.
-
Utilities: Installs additional scripts for the JDBC driver and other application utilities you select.
To select the Connected System option, first click Clear All, then select Connected System and Utilities. You should also select Web Components if you have the iManager utility installed on this server and you want Identity Manager plug-ins for Identity Manager and driver configurations added.
Figure 4-15 The Connected System Option
-
-
On the Install Location page, Click Next to accept the default directory path, which is C:\Novell\RemoteLoader.
Figure 4-16 Selecting the Install Location.
-
On the Select Drivers for Remote Loader Install page, select the Identity Manager drivers you want to load, then click Next. The selection includes Active Directory, Avaya, Delimited Text, eDirectory, Exchange, GroupWise, JDBC, LDAP, Lotus Notes, PeopleSoft, Remedy, SAP, SIF, and SOAP.
Figure 4-17 Remote Loader and Identity Manager Drivers
-
When you see the informational message reminding you about product activation, click OK.
You need to activate the drivers within 90 days of installation; otherwise, they will shut down.
-
You will also see the Password Synchronization Upgrade Warning! message. Click OK.
This message is for Windows servers running Password Synchronization 1.0. If you want backward compatibility to 1.0, you must add additional policies to the driver configuration files. Without the policies, Password Synchronization 1.0 works for existing accounts, but not for new or renamed accounts
-
On the Components To Install page, click Next.
The Novell Audit System Components is highlighted if you have the Novell Audit System installed on the server. Otherwise, it is not selected. The Application Components selection installs components for such application systems as JDBC and PeopleSoft. Select the utilities you want to install.
-
Click Next to accept the default install path for Identity Manager utilities (C:\Novell\NDS\DirXMLUtilities).
-
Select the system components you want to install, then click Next.
Figure 4-18 System Components
-
Review the items listed in the Summary page. If you approve, click Finish to install the components.
-
Click Yes to add a shortcut to the Windows server's desktop.
-
Click Close to exit the installation program.