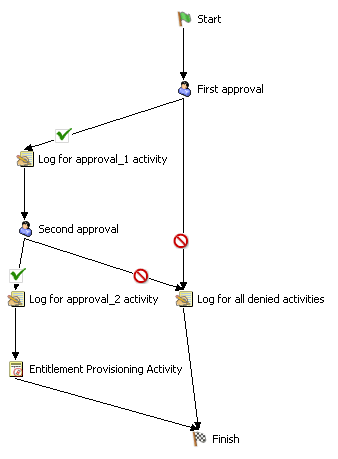
6.4 Configuring Flow Paths

After you have added a flow path to a workflow diagram, you can specify the path type. For details on adding flow paths to a workflow, see Section 6.3, Adding Flow Paths.

To configure a flow path:

  1. Click the flow path in the workflow diagram.

  2. Set the flow type on the Properties tab by selecting one of the options in the Type drop-down list.

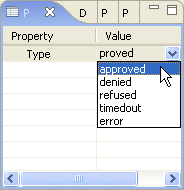
    The flow path types are described in the following table:

    Flow Type

    Description

    forward

    Forwards control to the next activity in a workflow.

    The forward flow path is available after all activities except:

    • Approval

    • Condition

    • Finish

    approved

    Determines what happens when a user approves a request.

    The approved flow path is valid only after the Approval activity.

    denied

    Determines what happens when a user denies a request.

    The denied flow path is valid only after the Approval activity.

    refused

    Determines what happens when a user refuses a request.

    The refused flow path is valid only after the Approval activity.

    timedout

    Determines what happens when an Approval activity times out because the user did not respond.

    The timedout flow path is valid only after the Approval activity.

    error

    Determines what happens when an Approval or Condition activity terminates with an error.

    The error flow path is valid only after the Approval and Condition activities.

    true

    Determines what happens when a conditional expression evaluates to True.

    The True flow path is valid only after the Condition activity.

    false

    Determines what happens when a conditional expression evaluates to False.

    The False flow path is valid only after the Condition activity.

    If the Properties tab is not displayed, right-click the flow path in the workflow diagram and select Show Properties.