12.3 Make Team Requests
The action enables you to request resources for team members.
-
Click in the group of actions.
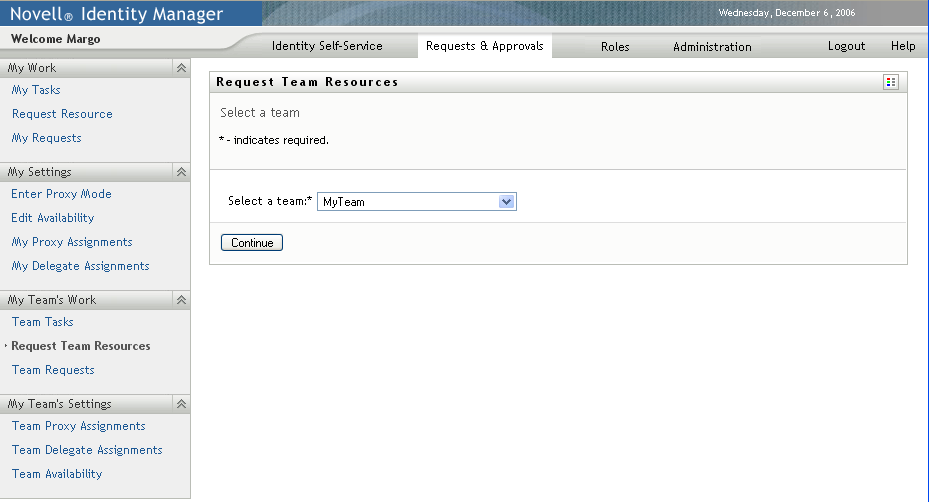
The Request Team Resources page is displayed.
-
Click to select a team for which you have been designated as a team manager. Then click .
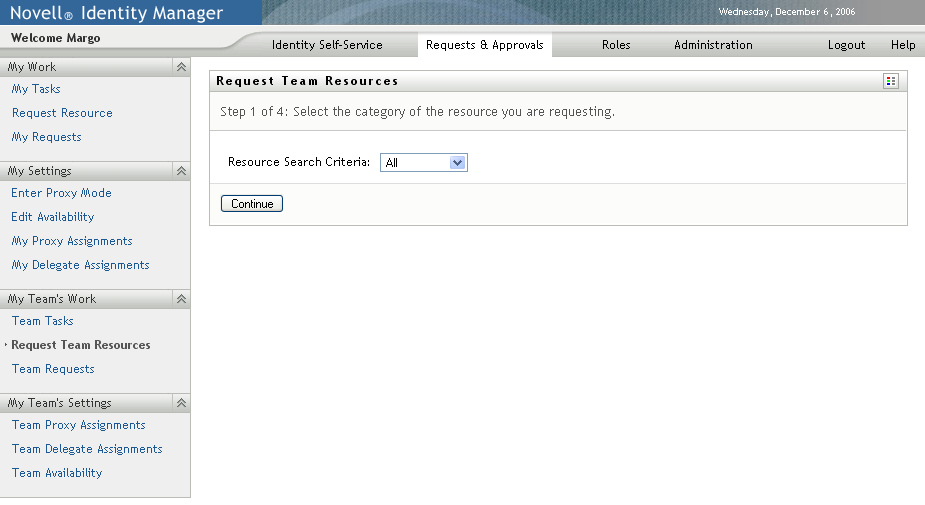
The application displays a page that lets you pick a category.
-
Select the category of the resource in the drop-down list. Select to include resources from all available categories.
The list of categories available depends on the team request rights. If the provisioning request scope for the team does not include resource categories, the category list is not displayed. In this case, skip to the next step to select a resource.
-
Click .
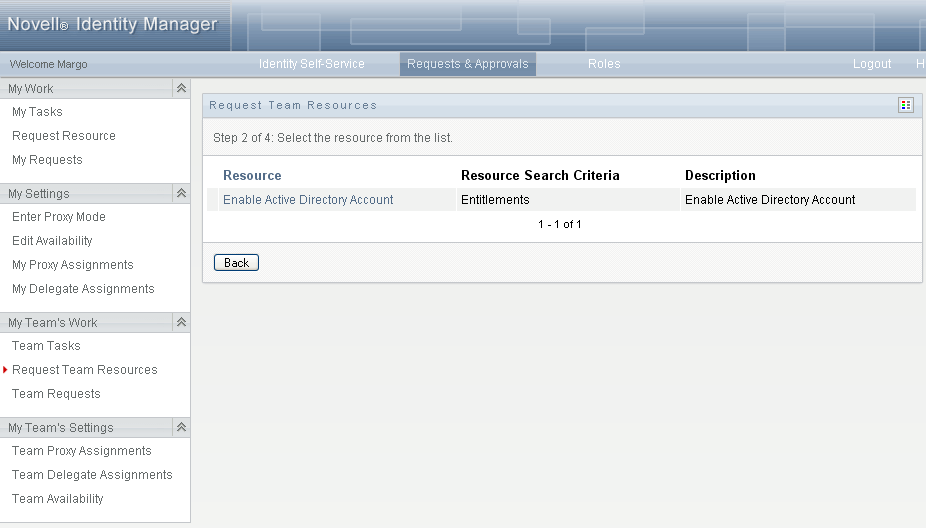
The Request Team Resources page displays a list of resources that you can request. The list includes only those resources for which team managers are permitted to initiate requests.
-
Click a resource name to select it.
-
Click a name to select it. The team member you select is the recipient for the request.
Depending on how the team was defined, you might see an icon
 beside the
selection box, instead of a list of team members. In this case, click the icon to open the Object Lookup window. Specify search criteria for the team member, click
and select the team member.
beside the
selection box, instead of a list of team members. In this case, click the icon to open the Object Lookup window. Specify search criteria for the team member, click
and select the team member.
If the flow strategy for the workflow has been defined to support multiple recipients, the application lets you pick a group, container, or team as the recipient. Depending on how the workflow is configured, the user application might spawn a separate workflow for each recipient (so that the request can be approved or denied independently for each recipient), or initiate a single flow that includes multiple provisioning steps, one for each recipient. In the latter case, the approval or denial of the request applies to all recipients.
-
Click .
-
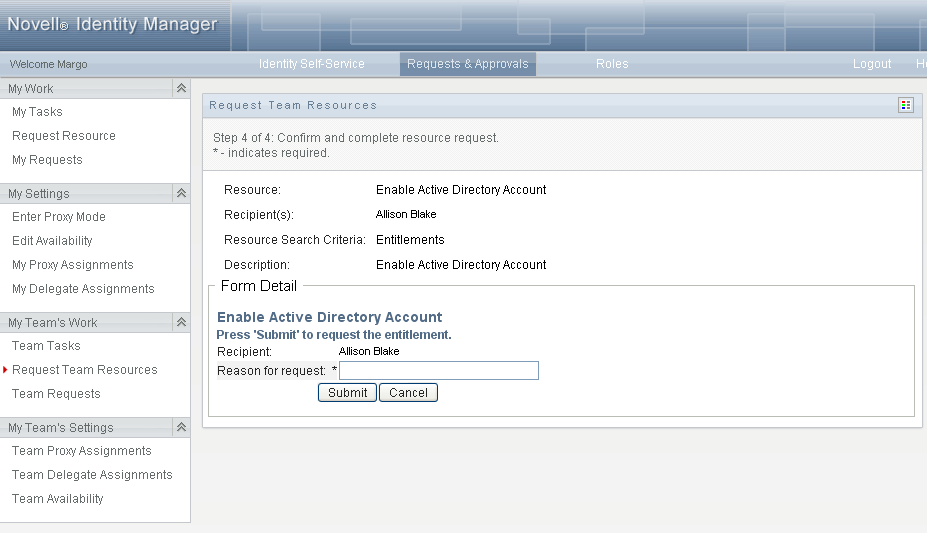
The Request Team Resources page displays the request form. Fill in the fields on the request form. In the following example, the only required field is .
The fields on the form vary according to the resource you requested.
If the resource you’ve requested requires a digital signature, the icon appears in the upper right corner of the page.
In addition, on Internet Explorer, a message appears indicating that you need to press the Spacebar or the Enter key to activate the digital signature applet:

-
If you’re making a request that requires a digital signature, perform these steps:
-
If you’re using a smart card, insert the smart card into the smart card reader.
-
On Internet Explorer, press the Spacebar or the Enter key to activate the applet.
At this point, your browser might display a security warning message.
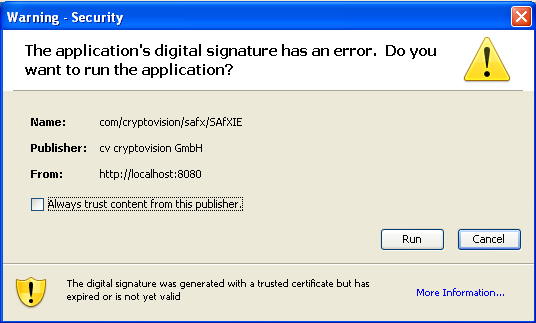
-
Click to proceed.
-
Fill in the fields in the initial request form. The fields on the form vary depending on which resource you requested.
-
Click the check box next to the digital signature confirmation message to indicate that you are ready to sign.
The digital signature confirmation message varies depending on how the provisioning resource was configured by the administrator.
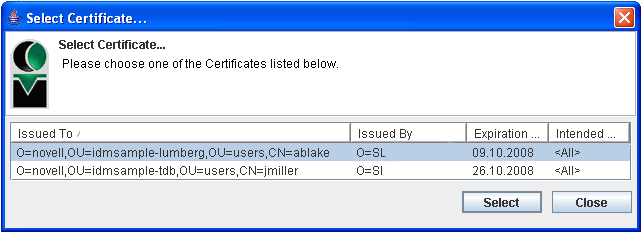
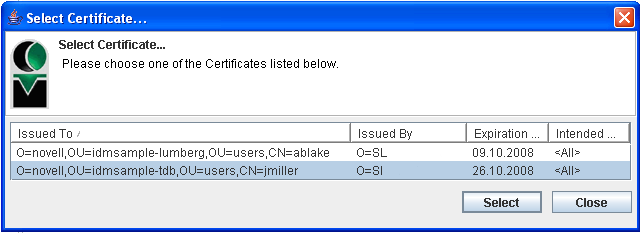
The applet then displays a pop-up window that allows you to select a certificate. The pop-up window lists certificates imported to the browser as well as certificates imported to the smart card (if one is currently connected).
-
Select the certificate you want to use and click .
-
If you select a certificate that has been imported into your browser, you need to type the password for the certificate in the field on the request form.
-
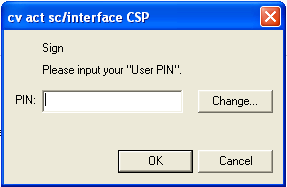
If you select a certificate that has been imported to your smart card, type the PIN for your smart card and click .
You do not need to type the password for the certificate if you’re using a smart card, because the certificate password has already been transmitted to the card.
If your administrator has enabled the ability to preview the user agreement, the button is enabled.

-
Click to see the user agreement.
If the digital signature type is set to Form, a PDF document is displayed. If the digital signature type is set to data, an XML document is displayed.
-
-
Click .
A workflow starts for the user.
The Request Team Resources page displays a status message indicating whether the request was submitted successfully.
If your request requires permission from one or more individuals in an organization, the request starts one or more workflows to obtain those approvals.