|
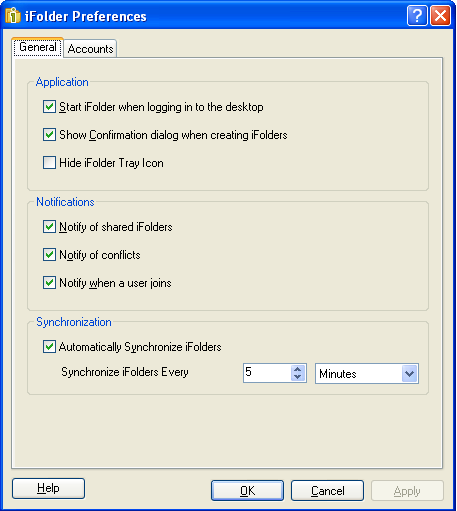
Start iFolder When Logging In to the Desktop (Available only in Windows Client) |
Select this option to launch iFolder whenever you log in with the local username where you set up the iFolder account. For those accounts where you have enabled , synchronization occurs in the background at the specified synchronization interval.
Deselect this option to start iFolder manually. |
|
Show Confirmation Dialog When Creating iFolders |
Select this option to receive a confirmation message each time you create an iFolder, in addition to the normal visual cues such as the iFolder appearing in the list of iFolders.
Deselect this option to stop receiving the confirmation message. |
|
Notify of Shared iFolders |
Select this option to enable a pop-up message in the notification area whenever you receive a new invitation to share an iFolder.
To view a list of iFolders that are available to download on your current computer, select in the iFolder browser whenever iFolder is running. |
|
Hide iFolder Tray Icon (Available only in Windows Client) |
Select this option to hide the iFolder tray icon in the notification area.
You can also hide the iFolder tray icon by using the right-click option in the notification area. Right-click the  icon in the notification area, then select . icon in the notification area, then select .
Deselect this option to display the iFolder tray icon when iFolder is running. |
|
Notify of Conflicts |
Select this option to enable a pop-up message in the notification area whenever a conflict occurs when synchronizing files.
Deselect this option to disable the pop-up messages for synchronization conflicts.
Whenever conflicts occur, the  icon is displayed on the iFolder when iFolder is running. icon is displayed on the iFolder when iFolder is running.
|
|
Notify When a User Joins |
Select this option to enable a pop-up message in the notification area whenever a user accepts an invitation to share an iFolder. Acceptance is keyed to when the user actually sets up the iFolder on his or her own computer.
Deselect this option to disable the pop-up messages for user share confirmation.
You can view a complete list of iFolder users whenever iFolder is running by selecting the iFolder, then clicking to open the iFolder Properties dialog box to the tab. |
|
Synchronization |
NOTE:Change in the sync interval does not take effect in the current synchronization cycle. The new sync interval is only effective in the next synchronization cycle.
For example, if the current sync interval is 10 minutes and you change that to 5 minutes, the change takes effect only after 10 minutes.
If you use the iFolder client with Novell iFolder 3.7, the effective minimum synchronization interval is always the largest value of the following settings:
-
The system policy default of zero (0), unless there is a user policy set. If a user policy is set, the user policy overrides the system policy, whether the user policy is larger or smaller in value.
-
The local machine policy, or the setting on the client machine synchronizing with the server.
-
The iFolder (collection) policy.
|