Micro Focus iPrint Appliance
2.0 iPrint Overview
iPrint provides secure enterprise print services for your desktops, laptops, and mobile devices. iPrint integrates with any of your existing corporate printers, irrespective of the printing vendor or brand allowing you to deliver self-service printer provisioning to your device users. Some of the salient features of iPrint include:
WalkUp Printing: WalkUp printer is a virtual printer that includes group of physical printers. The print jobs sent to the WalkUp printer are put on hold by the iPrint Appliance server and can be released to a desirable printer.
Simplified enterprise printing: iPrint connects all your organization's workstations and mobile devices to your current printers.
Self-service printing: You can print from your desktops, laptops, or mobile devices without waiting for the helpdesk to set-up a printer.
Mobile device printing: If you are using iOS, Android, and Windows mobile devices, you can download the iPrint app, which allows you to print from your mobile devices directly to any of your organization's printers.
Printing by scanning the QR Code: Scan a QR code to quickly connect your mobile device to a specific printer.
Printing through email: Any email-enabled device can print to any iPrint printer by sending the print job in the body of the email or as an attachment.
Leveraging your current directory service: iPrint makes secure printing easy by integrating its data store with your identity directory. It works with lightweight directory access protocol (LDAP) directories such as Active Directory and NetIQ eDirectory.
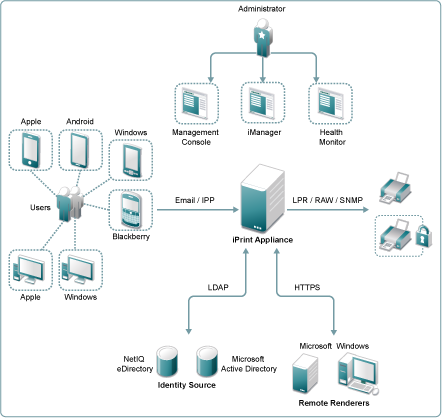
The iPrint Components are illustrated in the figure below:
3.0 Deploying the iPrint Appliance
-
Download and extract the iPrint Appliance software.
You can download the software from the Novell Customer Center (NCC) (https://www.novell.com/center). Or, you can download an evaluation version of the software from the Novell Downloads page (http://download.novell.com).
-
In your vSphere Client, click > .
-
Follow the on-screen instructions.
-
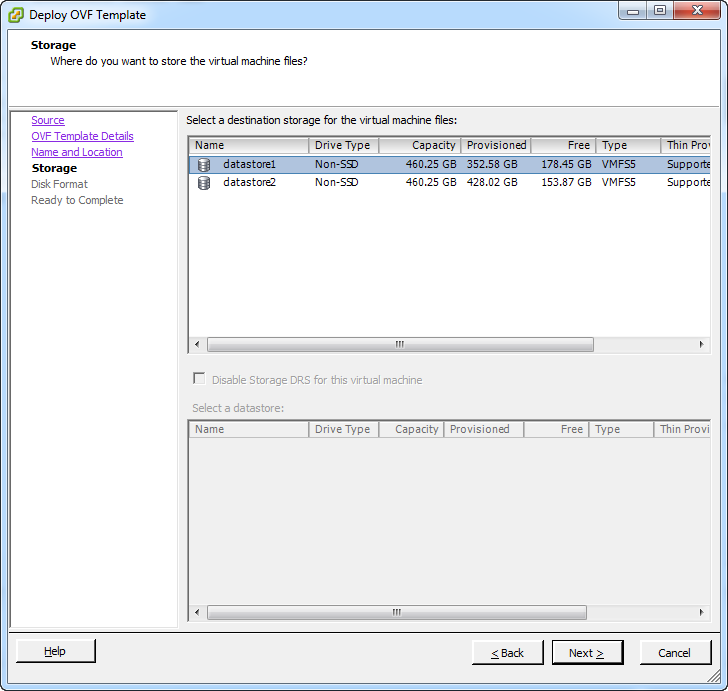
On the page, select a storage repository where the disk images for the imported VMs will be placed, and click .
-
Review the datastore details, and select an appropriate disk format from the available options. Retain all other default settings.
-
Click to successfully deploy the iPrint Appliance.
-
Add a secondary disk for the iPrint Appliance on which the appliance configuration details are stored.
-
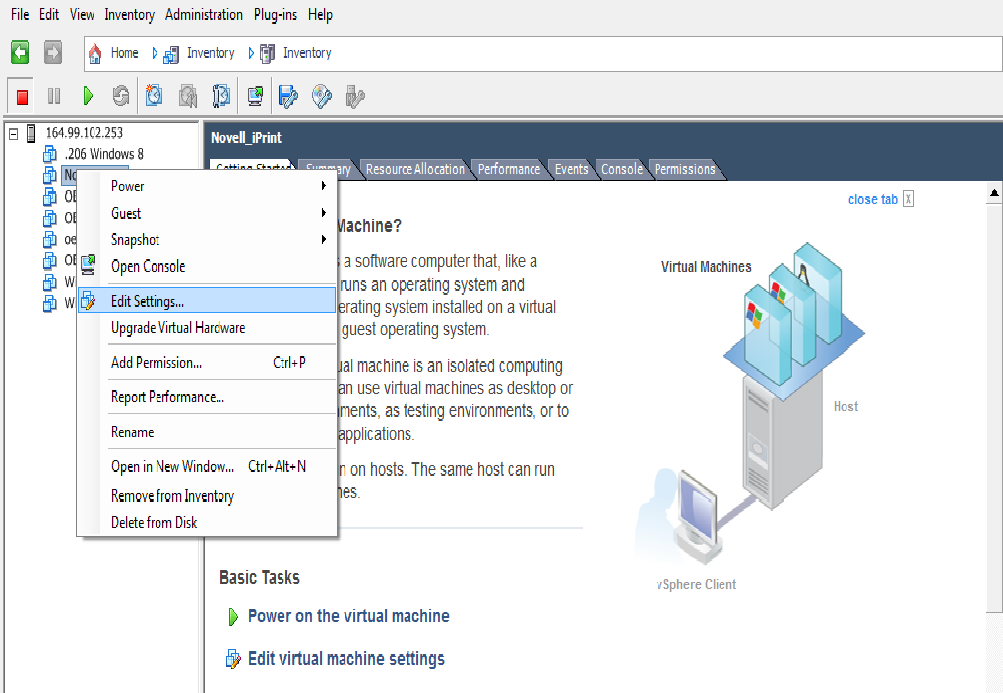
In the vSphere client, right-click the newly created virtual machine, then select .
-
On the tab, select , then click .
-
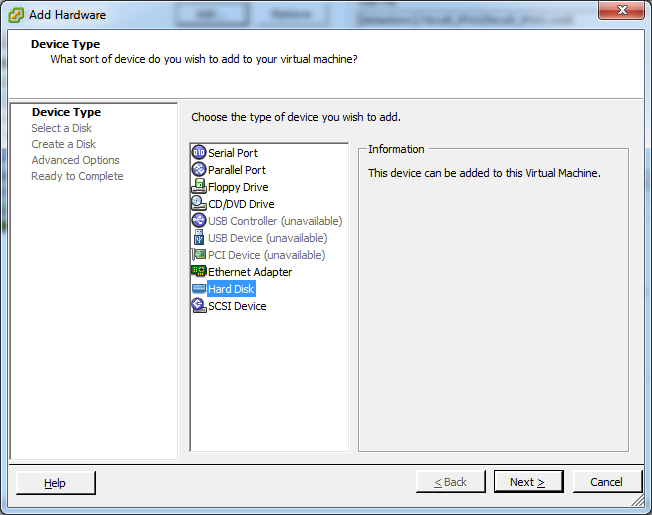
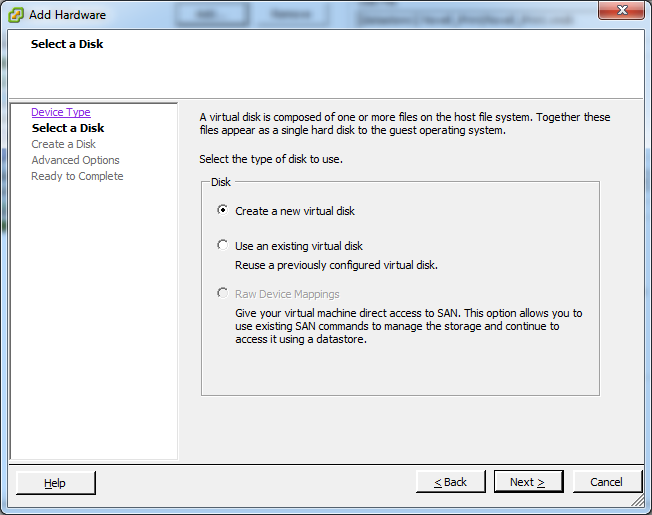
On the page, select from the type of devices displayed, then click .
-
From the page, select , then click .
-
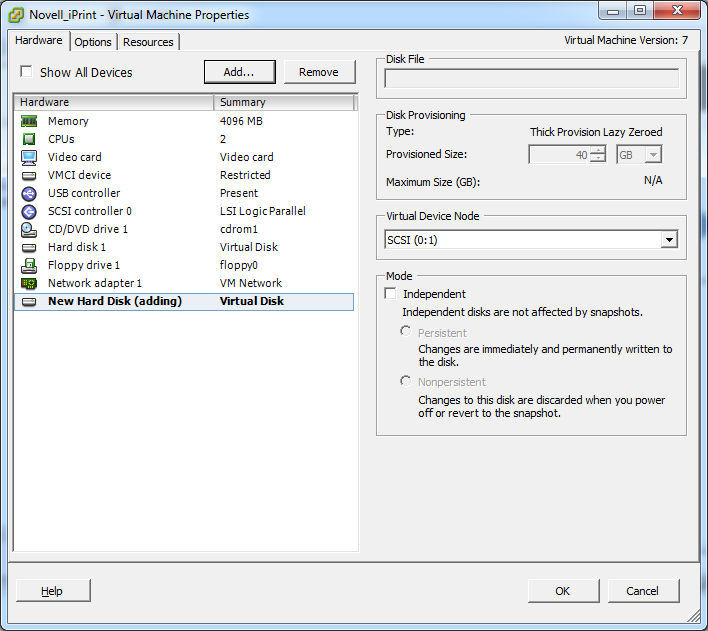
On the page, specify the amount of hard disk space that you want to allocate, then click . Retain the other default settings.
The recommended size is 40 GB.
-
In the page, under , select , then click .
-
Click to review the details.
-
Click .
-
Click to successfully add the hard disk.
-
-
Power on the appliance (virtual machine).
-
Right-click the newly created virtual machine, then select > .
The powering on process takes some time as the iPrint gets deployed only after powering on the virtual machine. You can navigate to the tab in your virtual machine to monitor the deployment process.
-
-
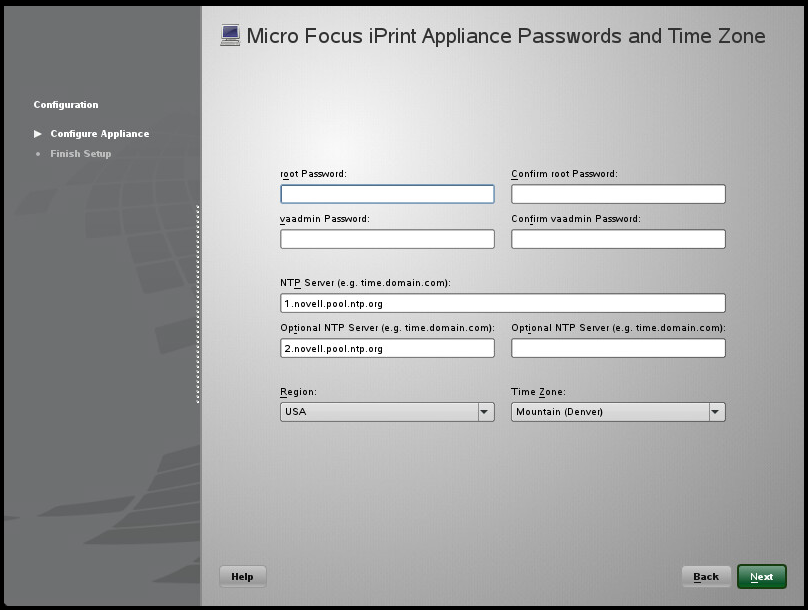
When the VM is powered on, accept the license agreement.

-
Click to accept the license agreement. The Configure Appliance page is displayed.
-
Specify all the required details such as , , details, and its corresponding .
-
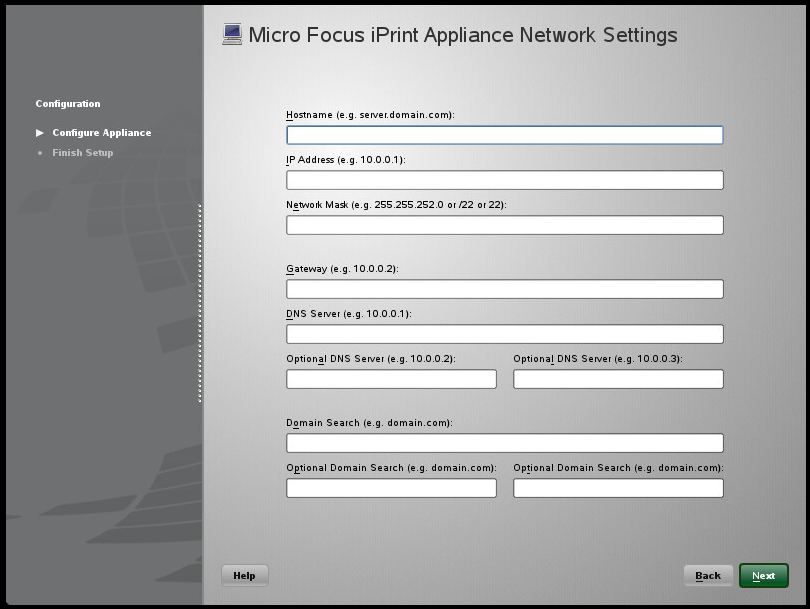
Click . The iPrint Appliance Network Settings page is displayed.
-
Specify all the required details such as , , , details, and details.
HINT:Hostname is a fully qualified DNS host name associated with the appliance’s IP address. To get the hostname, go to the command prompt and type nslookup <ipaddress>. For example, nslookup 192.168.1.255.
-
Click . The configuration process may take some time as the iPrint Appliance configures all the details that you have specified.
-
Select a hard drive from the drop-down list. If you have created a secondary hard drive for this appliance, it is automatically detected and the sdb is displayed as the hard drive. If you have not created a secondary hard drive, sda is chosen as the default partition.
If you have created a separate virtual hard disk for the iPrint Appliance, the field is enabled. Retain the default values for this field.
-
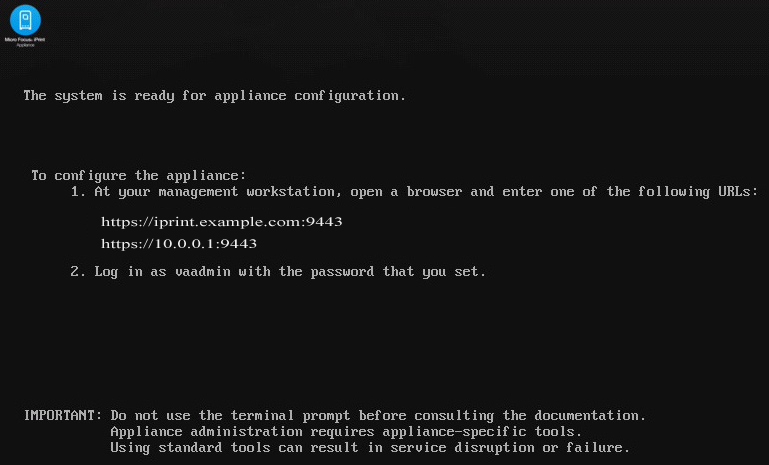
Click . The iPrint Appliance installation process begins.
Upon successful installation, a message stating, “The system is ready for appliance configuration” is displayed. After the installation is complete, a URL and an IP address to access the iPrint Appliance Management Console is displayed. Using a Web browser, you can navigate to the iPrint Appliance Management Console URL.
4.0 Configuring the iPrint Appliance
You can configure the iPrint Appliance through the iPrint Appliance Management Console. The iPrint Appliance Management Console is a browser-based web console that allows you to add driver stores, printer drivers, and so forth.
4.1 Initial Configuration Using the Management Console
-
On a Web browser, use either the host name or the IP address to access the iPrint Appliance Management Console. For example, https://10.0.0.1:9443.
Ignore the security certificate warning, and continue to the iPrint Appliance ManagementConsole.
-
Specify vaadmin or root as the user name.
-
Specify the password, then click .
Specify the password that you have provided in Step 11.
The Management Console page is displayed.
-
Click.
-
Click .

-
DNS for Print Service: The host name is tied to a Print service, rather than the server. The host name must resolve to the IP address of the Appliance. If you modify the value, ensure to validate that the DNS address is correct and functional before continuing because a wrong DNS address can result in errors.
Continue with the default value.
-
Authentication Realm: Specify the tree name only if you want to authenticate to an existing OES server.
-
iManager Credentials: The credentials in this section are used to log in to the iManager interface. iManager is a management tool that allows you to manage the print environment.
Administrator Username: The administrator account user name is pre-populated in the following format: cn=admin,o=iPrintAppliance. This field is not editable.
Administrator Password: Specify the password for the iManager administrator account. This password will be used to log in to the iManager for managing the print environment.
Re-type Password: Specify the password again to confirm.
-
-
Click . The configuration process may take some time.
After configuring iPrint Appliance, you must create or import users, create or import printers, and upload drivers. You can also configure printers to accept print jobs from mobile devices, AirPrint, or email.
4.2 Configuring Printers and Drivers Using iManager
-
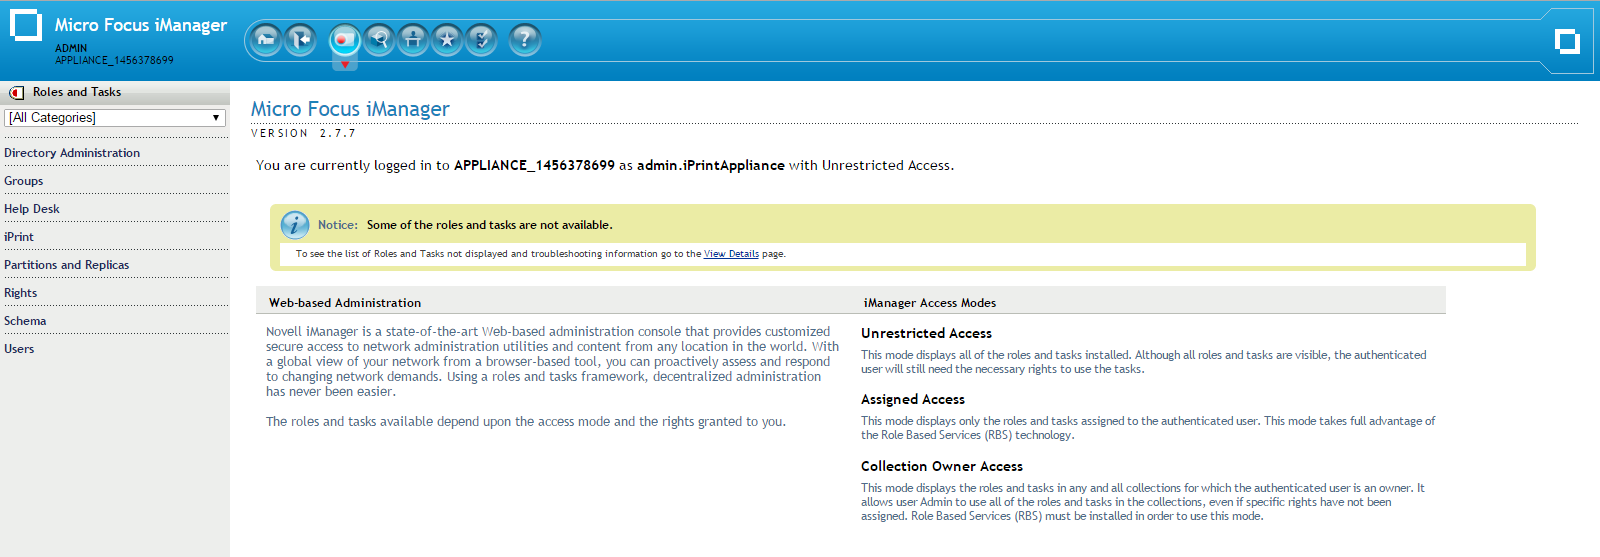
In the iPrint Management Console, click .
iManager is a web-based tool that allows you to set up and manage your print environment.
Accept the security certificate if prompted, and login by providing your eDirectory credentials. The Micro Focus iManager page is displayed.
-
Click > .
NOTE:You can only upload a driver through Microsoft Internet Explorer. Ensure that you are running Microsoft Internet Explorer as an Administrator by right-clicking on Microsoft Internet Explorer and selecting .

-
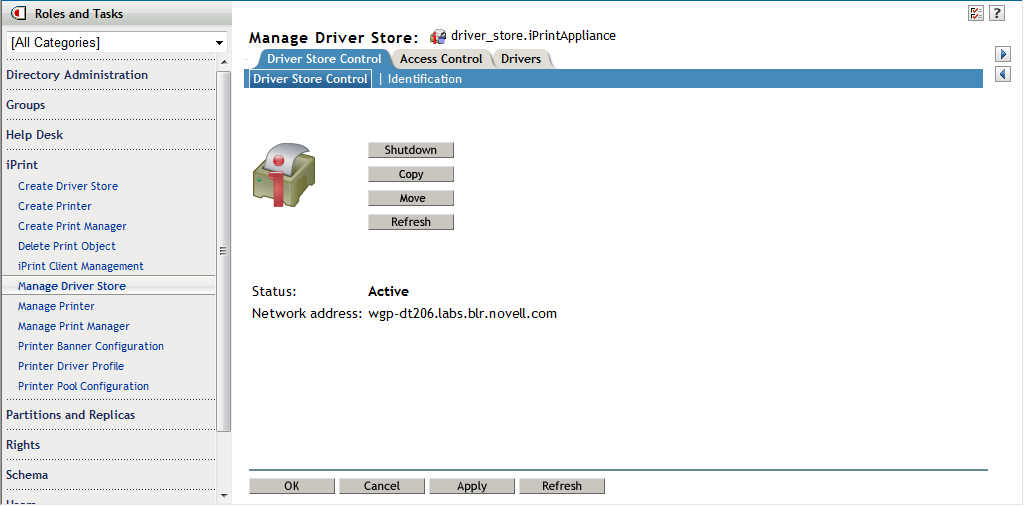
On the tab, click the icon and select the iPrint Driver Store from the displayed list.
-
Click . The Manage Driver Store page is displayed.
-
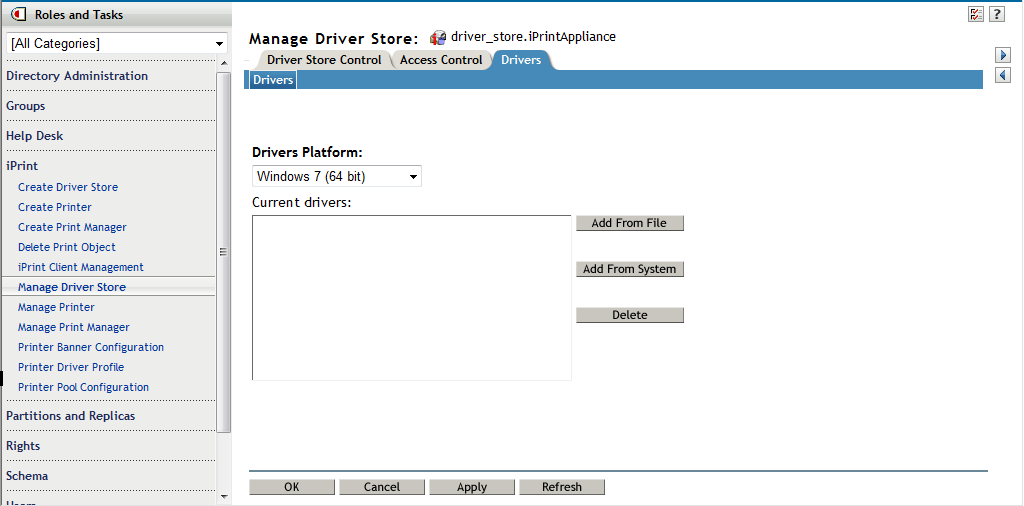
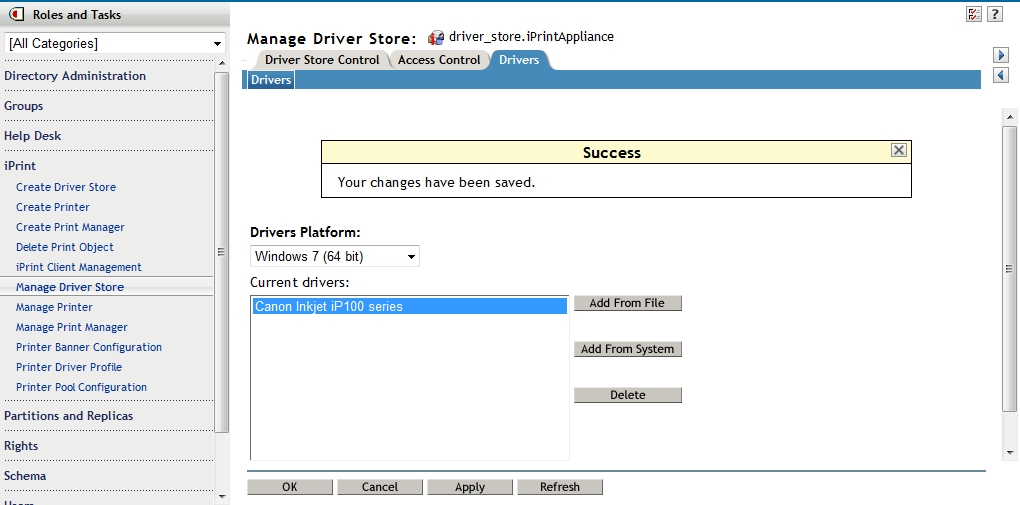
Navigate to the tab, and depending on the Operating System you are using, select the Operating System from the drop-down list.
-
Click . The dialog box is displayed.
-
From the dialog box, select the printer manufacturer and the corresponding printer.
-
-
Click . The selected operating system driver platform and the corresponding printer driver is displayed on your Micro Focus iManager page.
-
Click and .
-
Click .
-
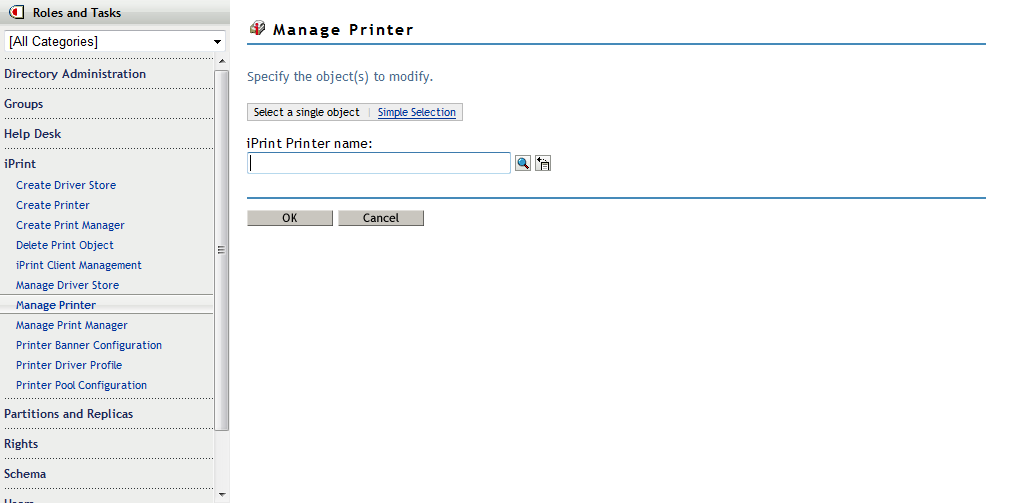
Click the icon and select the printer from the displayed list.
-
Click .
-
Navigate to the tab and select the Operating System that is applicable to you from the displayed list.
Depending on the operating system selected by you, the corresponding driver selected and displayed under the Available Drivers menu.
-
Select the driver from the menu and click and .
-
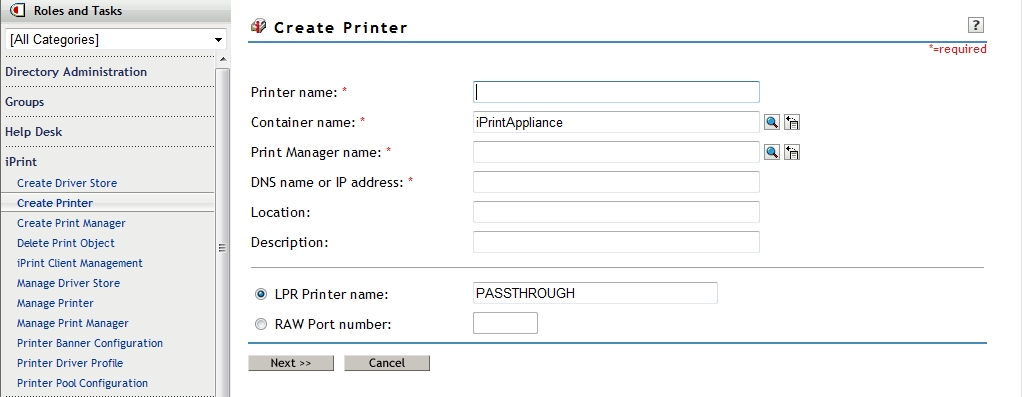
Click > . The Create Printer page is displayed.
-
Specify all the required details such as and . You must also select the print manager by clicking on the icon.
-
Select LPR Printer name and specify PASSTHROUGH in the text field adjacent to the LPR Printer name.
If the RAW protocol is selected, a port number is required. Most printers are configured, by default, to use port 9100 for RAW protocol communications.
-
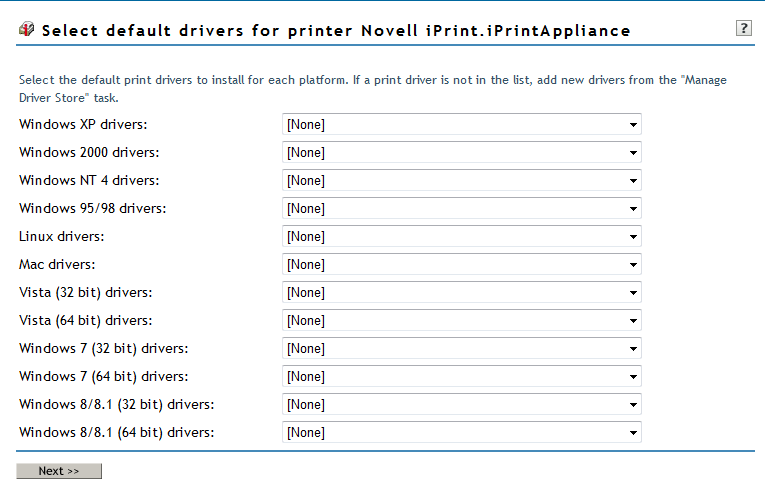
Click to select the default print drivers to install for each platform. If a print driver is not in the list, click to proceed to the next step.
-
Click .
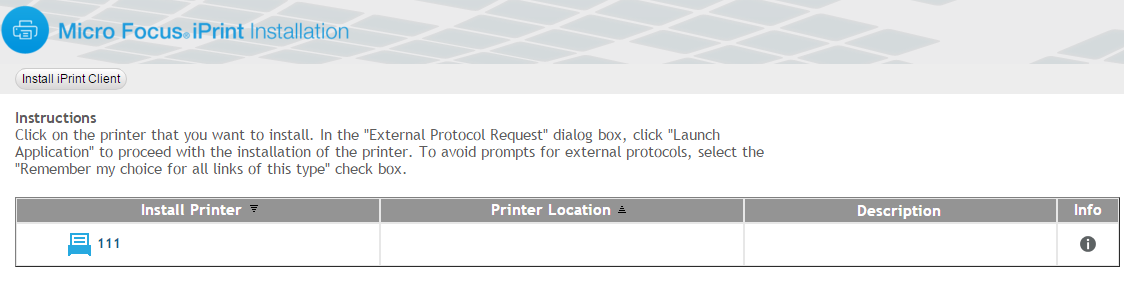
5.0 Installing the iPrint Client
You must install iPrint Client on your workstation to install printers.
-
On a Web browser, use either the host name or the IP address to access the IPP Page. For example, https://192.168.1.255/ipp.
-
Click to download the print client.
-
Run the nipp*.exe to install the print client.