Creating Server Certificates
-
Log in to iManager. On a Windows XP or 2000 machine connected to a NetWare® server, go to (https://ipaddress/nps/iManager.html), where ip address is the IP address of a NetWare 6 or NetWare 6.5 server running Novell BorderManager 3.8.
NOTE: You can run iManager from a NetWare server to configure other Novell BorderManager 3.8 servers.
-
Type the username and password. Click Login. The username and password are the Novell eDirectory login details. Specify the non-fully-distinguished name.
-
In the left pane, select Novell Certificate Server, then select Create Server Certificate.
Figure 31
Create Server Certification Wizard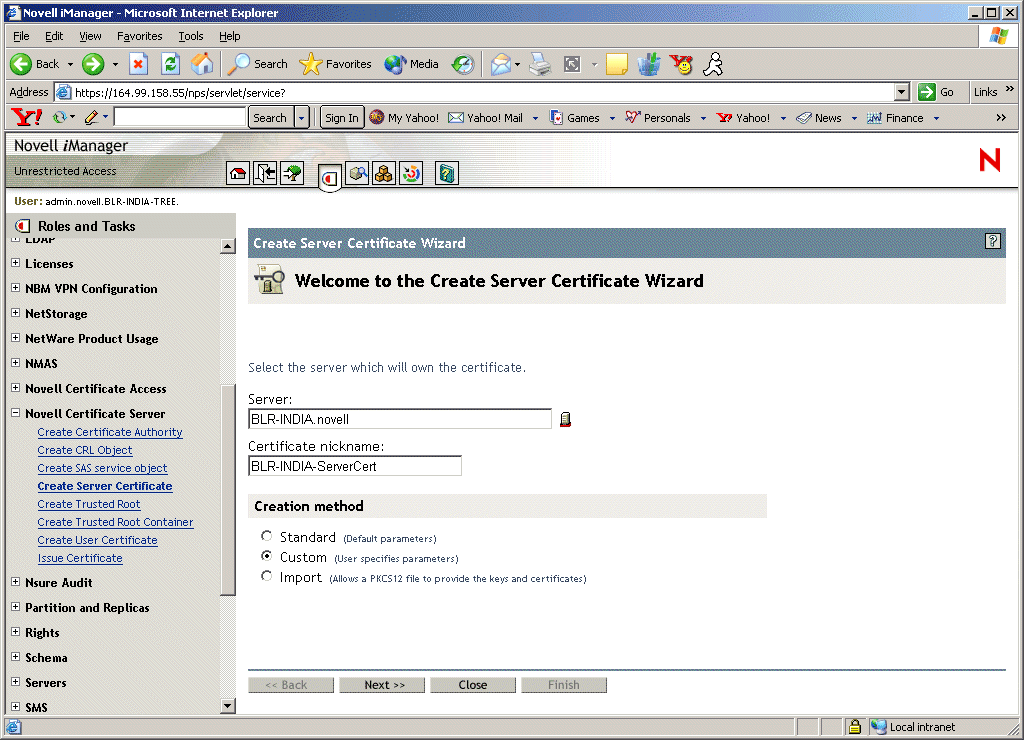
-
Specify the server name and the nickname for the certificate, or use the Browse button to select the server object that will be one of the underlined objects in iManager. The wizard will indicate which objects it is looking for. Select the Custom check box and specify the details of the certificate, then click Next.
NOTE: While creating server certificates, the custom check box must be selected, and the key usage should be set to data encipherment and digital signature. For user certificates, creating a standard certificate will suffice. We recommend that you use the Custom option. If you use the Standard option, client-to-site services will work but there might be some problems with site-to-site services.
Figure 32
Certificate Authority
-
Select Organizational Certificate Authority, then click Next.
Figure 33
Key Size and Usage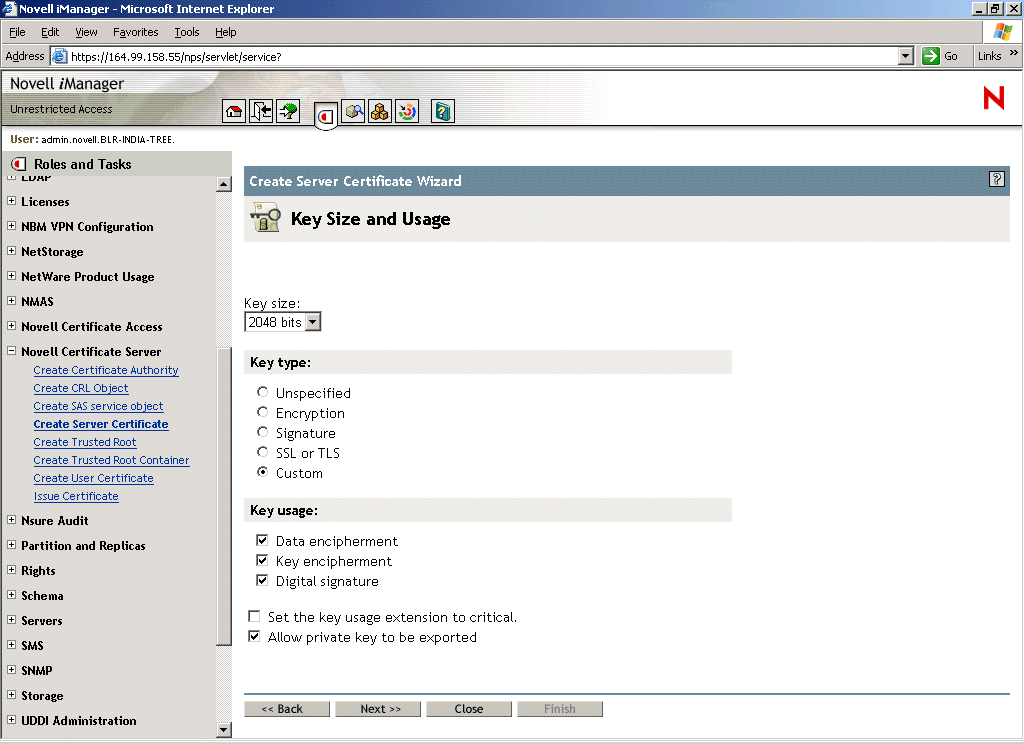
-
Specify the Key Type and Key Usage, then click Next.
Figure 34
Certificate Parameters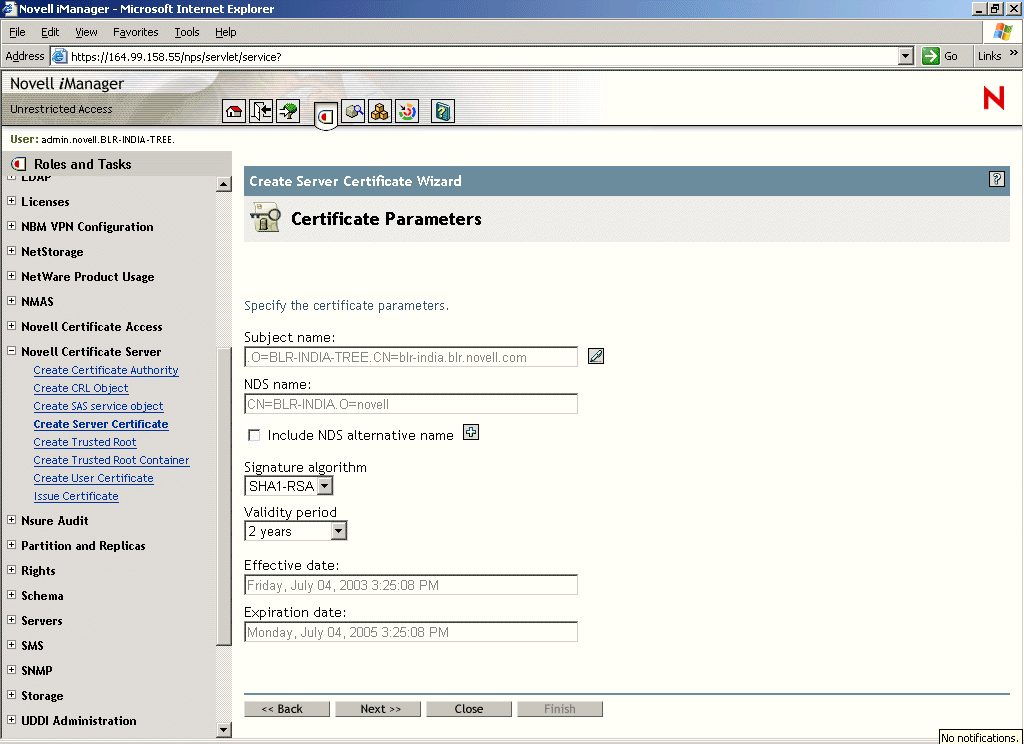
-
Specify the parameters of the certificate, specify the dates, then click Next.
Entering the exact time for validity has the advantage that if there is a timing issue with the server the entry won't be invalid.
Figure 35
Trusted Root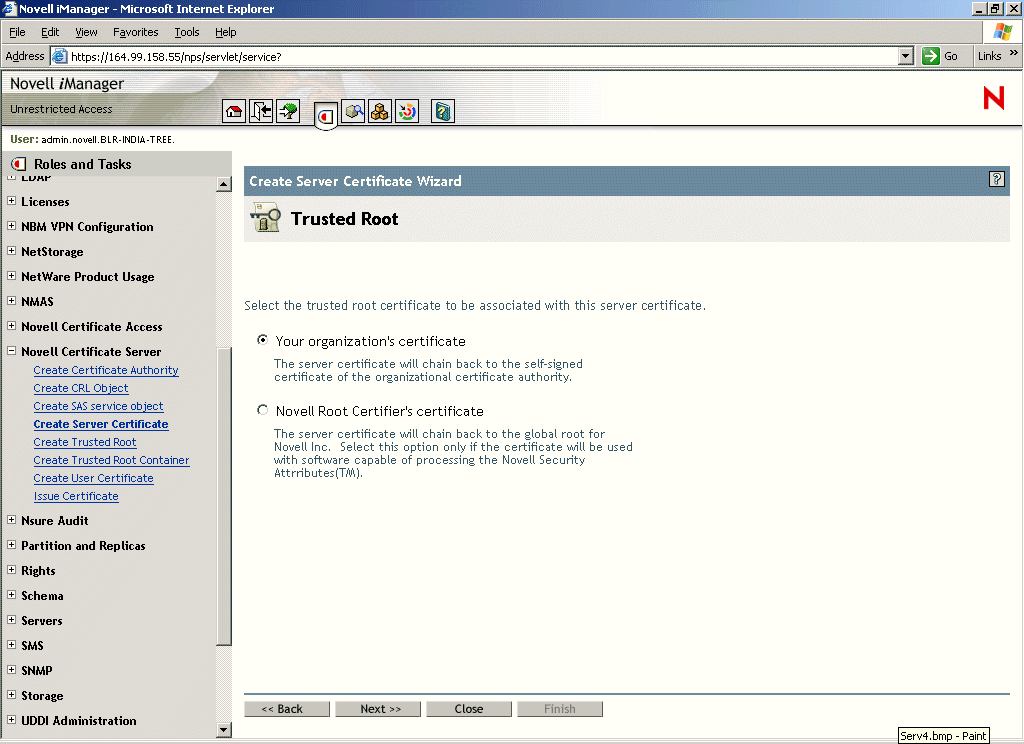
-
Select the relevant text box to specify the trusted root for the certificate, then click Next.
-
The summary page shows the complete details of the certificate chosen. If the information is correct, click Next. If it is not correct, then go back and make changes.
The certificate is created and you see a Success message.