6.3 KMail
KMail is a KDE mail application. In addition to sending and receiving e-mail and using multiple mail protocols, it offers the ability to configure several user-defined filters for sorting e-mail messages in individual folders. Encryption, decryption, and signing of e-mail messages can also be handled conveniently in KMail.
To launch KMail, click .
6.3.1 KMail and Kontact
KMail can be displayed along with other applications in one window. This is done with the Kontact utility. See Kontact for more information.
6.3.2 Access Types
KMail lets you access your electronic mail in various ways. The access type you use largely depends on your Internet Service Provider (ISP) or mail server. The main access types are POP3 and IMAP.
POP3 (Post Office Protocol Version 3) is a standardized procedure for receiving e-mail. A POP3 server stores the messages until the user retrieves them with a POP3 client (in this case, KMail). This method is used frequently by Internet Service Providers.
With IMAP (Internet Message Access Protocol), e-mail messages can be received and administered on the server without downloading them to the hard disk. This is often used in internal networks because it allows access to mail from different computers.
6.3.3 Configuring KMail
When KMail is started for the first time, a Mail folder is added to your home directory. This folder contains some basic mail directories (inbox, outbox, drafts, sent, and trash). Click to enter the information needed for sending and receiving messages. All configuration options can be accessed by clicking .
Defining Your User Identity
You can manage several e-mail addresses (for example, your private e-mail address and your business address) with KMail. Select from the defined identities when writing e-mail.
To create a new identity profile:
-
In KMail, click .
-
Type a name for the profile (such as Private or Office), click , then specify additional identity information.
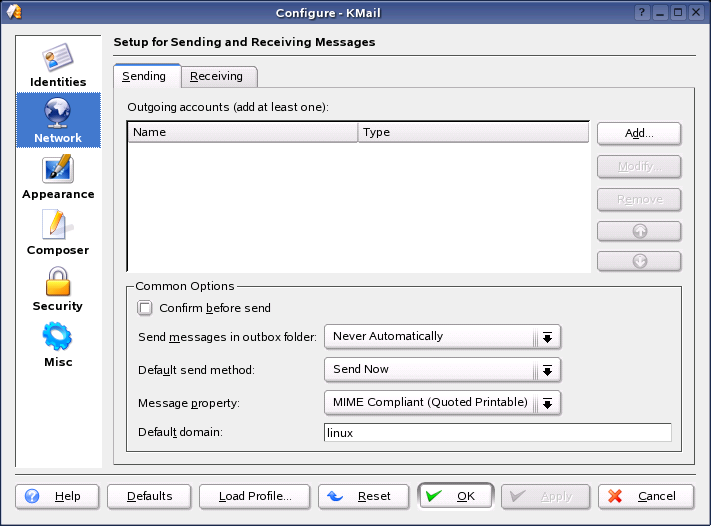
Setting Up Network Connections
The settings in tell KMail how to send and receive e-mail. There are two tabs, one for sending and one for receiving mail. Many of these settings vary depending on the system and network in which your mail server is located. If you are not sure about the settings or items to select, consult your system administrator.
Figure 101 Configuring Network Options in KMail
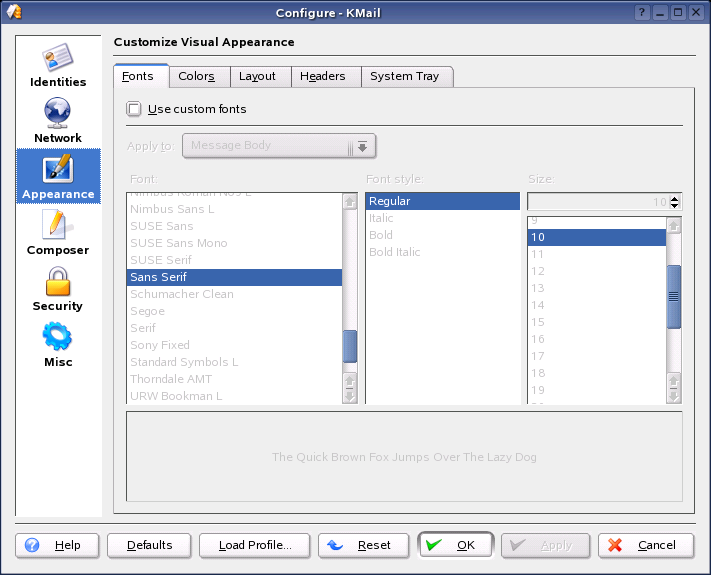
Configuring the Appearance of KMail
The settings in let you customize KMail according to your preferences. Click the tab to configure the fonts for the various displays, such as the message text and first-level quoted text.
Figure 102 Configuring the Appearance of KMail
6.3.4 Using KMail
When KMail starts, the main window opens. By default, the main window consists of three sections: the folder area, the header area, and the message area.
Figure 103 Main Window of KMail after Startup
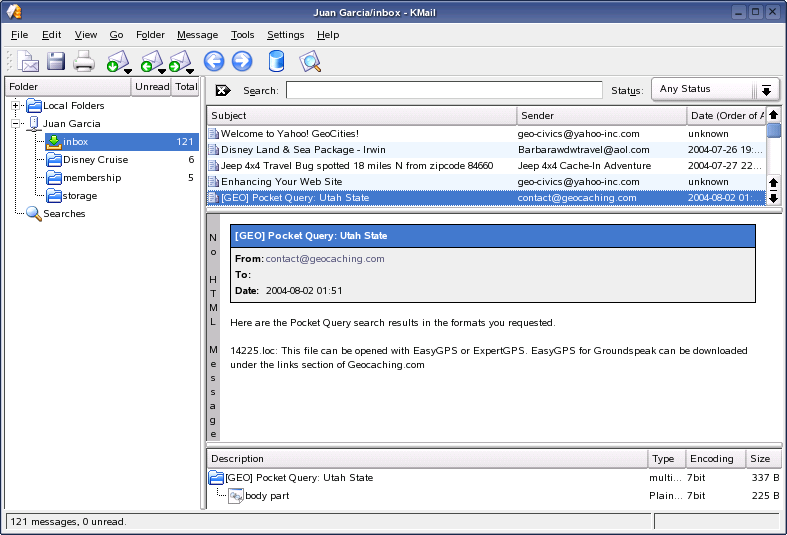
The folder area to the left contains a list of your mail folders (mailboxes) indicating the total number of messages and how many are still unread. To select a folder, simply click it. The messages it contains appear in the top right frame. The number of messages is also displayed in the status bar at the bottom of the application window.
The subject, sender, and time of receipt of received messages are listed in the header area to the right. Click a message to select it and display it in the message window. Sort the messages by clicking one of the columns (Subject, Sender, Date, etc.).
The contents of the currently selected message are displayed in the message frame in the lower part of the window. Attachments are depicted as icons at the end of the message, based on the MIME type of the attachment. Use PageUp and PageDown to scroll through the pages of the message.
Messages can be marked with different status flags:
New:(red dot, header in red) The message is new and has not yet been read.
Unread:(green dot, header in blue) A message changes its status from New to Unread after the folder containing it is reopened.
Read:(dash) The message has been read.
Replied:(blue, U-shaped arrow) The message has been answered.
Forwarded:(blue, straight arrow) The message has been forwarded to another e-mail address.
Waiting:(envelope) The message has been placed in the outbox to send later.
Sent:(slanted envelope) The message has been sent.
Important:(flag) The message is important.
You can change the status by clicking .
6.3.5 Message Folders
Message folders serve as an organizing tool for your messages. By default, all message folders are stored in the Mail folder in your home directory. The inbox, outbox, sent-mail, and trash folders are created when KMail is started for the first time.
Inbox:KMail stores new messages here (unless a filter has been defined).
Outbox:Messages to send are stored here.
Sent-mail:Copies of all sent e-mails are stored here.
Trash:Stores deleted e-mails until emptied.
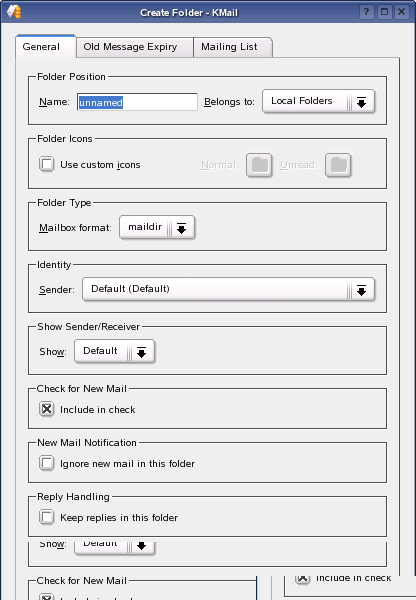
Clicking creates additional folders for organizing your e-mail messages. To create a subfolder, select the parent folder from the drop-down list. Specify the folder type, any mailing list associated with it, and an expiration date after which the messages are marked for deletion. You can also select an identity or display a certain sender or recipient.
Figure 104 Creating New Folders
Messages are not permanently deleted until you empty the trash.
6.3.6 Importing Mail
KMail assists in importing e-mail messages from other applications. Click to start the KMailCVT Import Tool. The tool currently features import filters for Outlook* Express 4, 5, and 6; the mbox format; simple e-mail texts; and Pegasus Mail folders.
6.3.7 The Address Book
Save frequently used addresses and contacts in the address book by clicking . To create a new address book entry, click and then enter the data of the person.
The menu allows creation of custom views for the contacts. The Table View is the default setting. Add View lets you create a new view with options for how contact information should be displayed. You can change between views by clicking and then selecting the view you want.