13.1 Creating a Reverse Proxy and Proxy Service
A reverse proxy acts as the front end to your Web servers on your Internet or intranet and off-loads frequent requests, thereby freeing up bandwidth. The proxy also increases security because the IP addresses of your Web servers are hidden from the Internet.
To create a reverse proxy, you must create at least one proxy service with a protected resource. You must supply a name for each of these components. Reverse proxy names and proxy service names must be unique to the Access Gateway because they are configured for global services such as IP addresses and TCP ports. For example, if you have a reverse proxy named products and another reverse proxy named library, only one of these reverse proxies can have a proxy service named corporate.
Protected resource names need to be unique to the proxy service, but they don’t need to be unique to the Access Gateway because they are always accessed through their proxy service. For example, if you have a proxy service named account and a proxy service named sales, they both can have a protected resource named public.
-
In the Administration Console, click > >
The link is either for a single Access Gateway or for a cluster of Access Gateways.
-
Click .
-
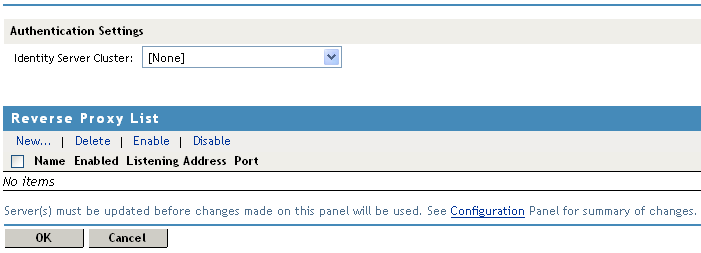
Select an .
Identity Server Cluster: Specifies the Identity Server you want the Access Gateway to trust for authentication. Select the configuration you have assigned to the Identity Server.
Whenever an Identity Server is assigned to a new trust relationship, the Identity Server needs to be updated. This process is explained following the step that saves this configuration setting (see Step 5 and Step 6).
-
In the , click , specify a display name for the reverse proxy, then click .

-
Enable a listening address. Fill in the following fields:
Cluster Member: (Available only if the Access Gateway is a member of a cluster.) Select the server you want to configure from the list of servers. The and modifications apply to the selected server. Modifications made to any other options on the page apply to all servers in the cluster.
Listening Address(es): Displays a list of available IP addresses. If the server has only one IP address, only one is displayed and it is automatically selected. If the server has multiple addresses, you can select one or more IP addresses to enable. You must enable at least one address by selecting its check box.
If the Access Gateway is in a cluster, you must select a listening address for each cluster member.
TCP Listen Options: Provides options for configuring how requests are handled between the reverse proxy and the client browsers. You cannot set up the listening options until you create and configure a proxy service. For information about these options, see Section 13.6.1, Configuring TCP Listen Options for Clients.
-
Configure the listening ports:
Non-Secure Port: Specifies the port on which to listen for HTTP requests; the default port for HTTP is 80. Depending upon your configuration, this port might also handle other tasks. These tasks are listed to the right of the text box.
Secure Port: Specifies the port on which to listen for HTTPS requests; the default port for HTTPS is 443.
For information about the SSL options, see Section 14.0, Configuring the Access Gateway for SSL.
-
In the section, click .
The first proxy service of a reverse proxy is considered the master (or parent) proxy. Subsequent proxy services can use domain-based, path-based, or virtual multi-homing, relative to the published DNS name of the master proxy service. If you are creating a second proxy service for a reverse proxy, see Section 17.2, Using Multi-Homing to Access Multiple Resources.
-
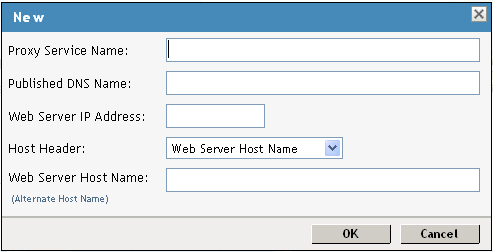
Fill in the fields:
Proxy Service Name: Specify a display name for the proxy service, which the Administration Console uses for its interfaces.
Published DNS Name: Specify the DNS name you want the public to use to access your site. This DNS name must resolve to the IP address you set up as the listening address.
Web Server IP Address: Specify the IP address of the Web server you want this proxy service to manage. You can specify additional Web server IP addresses by clicking the Web Server Addresses link when you have finished creating the proxy service.
Host Header: Specify whether the HTTP header should contain the name of the back-end Web server ( option) or whether the HTTP header should contain the published DNS name (the option).
Web Server Host Name: Specify the DNS name of the Web server that the Access Gateway should forward to the Web server. If you have set up a DNS name for the Web server and it requires its DNS name in the HTTP header, specify that name in this field. If the Web server has absolute links referencing its DNS name, include this name in this field. If you selected , this option is not available.
NOTE:For iChain® administrators, the is the alternate host name when configuring a Web Server Accelerator.
-
Click .
-
Continue with Section 13.2, Configuring a Proxy Service or select one of the following tasks:
-
For instructions on creating multiple reverse proxies, see Section 17.3, Managing Multiple Reverse Proxies.
-
For instructions on creating multiple proxy services for a reverse proxy, see Section 17.2, Using Multi-Homing to Access Multiple Resources.
-