20.1 Configuring Traffic Policies
You can configure a maximum of 250 traffic rules per role, depending on the length of the policy name. If you have configured multiple traffic policies, the policies are prioritized based on the order of their creation.
You can configure a different set of traffic policies for different roles as follows:
-
In the Administration Console, click > .
-
Select from the section. The SSL VPN Traffic Policies page is displayed.

-
Click . The New dialog box is displayed.
-
Specify the traffic policy name in the field, then click .
-
Click the newly added traffic policy. The Edit Traffic Policy page is displayed.
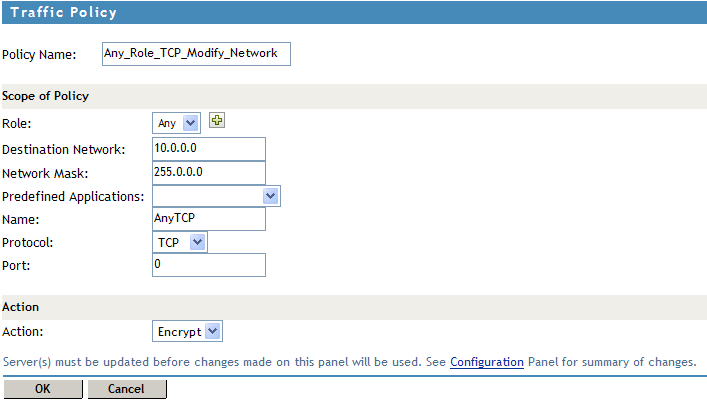
Fill in the following fields:
-
Policy Name: Specify the name for the traffic policy.
-
Role: The role to which the traffic rule applies. Select the role from the drop-down list. If the role is not listed, click the role icon to add new roles.
The Role is case-sensitive. If the role configured is Employee and the Identity Server sends a request for employee, the rule is not pushed to the client.
-
Destination Network: Specify the host or network IP address of the destination.
-
Network Mask: The network mask is displayed by default when you specify the destination address. However, you can edit the mask.
-
Predefined Application: Select a predefined application from the drop-down list.
-
Name: Specify a name for the application. This information is optional.
-
Protocol: Select a protocol from the drop-down list. You can select the protocol to be TCP, UDP, ICMP or Any.
-
Port: Specify the port number on which the service you select must listen.
NOTE:Specify 0 to allow all ports depending on the protocol.
-
Action: Specify if a service can be allowed or denied. Select to allow the service in encrypted form. Select if you do not want to allow the service.
-
-
To delete a traffic rule, select the rule, then click .
-
To enable a traffic rule, select the rule, then click.
-
To disable a traffic rule, select the rule, then click .
-
To save your modifications, click , then click on the Configuration page.