3.2 Installing eDirectory Advanced - New Tree
This option installs a new eDirectory tree on your server, and allows you to specify many of the parameters, such as server context and LDAP ports.
-
In the components section of the NOWS SBE administration page, click for eDirectory.
-
Click , then click .
-
Specify the eDirectory tree name. Do not use special characters when specifying your tree name.
-
Specify your organization name. This will be the name of the eDirectory container that the server is installed into. Do not use special characters when specifying your organization name.
-
Specify your administrative information. Do not use special characters when specifying your password.
-
Administrator Password: Password of the eDirectory administrator user.
-
Administrator Password Confirm: Retype the password for the eDirectory administrator user.
-
SBS Administrator Password: The password for the SBS administrator user.
-
SBS Administrator Password Confirm: Retype the password for the eDirectory administrator user.
-
-
Specify the advanced settings for your server. Do not use special characters, except for hyphens, when specifying the server name.
-
Server Name: Specify the name of the server you are adding to the tree.
-
Server Context: Specify the server context. The server will be added to the tree in the specified context.
-
Path for DIB: Specify the directory path where the database files are to be stored.
-
LDAP Port: Specify the TCP port number on the LDAP server, such as 389. Fill in the field only if you know the correct information; otherwise, leave it blank.
-
Secure LDAP Port: Specify the secure port number on the LDAP server, such as 636. Fill in the field only if you know the correct information; otherwise, leave it blank.
-
HTTP Port: Specify the HTTP clear port number, such as 8028. Fill in this field only if you know the correct information; otherwise, leave it blank.
-
HTTPS Port: Specify the HTTP secure port number, such as 8030. Fill in this field only if you know the correct information; otherwise, leave it blank.
-
-
Specify NCP settings if you want to enable access to NCP™ volumes via the Novell Client™ or other NCP aware utilities.
-
NCP Support: Enables NCP support on native Linux file systems (not NSS).
-
Name for Default NCP Volume: If is enabled, a volume with this name is created.
-
NCP Volume Mount Point: Specify the location on the file system where the NCP volume will reside if NCP support is enabled.
-
-
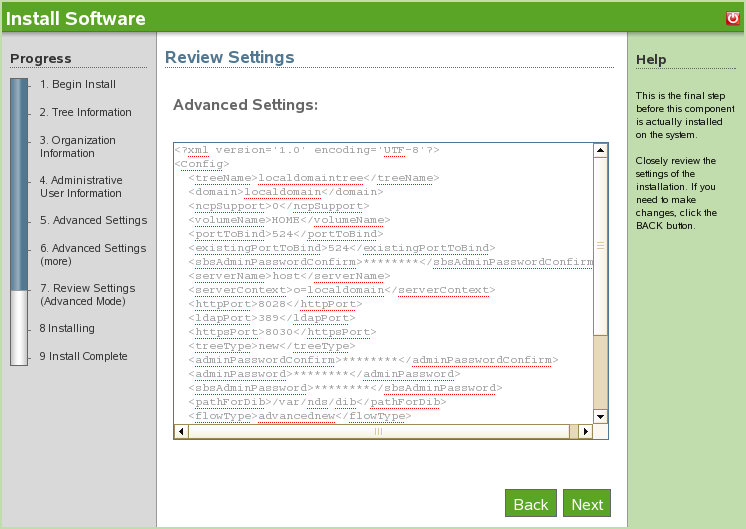
Review the settings. To make changes, you can edit the XMPL text directly to specify additional advanced settings as needed. To proceed with the installation, click .
-
The Advanced eDirectory - New Tree install is now complete. Click to return to the available components page. eDirectory is now listed on the installed software list.