13.11 Deleting a Clustered LVM Volume Group and Logical Volume
Before you delete a clustered LVM volume group, you must take the volume group cluster resource offline, and delete the cluster resource object and related objects in eDirectory.
All resource configuration must happen from the master node. On the Cluster Options page for iManager, you are automatically connected to the Cluster object, which is associated with the master node.
-
Log in to iManager as a cluster administrator.
-
In , select > , then select the cluster.
-
Take the volume group cluster resource offline:
-
On the Cluster Manager page, select the check box next to the volume group cluster resource, then click . Wait until the resource is offline to continue.
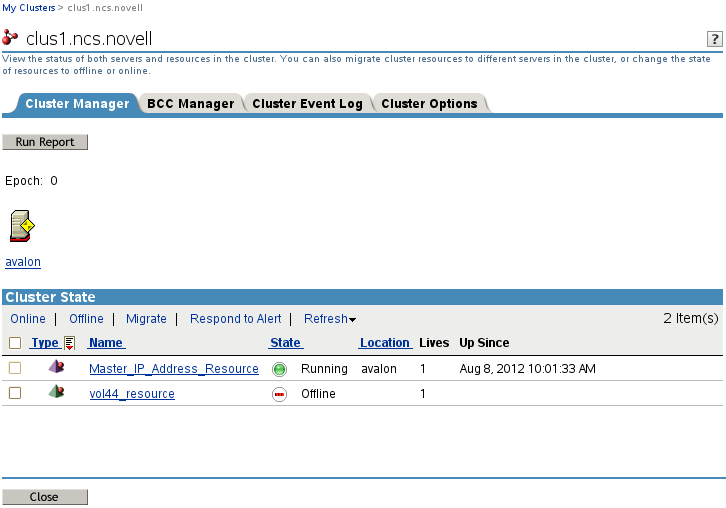
The unload script unbinds the NCP virtual server from the resource IP address, dismounts the NCP volume, dismounts the Linux LVM logical volume, and deactivates the Linux LVM volume group.
-
-
Delete the volume group cluster resource:
-
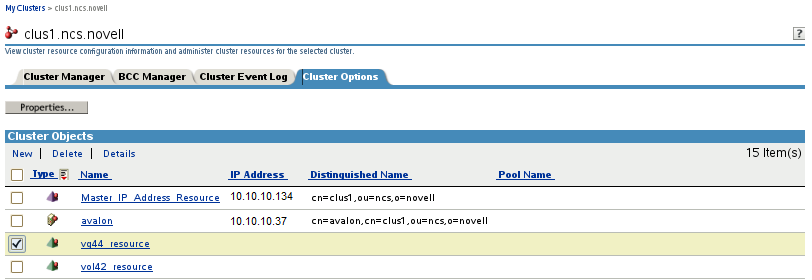
Click the tab.
-
Select the check box next to the volume group cluster resource, then click .
-
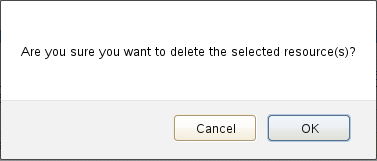
When you are prompted to confirm the deletion, click to continue, or click to abort the deletion.
-
-
If the Linux volume was enabled for NCP file access, delete the NCP volume object.
-
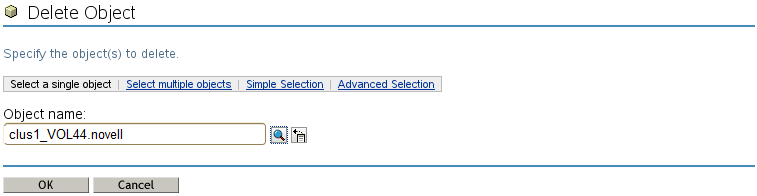
In iManager, select >
-
On the Delete Object page, browse to locate and select the resource’s NCP Volume object (such as clus1_VOL44.novell), then click .
-
Click to delete the NCP volume object, then click again to close the success message.
-
-
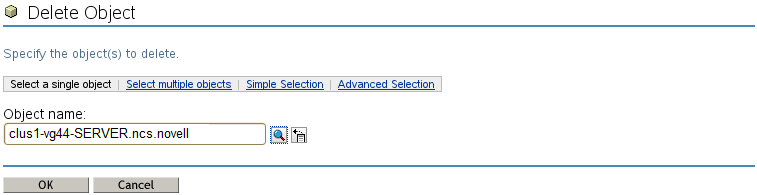
If the Linux volume was NCP enabled, or if you manually created an NCP virtual server for the resource, delete the NCP virtual server object.
-
In iManager, select >
-
On the Delete Object page, browse to locate and select the resource’s NCS:NCP Server object (such as clus1-vg44-SERVER.ncs.novell), then click .
-
Click to delete the NCP virtual server, then click again to close the success message.
-
-
Delete the LVM volume group and logical volume:
-
Log in as the root user to the cluster node where the resource was online, then open a terminal console.
-
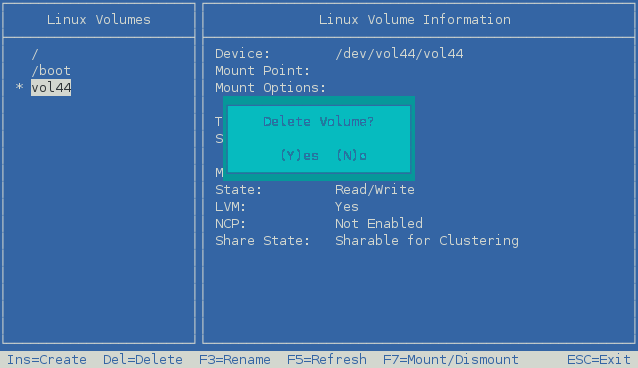
At a command prompt, launch NSSMU:
nssmu
-
In the NSSMU main menu, select , then press Enter.
-
In the list, select the clustered linux volume, then press Delete.
-
When you are prompted to confirm the delete action, press y (Yes) to continue, or press n (No) to cancel the delete action.
Deleting the volume and volume group puts the device in an uninitialized state.
-
Press Esc to return to the main menu.
-
-
Re-initialize the device:
-
In the NSSMU main menu, select , then press Enter.
-
In the list, select the device.

-
Press F3 to initialize the device.
-
When you are prompted to confirm the initialization action, read the warning message, then press y (Yes) to continue, or press n (No) to cancel the action.
-
Select or as the partitioning type, then press Enter.
-
Visually verify that the device was initialized and the specified partition type is displayed.
-
Press Esc twice to exit NSSMU.
-
-
Verify that the LVM volume group is deleted by entering the following the native LVM command:
vgdisplay