5.1 Installing CIFS during the OES 11 SP3 Installation
-
In the YaST install for OES, on the page, click to go to the page.
For information about the entire OES 11 SP3 installation process, see the OES 11 SP3: Installation Guide.
-
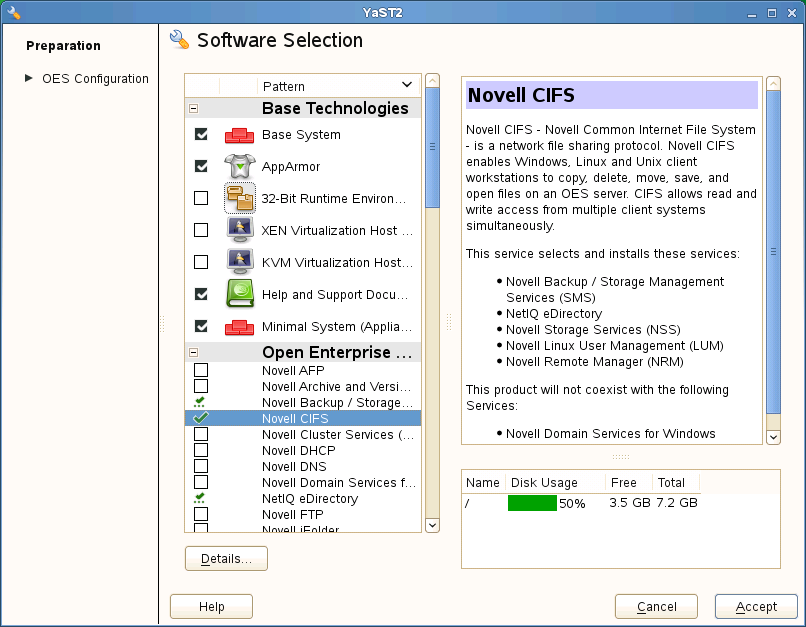
From the option, select , then click .
The following additional services are automatically selected:
-
Novell Backup / Storage Management Services (SMS)
-
NetIQ eDirectory
-
Novell Linux User Management (LUM)
-
Novell NCP Server / Dynamic Storage Technology
-
Novell Remote Manager (NRM)
-
Novell Storage Services (NSS)
-
-
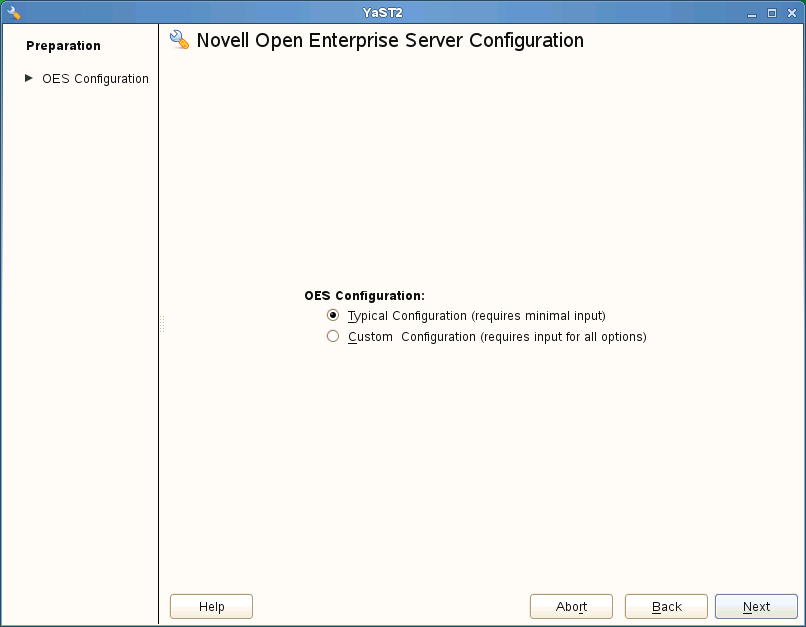
Select an appropriate install option.
Typical Configuration: A two-click express installation with minimal user inputs. This method collects only essential information to proceed with the OES configuration and uses default values for most options. In case you want to modify the default configuration parameters; in the OES install summary screen, click the respective links and modify them.
Custom Configuration: This method of OES configuration requires inputs for all parameters.
-
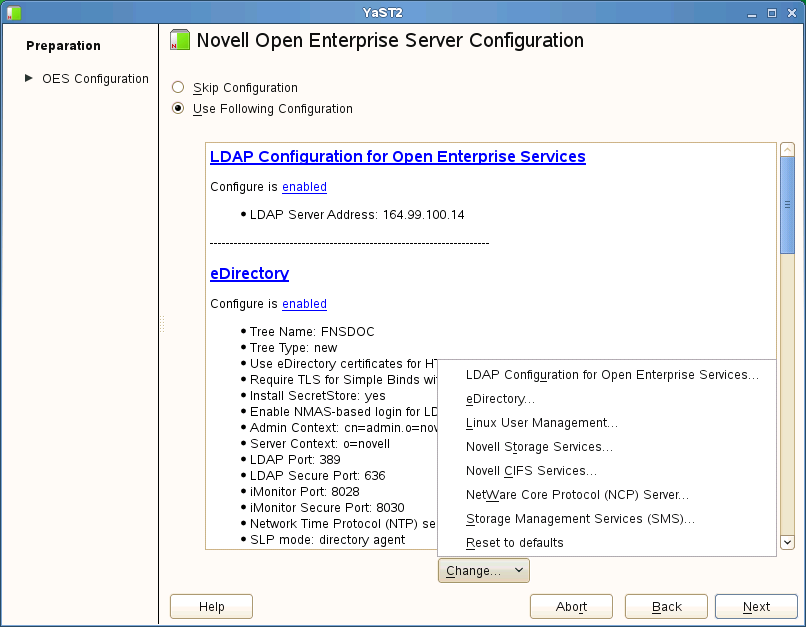
On the Novell Open Enterprise Server Configuration window, click and then click .
-
Select the IP address of the LDAP server from the drop-down list. If you do not want to use the default, select a different LDAP server in the list.
-
Browse or specify a user (existing or created here) with rights to search the LDAP tree for CIFS objects.
If you selected the check box during eDirectory configuration, the Proxy user name and password fields are auto-populated. If a common proxy is not configured, the field is populated with a system-generated proxy user name.
-
Specify a password (existing or created here) for the Proxy user.
This field is disabled if you selected the check box during eDirectory configuration. If a common proxy is not configured, the Proxy Password field is auto-populated with a system-generated proxy password.
-
Retype the same password in the field.
-
Click , then browse to search for an existing eDirectory context. Specify the list of contexts to search for CIFS users. They will be sequentially searched when CIFS users enter their credentials.
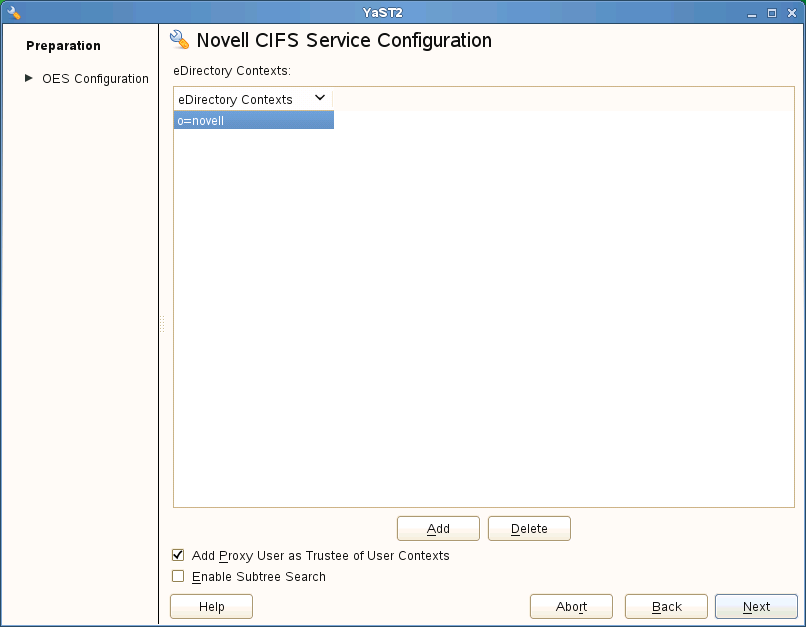
Add Proxy User as Trustee of User Contexts: This option is selected by default. Deselecting this option will not grant the CIFS proxy user the rights required over eDirectory contexts to search for a CIFS user in the subtree.
Enable Subtree Search: This option is not selected by default. Selecting this option enables CIFS to search for a user in the entire subtree of selected contexts.
The CIFS server searches through each context in the list until it finds the correct user object. For example, if users exist in ou=users, provide the context. If there are any users in ou=user1,ou=users, it is not resolved unless you have a subtree search enabled. The ou=user1,ou=users context must be added explicitly.
-
Click .
-
Click to save the changes.