9.2 Setting a Directory Quota in iManager
-
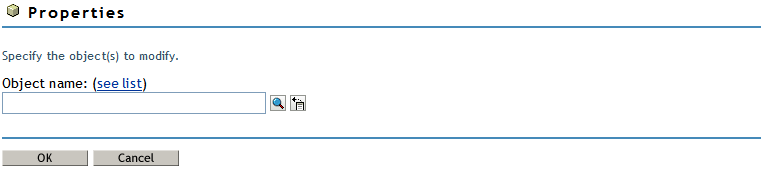
In iManager, use either of the following methods to select a file or folder and open its Properties page:
-
Files and Folders Role: In the iManager toolbar, select the icon. In the left panel, select .
On the Properties page, click the icon, browse to locate and select the folder you want to manage on an NSS volume, then click to open the Properties page for the selected folder.

-
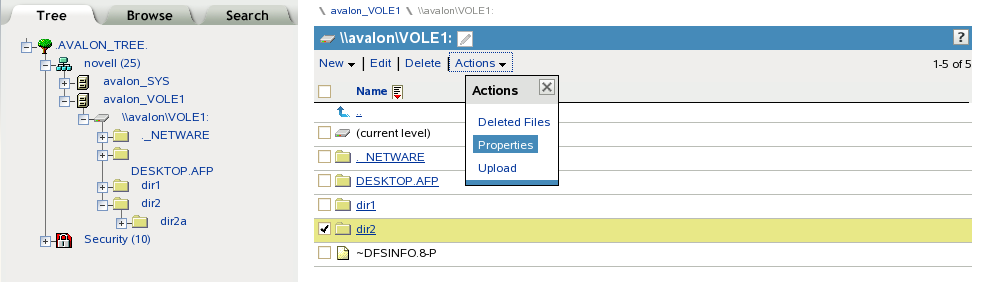
Tree View: In the iManager toolbar, click icon. In the left panel, browse the Tree to locate and select the folder you want to manage on an NSS volume.
In the right panel, select the check box next to the folder, then select > .
-
-
On the Properties page, view the current status of the Directory Quota on the selected folder.
If a Directory Quota is set, the field is selected and the fields show the quota size in KB, MB, GB, or TB.
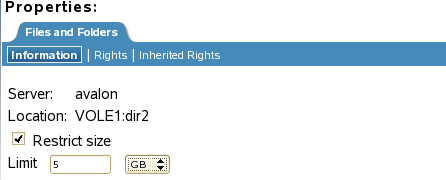
If the Directory Quota is not set, the field is deselected and the fields are dimmed (not available).

-
(Optional) Set or modify a Directory Quota on the selected folder:
-
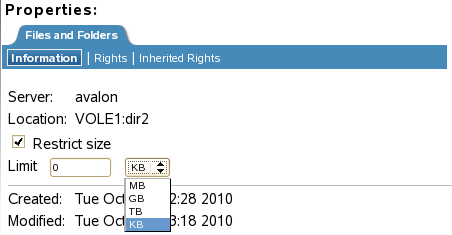
Add a Quota: Select the check box to enable space restrictions for the selected directory. In the field, type the quota value, then select whether this is KB, MB, GB, or TB from the Units drop-down list.
-
Modify an Existing Quota: In the field, type the new directory quota, then select whether this is KB, MB, GB, or TB from the Units drop-down list.
-
-
(Optional) Remove a directory quota by deselecting the check box.
This disables space restrictions for the selected folder. The fields are automatically dimmed (not available).
-
At the bottom of the page, click or to apply the changes.