11.2 Installing the DNS Server
DNS can be installed on your system by using a YaST install:
YaST Install
This YaST Install is a predefined system of installing components along with the associated dependencies. For a service to function properly, all the dependent products must be installed. Pattern deployment provides patterns for different services. Selecting a pattern automatically selects and installs its dependencies.
-
Follow the instructions in the
Installing OES 2015 SP1 as a New Installation
chapter to go to the page. -
In the YaST install, on the page, click to go to the page.
-
Under the OES Services option, select . Click .
-
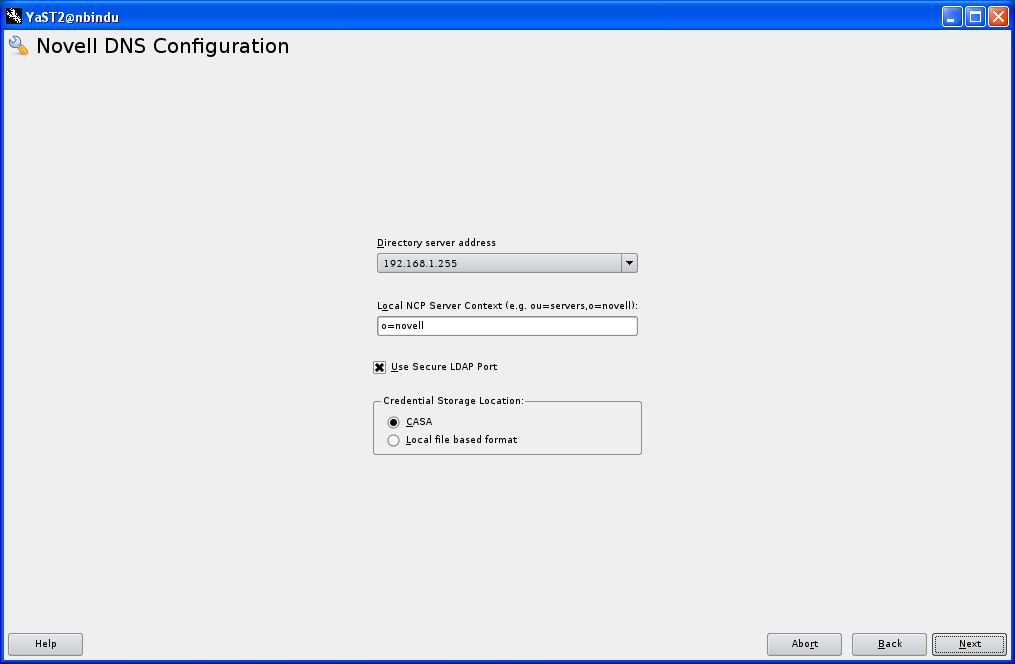
Specify options for configuring a DNS server
-
Specify an IP address of an LDAP server from the list. By default, the IP address of the default LDAP server for this service is displayed.
If you are installing into an existing tree, ensure that the server you select has a master replica or read/write replica of eDirectory. If you need to add another LDAP server to the list, add it using the LDAP Configuration for Open Enterprise Services dialog.
-
Specify a context for the local NCP Server object.
-
The check box is selected by default to ensure that the data transferred by this service is secure and private. If you deselect this option, the transferred data is in clear text format.
-
Specify where the proxy user's credentials are to be stored. It is recommended to use CASA.
-
Click to proceed.
-
-
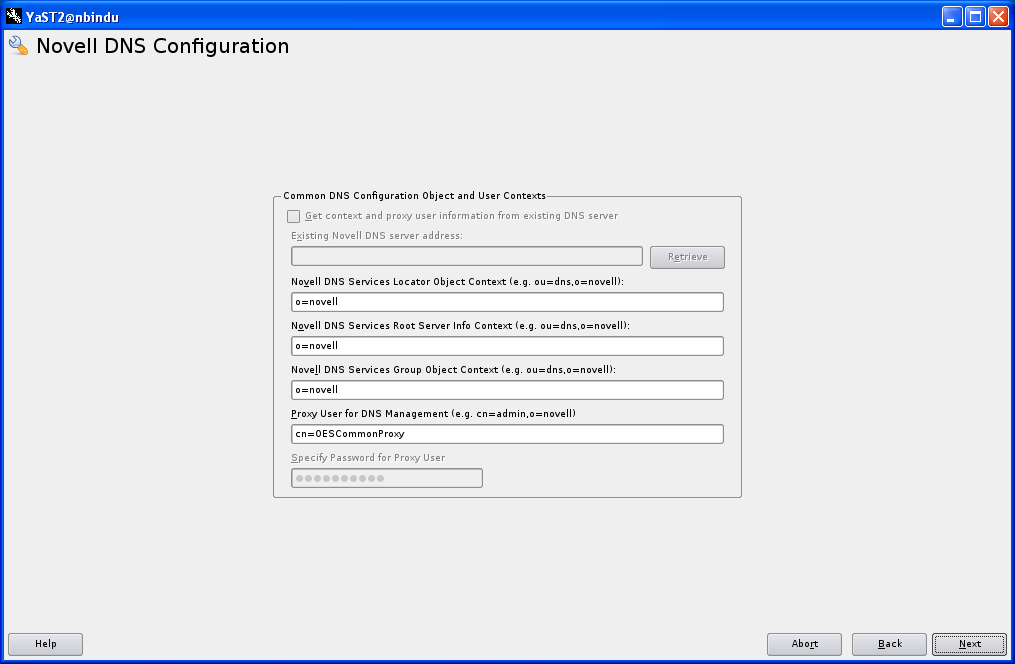
Specify the following:
-
If you are configuring DNS in an existing tree where DNS is already configured and you want to use the existing Locator, Root Server Info, Group and Proxy User contexts, you can select the check box and provide the IP of an NCP server hosting the existing DNS server and click . This will fetch the contexts of the Locator, Root Server Info, Group and Proxy User contexts. Make sure the NCP server hosting the existing DNS server is running before hitting .If you do not wish to use existing contexts, you can provide those manually.
-
Specify the context for the DNS Locator object in the field. The Locator object contains global defaults, DHCP options, and a list of all DNS and DHCP servers, subnets, and zones in the tree.
-
Specify the context for the DNS Services root server in the field.
-
Specify the context for the DNS Group object in the field. This object is used to grant DNS servers the necessary rights to other data within the eDirectory tree.
-
Specify the fully distinguished, typeful name of an eDirectory user in the field. This user is used to authenticate to eDirectory to access information for DNS during runtime. The user must have eDirectory read, write, and browse rights under the specified context. If the user does not exist, it will be created in the specified context.
During eDirectory configuration, if you have selected the check box, then the proxy user and password fields are populated with common proxy user name and password.
-
Type the password for the eDirectory user that you specified for accessing DNS. This field is disabled, if you have selected the check box during eDirectory configuration.
-
-
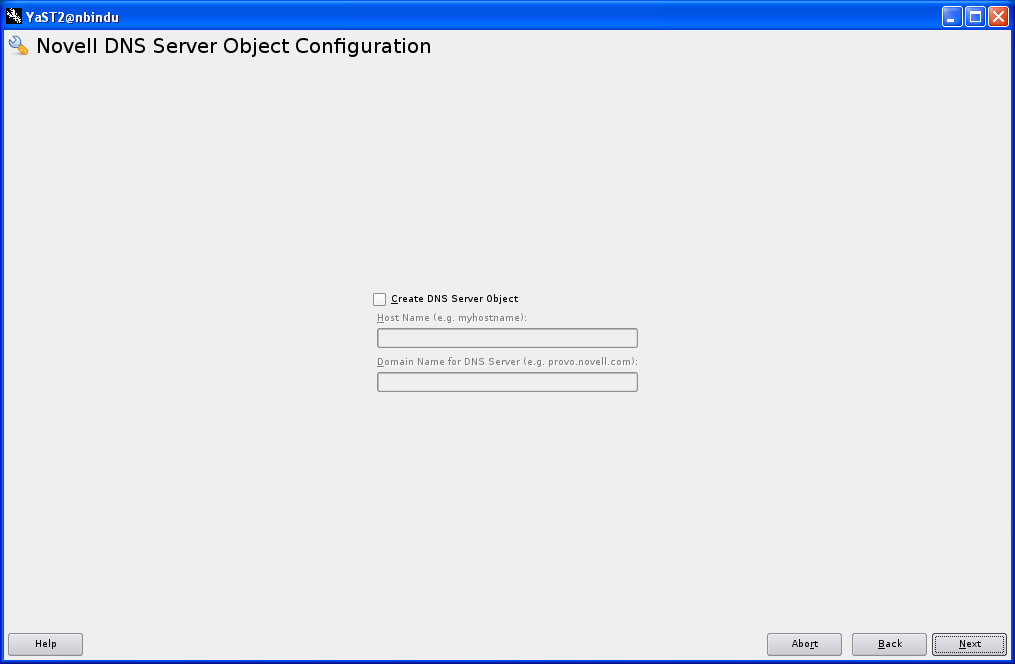
Specify details to create DNS server object
-
Select the to create a DNS server object in the eDirectory tree associated with the NCP Server.
-
Type the unique hostname for the DNS Server object in the field.
-
Type the domain name for the Server object in the field and click .
-
-
Click to complete the installation process.