17.8 Useful Tools
digiKam offers several little helpers for organizing your image collection and for processing your images. Find them in the menu:
- Find Duplicate Images
-
If you suspect your collection to contain a number of duplicates, use this option to find and delete them. First, determine which album or tag to include in the scope of your search. Click to initiate the search. If your collection contains any duplicates, you get a split screen showing both images and can select one of them for deletion to eliminate the duplicate.
- Create Calendar
-
Create a simple calendar using a standard layout by just selecting the images to use and by selecting paper size and fonts.
- Slideshow
-
Present your image collection by means of a slide show. Determine the scope of the slide show, the effects to use and what information to display along with the images. Set the delay between images and start the slide show.
- RAW Image Converter (Single)
-
digiKam supports converting images from various vendor-specific RAW formats to common image formats such as JPEG or PNG. Using this option, convert single images. If you need to convert several images, consider using a batch conversion (). To find out whether your camera's RAW format is supported by digiKam converter plug-in, check http://www.cybercom.net/~dcoffin/dcraw/.
- Batch Processes
-
Perform certain actions on a large number of files at once. Add borders, edit the colors, apply various effects and filters, rename and resize images, recompress them, or perform a RAW conversion.
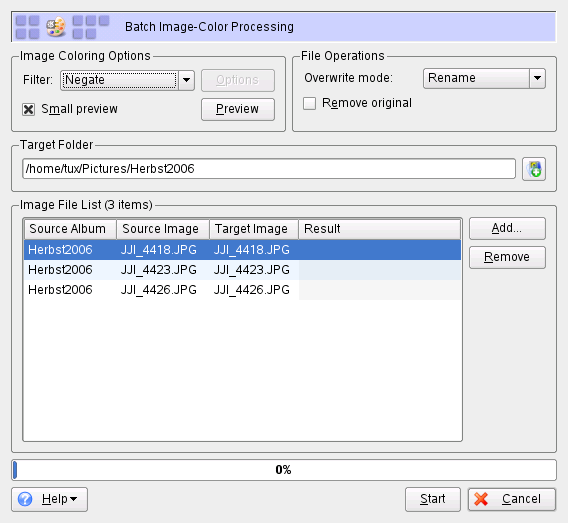
An example batch processing of images could involve applying a solarizing effect to a number of images. To queue images for batch processing and perform the actual processing, proceed as follows:
-
Select or right-click the album's name and select .
-
Set the effect to and click to determine the degree of the effect to be applied and display an optional preview.
-
Determine whether to rename or overwrite the original images or even have them removed after the transformation has taken place.
-
Set the target folder to hold the resulting images. If you do not want the new images to be written to the original folder, select and add a new folder or subfolder. Select the new folder with your mouse pointer.
-
Accept or modify the list of images queued for the transformation.
-
Click to initiate the transformation.
digiKam informs you about the progress and the success of the transformation.
Figure 17-8 Batch Processing: Solarizing Images