6.3 Customizing Kopete
Kopete offers numerous options to customize it according to your needs. Find some examples in the following sections.
6.3.1 Adding Groups
Grouping contacts in your list can give a better overview. Click . Name the group and confirm this with . A new folder appears in the contact list that can be used to store the desired contacts. Drag and drop contacts into the desired folder.
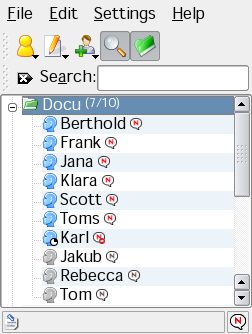
Figure 6-2 The Main Kopete Window
Empty groups can be disabled by activating .
6.3.2 Using a Global Identity
Kopete can manage several accounts which is helpful if you have friends
using different messenger protocols. Instead of creating several
identities for various protocols, you can also set up a global
identity
:
-
In Kopete, select .
-
In the configuration window, select and activate .
-
Click and enter a name for your global identity.
-
Specify some details for your identity such as nickname or photo.
-
On the tab, decide if you want to use a nickname or a nickname already specified in another Kopete account.
-
If you want to add a photo, select one of the options on the tab.
-
In order to use data that you have already specified in KAdressbook, go to the tab first. Click , select your entry from the list and click . Now you can switch back to the or tab and activate the address book options there.
-
6.3.3 Changing the Appearance
Kopete lets you install new themes, change the style of the chat window or modify colors and fonts. To change the appearance, select and click . Find two examples below:
- Installing a New Icon Theme
-
On the tab, click for a list of themes available from the Internet. To download one or several themes, select an entry in the list and click . The new theme is added to your list on the tab. From there, choose the desired theme and click .
- Changing the Style of the Chat Window
-
Choose one of several Kopete styles available from the tab or download new styles with .
6.3.4 Configuring Notifications
Kopete allows you to configure notifications for events such as contacts coming online or going offline or an incoming message for you.
If you want to be notified if a certain contact has come online, proceed as follows:
-
Make sure all your contacts are shown in the Kopete window (otherwise select ).
-
Right-click your preferred contact and select .
-
Go to the tab and select .
-
Decide which action should be executed for this event: , , or .
-
Click to confirm your settings.
To modify the default notification options, select . Select which event is important for you and change the notification settings. For example, if you want to be informed by a sound when any of your contacts has come online, select and activate . Select the sound and click to close the configuration dialog.
6.3.5 Configuring Kopete Plug-ins
Kopete offers some nice extensions for you chat sessions which can be accessed from . For example, you can auto replace text, encrypt outgoing messages, highlight text if the message contains some interesting words, render LaTeX formulas, or translate messages.