9.4 Retain Publisher
The Retain Publisher must be run to create the local archive for the Viewer to connect to. The Publisher does not display messages, it just accesses and exports messages into a portable message archive.
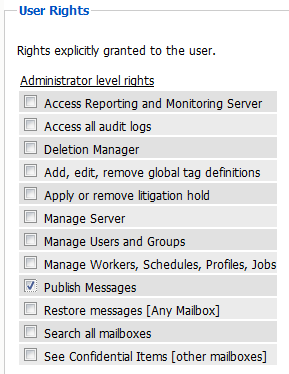
The Publisher must be used in conjunction with a user that has administrator rights to publish messages. Because the Publisher connects over the network, it requires an open network connection to the Retain Server.
The Administrator account for Retain automatically has the publish messages right, and can be used here, though it is highly recommended to create and use an auditor account with the mail export right and access to the desired mailboxes or post offices required.
Start Retain Publisher by opening the program Publisher.exe.
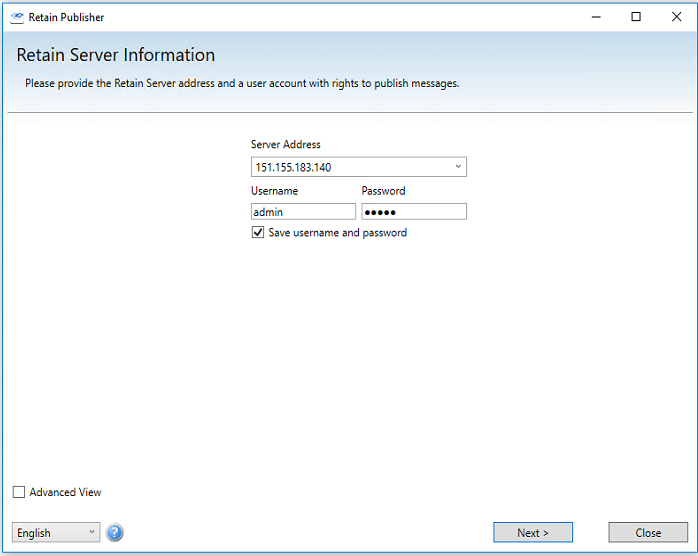
9.4.1 Retain Server Information Page
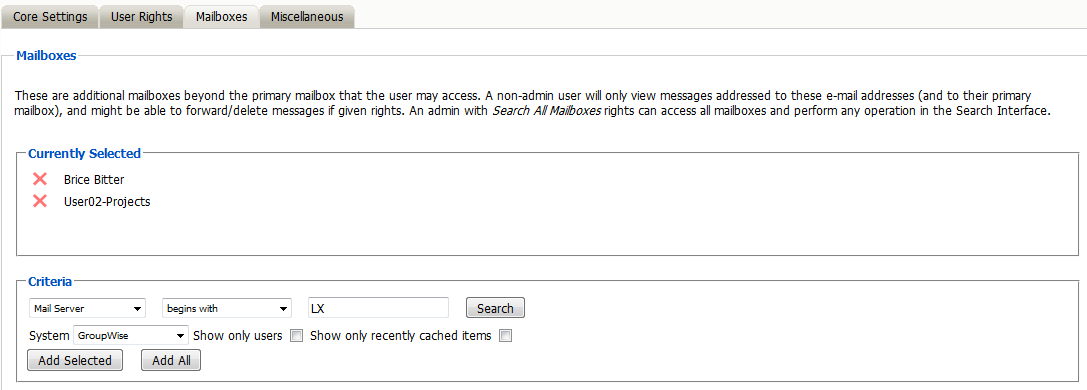
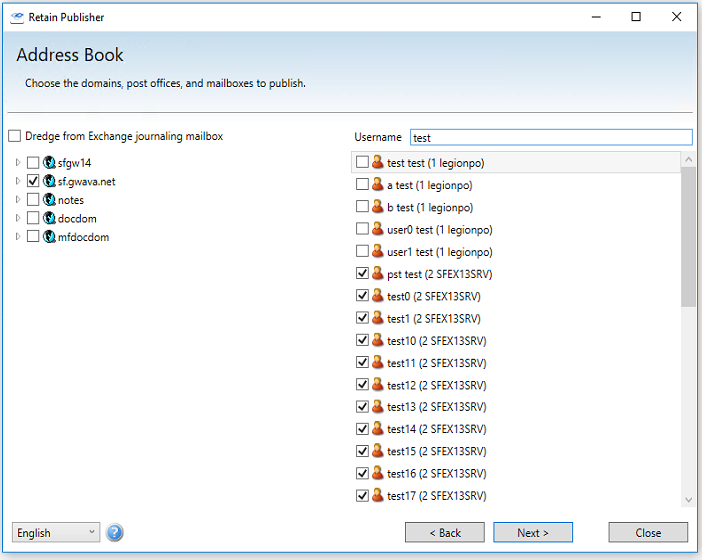
Input the Retain Server’s DNS or IP Address and the login for the account with message export rights and rights to the desired mailboxes. Unless the login account has the administrator level right to ‘search all mailboxes’, only the mailboxes granted to the auditor account will be accessible. Granting rights to mailboxes other than the active user’s own mailbox are specified in the user rights section, under the ‘mailboxes’ tab.
The advanced view provides a protocol and port options.
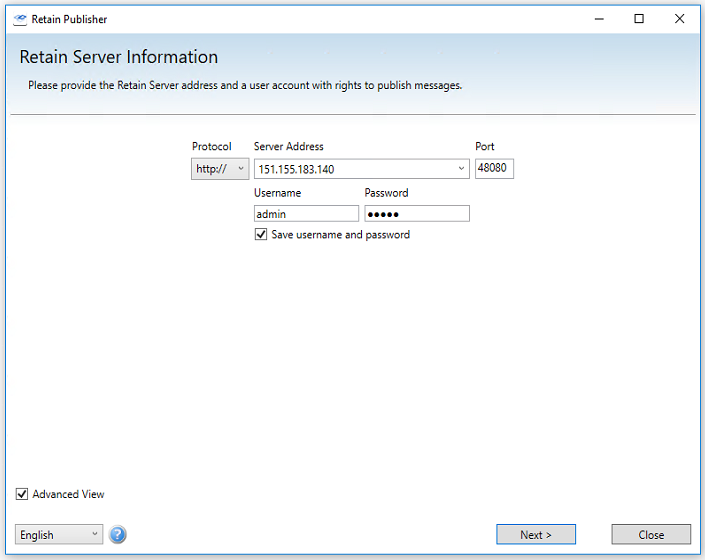
Select ‘Next’ to login to the Retain Server.
Publishing Location Page
The Publisher then asks for the desired location for the exported archive messages.
The messages extracted from the Retain Server will be saved in a database at this location. Select an existing location or select the green plus button and then browse to, or create a new folder for the published archive destination. If a destination is selected which already contains an existing archive, a warning of overwriting an existing archive will be displayed.
You must select, or create and select, a location for the messages to be exported to before you may proceed to the next screen.
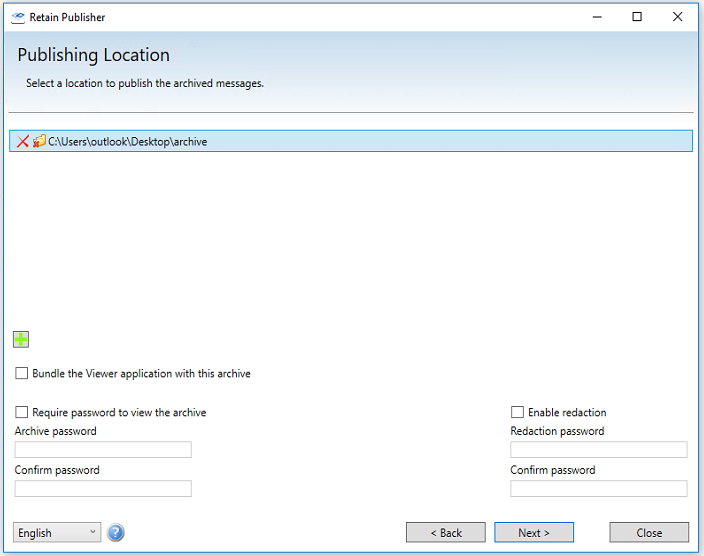
The options to password protect and use Redaction, both require passwords. To use them, select the checkbox and specify a password. The passwords can be different and both options may be present on the same archive.
When the ‘Bundle the Viewer application with this archive’ option is selected, the Viewer installation file is copied into the archive as well, preparing it to be completely mobile; the entire destination folder can then be copied or sent to any system with all that is required to read and search the archive. If the archive is to be distributed on a burned DVD or CD, further redaction will not function from the disk. All redaction comments should either be made before the archive is burned to a disk, or the archive should be copied from the disk to a local location where changes can be saved. When writing the archive to a read-only medium, it is always prudent to finalize the compilation.
Making the archive mobile can be very useful in situations where direct access to the Retain archive, such as during legal discovery, when email information is required to be surrendered for a user or group of users, an archive can be created and provided without disrupting current Retain operation. Click ‘Next’ to continue.
Address Book Page
Select the Post office and/or user(s) to dredge.
Search for users by their display name.
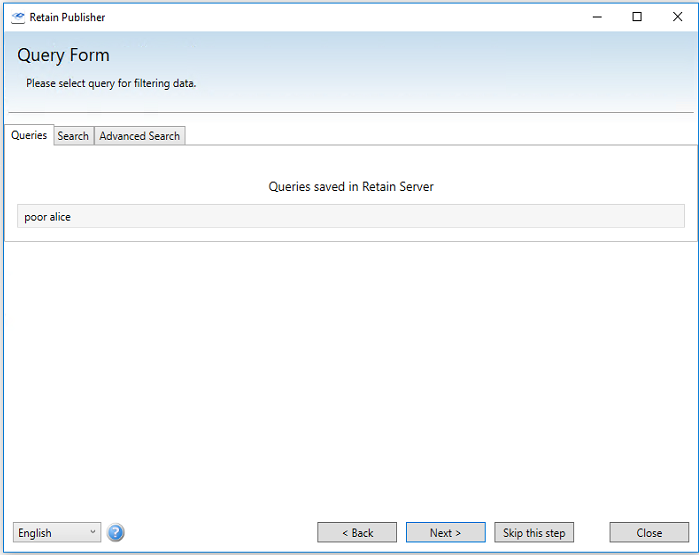
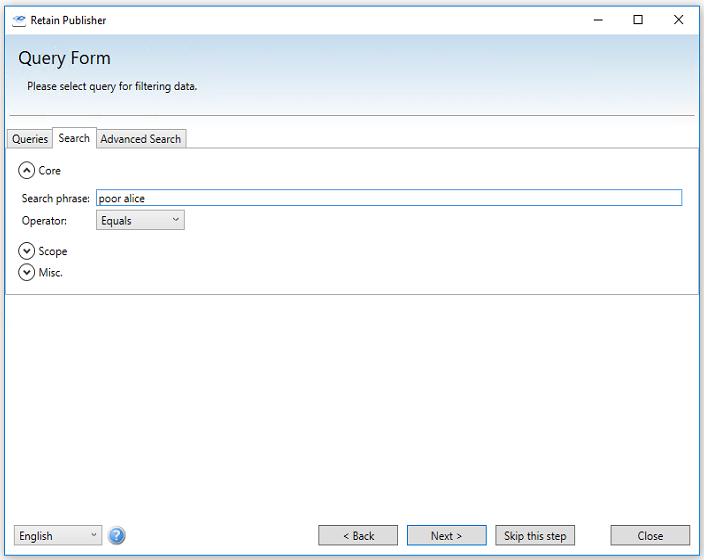
Query Form Page
Select or create a query to filter the scope of the export job. There are three tabs but you only need to use the one you need to build the query. You can use a query saved in the Retain Web console, a simple search or an advanced search.
If you don’t want to perform a query, press the “Skip this step” button.
Queries Tab
A query saved on the Retain Server can be loaded at this point.
Queries can be saved under the Search and Advanced Search tabs in the Search Messages Web interface. Publisher requires you to log in to the same account as the one used in the web interface to access the saved query.
Search Tab
The Search tab allows you to create a simple search query within Publisher.
Advanced Search Tab
The Advanced Search Tab allows you to create a complex search query within Publisher.
The Publisher may restrict what mail or items are published into the message archive by specifying search or query terms. If a message or item does not apply to the search terms, it will not be added to the published archive. There are three opportunities to specify search terms or criteria; Core (query), Scope, and Misc.
Each of the three different criteria panels at this step may be shown or hidden by clicking on the hide/show arrow. Previously saved searches or searches that have been shared with the logged-in user will be displayed in the queries menu.
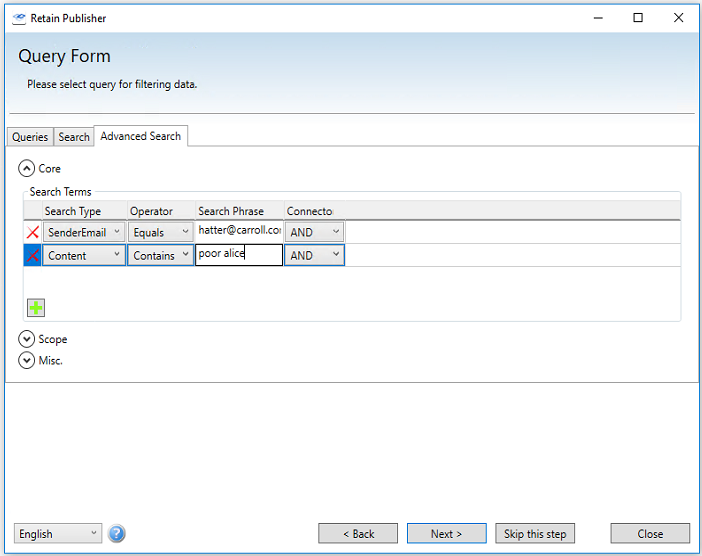
Core Panel
To add criteria to the Core query parameters, simply select the green ‘+’ icon, then select the different desired operator, search type, and phrase.
For instance, a very exclusive ‘contains’ search of the message contents will only publish messages that have the exact specified word or phrase in them. Fuzzy searches for approximates to the specified phrase, producing results including the words, but not in the specific order, or similar words.
Scope Panel
The Scope details what types of messages will be searched for. If no items are checked, all are allowed, and that setting is default.
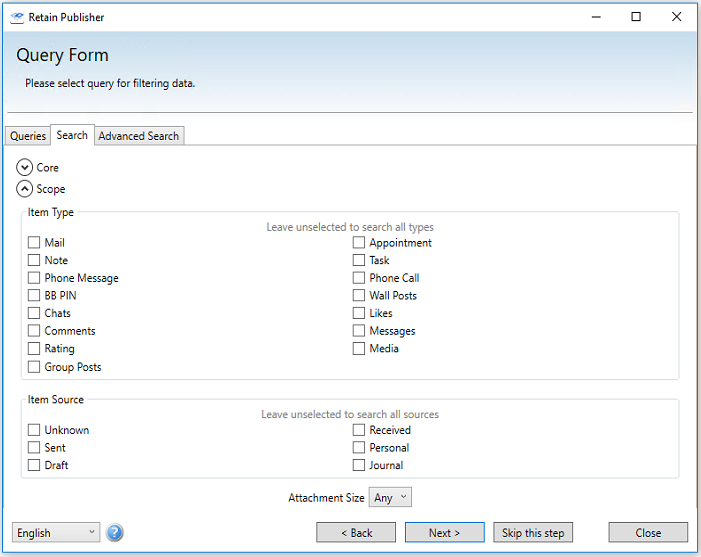
To restrict to specific messages and types, (some are mail system specific), at least one item must be selected. If one item is selected, or something is desired to be excluded from the published archive, select all desired item types. The Item Type, Item Source, and Attachment size, are all independent factors and must be specified independently or left blank. A blank item source and attachment size will not restrict those criteria when combined with a specified type.
Attachment sizes can be restricted or allowed into the message archive, and are accessible through the drop-down menu at the bottom of the query screen, under the ‘Attachment Size’ menu.
Less than 100 kilobytes
Greater than 100 kilobytes, but less than 1 megabyte
Greater than 1 megabyte, but less than 10 megabytes
Greater than 10 megabytes, but less than 100 megabytes
Greater than 100 megabytes
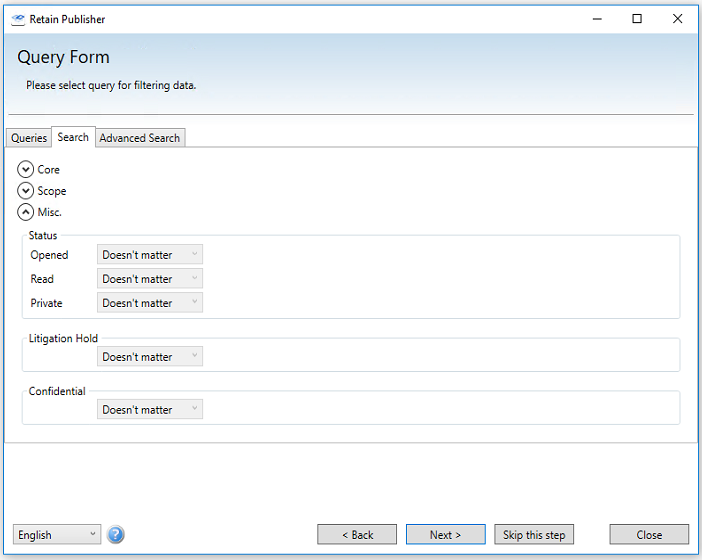
Misc Panel
The Miscellaneous panel allows you to restrict the message based on the message's status. Options are Doesn't matter, True or False.
Select ‘Next’ to continue.
Folder Structure and Date Range Page
Choose how much of the folder structure and date range you wish to download. By default, the entire date range of the system will be searched.
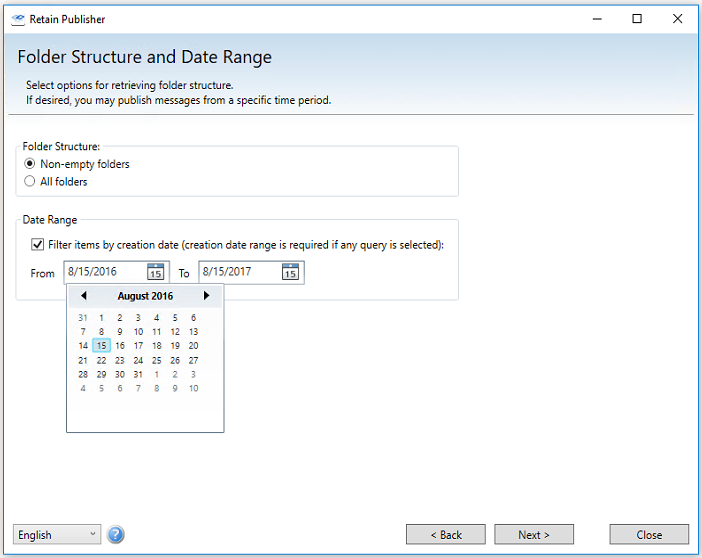
Simply selecting the desired setting will make it active in the search criteria. Set as desired and continue.
The publisher can also be restricted to exclude all empty folders from the published archive.
The Date Range allows for specific item date ranges to be selected or excluded. The query will cause the publisher to only look for the specific mail required within the specified time frame. The time range may have a start date, and end date, or both. This feature is disabled if a saved query is being used.
This setting differs from the following time restriction in that the start and end times may be specified in a range, instead of a specific hard date. Only messages strictly adhering to the range will be published. If a date range is desired, enable the date range and select the desired range.
A date range is required to be specified if the active query is anything other than a previously saved query, so make sure it is set to an acceptable window for the desired data. The publisher automatically defaults the date range to one year.
Click on the ‘From’ or ‘To‘ dates to reveal the data selection calendar and specify the date as desired.
Click ‘Next’ to continue.
Indexer Filter Settings Page
Select what types of documents to be indexed. It is best to index all types of documents so all items may be searched.
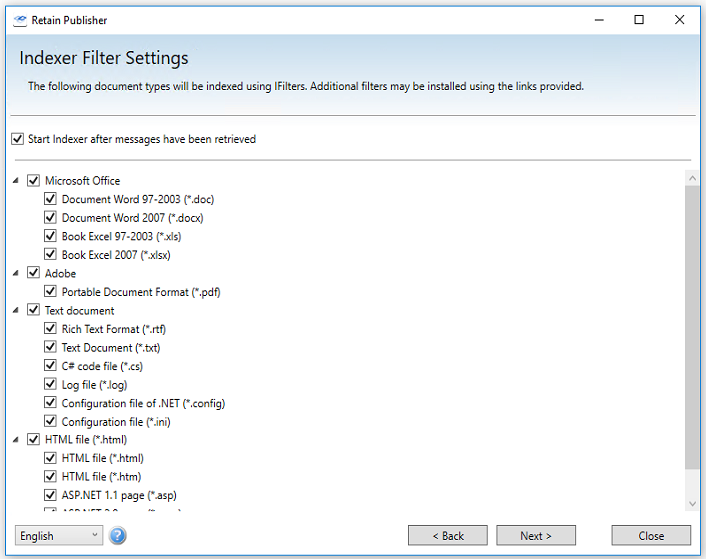
The Publisher can create and index the archive for faster searching and browsing by the Viewer. It is highly recommended to index a published archive. All default filters are shown. To enable Adobe PDF indexing you will need to install Adobe PDF iFilter found on Adobe’s web site.
Click ‘Next’ to continue.
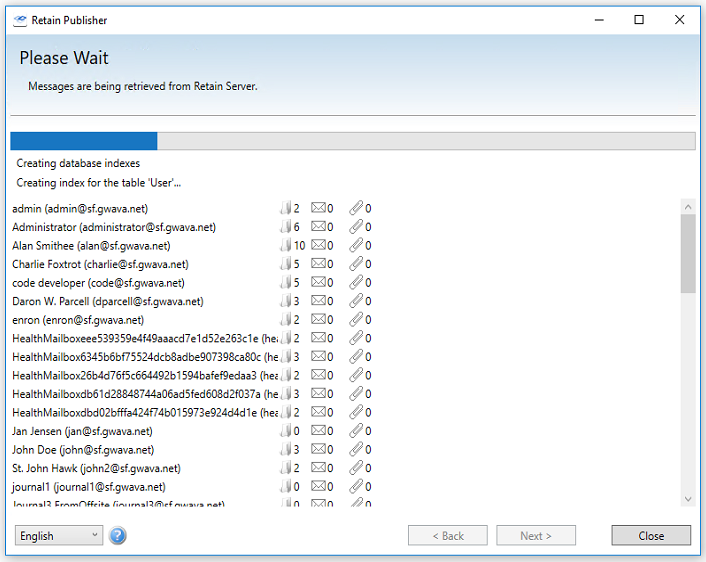
The Publisher will connect to the Retain Server and export the qualifying messages from the selected user(s) mailboxes and builds the local archive.
When the Publisher is done, it will display a report on the job. Depending on whether the exported archive was selected to be indexed after the job is done, the indexer will run. A.net error may occur at the end of Indexing, caused by an error in Adobe iFilter, if this error occurs, please install the latest Adobe PDF iFilter found on Adobe’s web site.
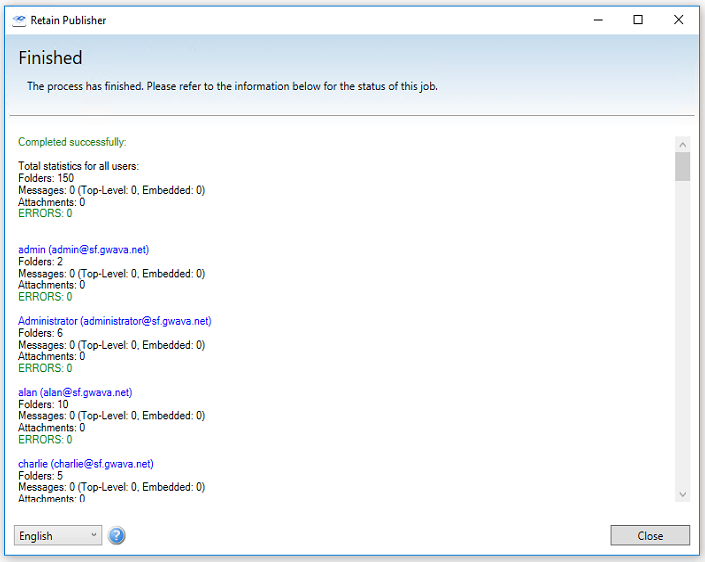
Select ‘Close’ to exit the publishing wizard and the indexer will automatically run if that option was selected. With a successful publishing job, the archive is now ready to be connected to the Viewer.