13.2 Using the SDM GUI
13.2.1 Prerequisites
There are several prerequisites to running the SDM GUI:
-
The user must know the following information:
-
Name and password for the Sentinel Database User (dbauser by default)
-
Database host server
-
Database (instance) name
-
Port used for database communications (the default port number is 5432)
-
13.2.2 Starting the SDM GUI
Using the Command Line Option
-
Log in to the machine as dbauser.
-
Go to <install_directory>/sdm
-
Enter the following command:
./sdm
Using the Web Interface
-
Log in to the Sentinel Rapid Deployment Web interface, then click .
-
For more information, see Section 1.1, Accessing the Novell Sentinel Web Interface.
-
Click
-
Open the SDM with the Java Web Start Launcher.
-
Specify the server, database, host, and port number.
-
Specify the user credentials and click .
To run the SDM from the command line, see Section 13.3, Using the SDM Command Line.
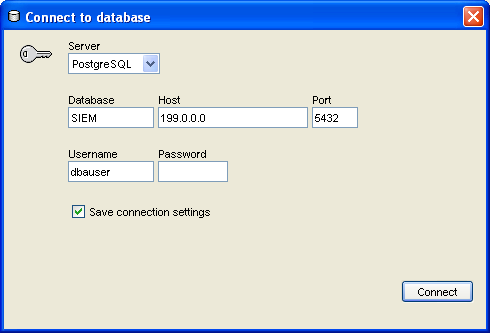
13.2.3 Connecting to the Database
-
Log into the machine that has the SDM installed.
If the Sentinel Database Administrator account uses Windows Authentication, you must log into the SDM machine by using the Sentinel Database Administrator account.
-
Start the SDM GUI, using the appropriate procedure:
-
Select the database type.
-
Specify the database instance name used during the Sentinel database installation.
-
Specify the database host (hostname or IP address).
-
Specify the port used for database communications.
-
If you are using PostgreSQL Server authentication, specify the Sentinel Database Administrator username and password.
If you select to save your connection settings, the settings are saved to the local sdm.connect file. By default the sdm.connect file is located in <install_directory>/bin. Next time you start the GUI, the connection settings are repopulated from the sdm.connect file. This file can be used when you run the SDM from the command line.
-
Click . The SDM is now ready for use.
13.2.4 Partitions Tab
The Sentinel database is partitioned by time to simplify maintenance and improve the performance of the database. The tab in the SDM allows users to view and manage database partitions for the tables that hold event data, correlated event data, and summary data.
To view partitions in the GUI:
-
Click the tab.
-
In the drop-down list, select the table you want to see.
The SDM displays the partitions of the currently selected database table.
Each row in the Segments table displays the related database table, time range, status and the name of the partition.
The status of each of the partitions shown in the stegments table has one of the following states:
Table 13-1 Partition States
NOTE:If you delete a partition without archiving it, it is deleted from the partition list in the GUI.
Figure 13-1 Sentinel Data Manager
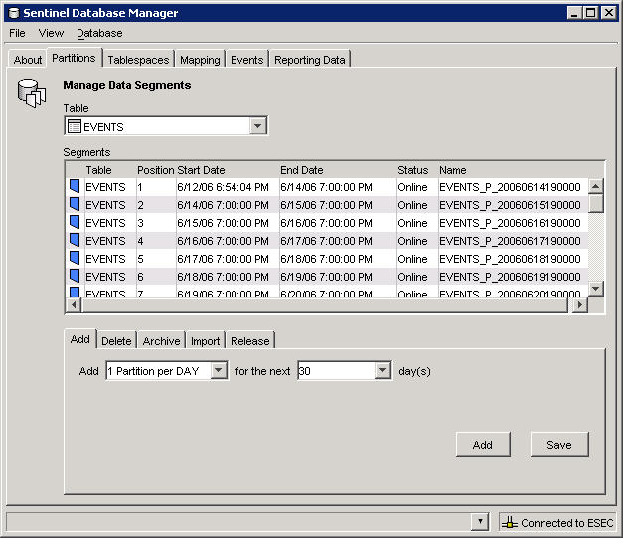
At the bottom of the Partitions page, there are several smaller tabs that allow the user to perform the following operations:
-
Add empty partitions to the database
-
Delete partitions from the database
-
Archive data from partitions to flat files in a specified, preexisting directory
-
Import partitions
-
Drop partitions
Many of these operations can be executed automatically in the database by using stored procedures, but this page allows the administrator to perform these tasks manually.
To manage partitions:
-
Click the tab.
-
Select the table in the drop-down list.
Sentinel partitioned tables are organized into two groups. One is the EVENTS table group, which includes EVENTS and CORRELATED_EVENTS; the other is the summary table group, which includes all summary, or aggregate, tables. If any one of the tables in the group is selected, the changes apply to all the tables in the group.
-
At the bottom of the window, select the tab that relates to the operation that you want to perform : , , , or .
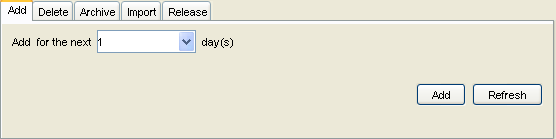
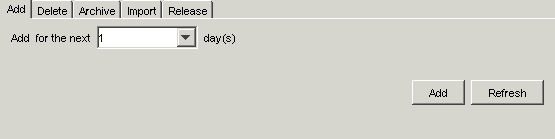
To add partitions
-
Select the partitions tab.
-
Specify the number of days to use for adding the partitions.
You can specify the number of partitions in in the SDM GUI.
-
Click .
To delete partitions:
-
Select the tab.
-
Specify the number of days after which older partitions will be deleted.
-
Click .
To import partitions:
-
Select the tab.
-
Select the partition in the Segment table into which the data will be imported.
You can specify the input directory in the field in the tab in the SDM GUI.
-
Click .
To release imported partitions:
-
Select the tab.
-
In the Segment table, select the partitions that need to be released.
-
Click .
Archiving Partitions
Events, correlated events, and aggregation (or summary) tables can all be archived by using the SDM. There are several requirements for archiving:
-
The directory to which the partitions are archived must already exist on the database server (not the machine running the SDM); the SDM does not create the directory.
-
You cannot archive the data to the /root directory.
-
You must have permissions to write to the archive directory.
To archive partitions:
-
Select the partitions tab.
-
Specify the number of days the older partitions are archived for.
You can specify the archive directory in the Archive Destination field in the Partition configuration tab in the SDM GUI.
-
Click .
13.2.5 Tablespaces Tab
The tab in the SDM allows users to view the current database space utilization, including:
-
Total space allocated for each tablespace
-
Space used by each tablespace
-
Space available (free) for each tablespace.
NOTE:
-
PostgreSQL does not allocate a maximum size for a tablespace. Typically tablespaces can grow up to the maximum free space available on a file system. Therefore, Sentinel Rapid Deployment allocates 100% of the free disk space for tablespaces at the time of installation, and is represented as the total space allocated for each tablespace.
-
The space used by each tablespace that is displayed is not correct. This is because, the space used by the tablespaces is only considered and does not include other files within that partition.
-
The free space available for each tablespace that is displayed is not correct. This is because the free space is calculated on the total available space with the space used only by the tablespace and does not include other files within that partition.
Figure 13-2 Sentinel Data Manager

Color-coded bar graphs help to visualize the total space allocated for each tablespace and the percent used of each tablespace.
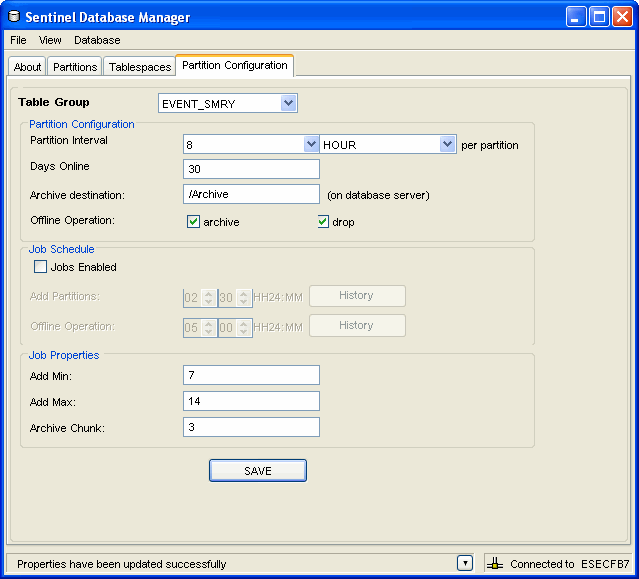
13.2.6 Partition Configuration
The tab in the SDM allows you to set parameters to auto-archive partitions. It also allows you to auto-add partitions.
To configure auto-archive parameters:
-
Click the tab. The Partition Configuration window displays.
-
Select the table group from the drop-down list.
-
Specify the following partition configuration information:
-
Partition Interval: Specify the number of partitions that should be created per day or per hour.
-
Days Online: Number of days of data to keep online in the database.
-
Archive destination: Specify the destination to store the automatically archived data and the manually archived data.
-
Offline operation: Select to archive or drop the data.
Data that is dropped without archiving cannot be retrieved by using the SDM. You should almost always select the archive option.
-
-
Specify the Job Schedule parameters:
-
Select check box if it’s not selected. By default, the check box is selected if you selected this feature during installation.
-
Schedule adding partitions and offline operation parameters. Click .
-
Click to view the Job History.
Partition Job scheduling through the SDM is reflected only after the partition job refresh interval.The default partition job refresh interval is 5 minutes.
To change the partition job refresh interval, edit the partitionJobRefreshInterval option specified in the <install_directory>/config/das_core.xml file. The partitionJobRefreshInterval option is provided as part of the Scheduler component in the DAS_Core container.
After you update the partitionJobRefreshInterval, restart the Sentinel service in order for the new refresh interval to take effect.
-
-
Specify the Job Properties:
-
Add Min: Minimum number of days of partitions for future data that should exist in the database at any time
-
Add Max: Maximum number of days of partitions for future data that should exist in the database at any time
-
Archive Chunk: Minimum number of days of partitions that apply to the total number of days of partitions for the Archive.
NOTE:If the fewer than Add Min days partitions exist in the database, partitions are added until there are enough partitions for Add Max days. Archiving is done in chunks of days so that these database operations are not necessary every day.
-
-
Click Save.
13.2.7 Managing Disk Space Allocation
The Sentinel Rapid Deployment installation allocates 70% of the free disk space available at the time of installation for database, and the value is specified in the diskSpaceAllocated property of the das_core.xml. If the database consumes more than what is allocated, the Sentinel services might halt. To monitor such incidents, a scheduler job has been created in the Sentinel services. The scheduler job monitors the disk space for threshold. There are two thresholds for the disk space. The value for the lower threshold is 85% and for the upper threshold it is 95% of the disk space allocated.
The scheduler job runs based on the value specified in the dbStatsInterval property of the das_core.xml. When the database/tablespace size reaches the threshold limits, Sentinel Rapid Deployment system warns you of the disk space limit and behaves as follows:
Lower Threshold: When database/tablespace size reaches 85% of the disk space allocated, the Sentinel Rapid Deployment system warns you with an internal audit event indicating the limit. These are logged as internal audit events with severity 4.
Upper Threshold: When the database/tablespace size reaches 95% of the disk space allocated, Sentinel Rapid Deployment system removes the oldest partitions for each partition group until database/tablespace size falls below the threshold level (85%), and also sends an internal audit event for each partition dropped.
NOTE:Sentinel Rapid Deployment does not attempt to remove the online current partition.