
All requests, be they Incidents, Service Requests or Change Requests, logged by the Technician on behalf of the Customer, or requests submitted by a Customer or their Organizational Unit can be viewed within the Requests tab of the Customer Portal.
The Home tab displays all Open and Pending requests, whereas the Requests tab lists all requests logged against Customer Items regardless of their Status. This list also includes all requests that have been closed. Requests within this tab are listed with the most recent request logged appearing at the top of the list.
To view the details of a request:
Click on the Request
number hyperlink to open the Request Details screen
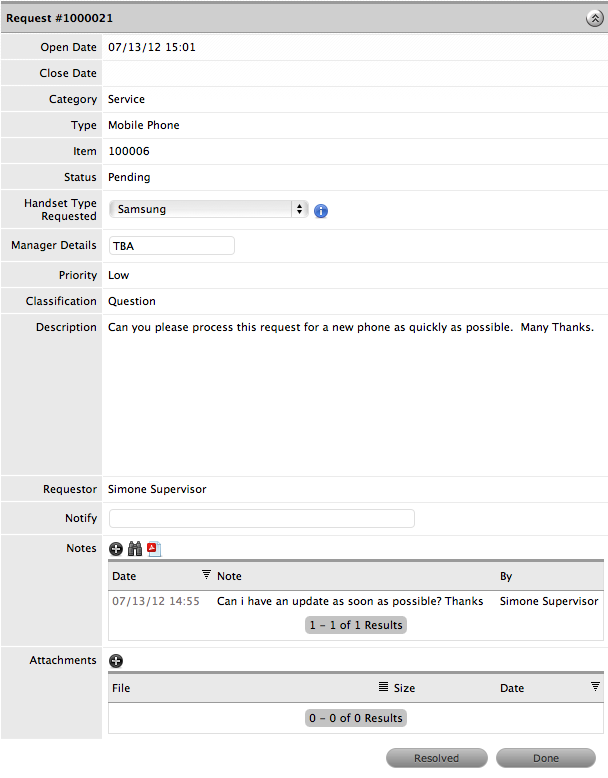
Click Done button to return to the Request list.
Customers can add Notes or Attachments to requests with a status of Open or Pending, if the View & Edit option has been set for the Incident, Change or Service Request Process within the Admin>Setup>Privileges>Customer tab.
To add request Notes or Attachments:
Click on the Request number hyperlink to display the Request details
Click ![]() ,
in either the Attachments or Notes field
,
in either the Attachments or Notes field
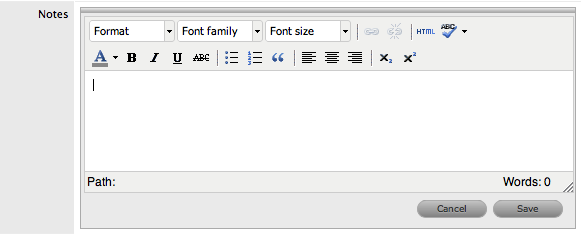
Add or edit the Notes and/or Attachments
Update the Notify field email addresses, if relevant
Click Save.
Notes that have been created for a request can be viewed by Customers.
To view Public or Customer created Notes:
Select Requests tab
Click on the Request's
number hyperlink
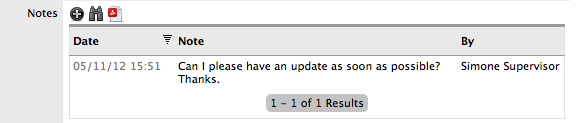
Click ![]() to display the contents of all Notes in a pop-up window
to display the contents of all Notes in a pop-up window
Click ![]() to close the expanded window.
to close the expanded window.
To respond to
a Note, select the relevant Note time/date stamp link
The request Note screen expands to display the content.
Click ![]() to reply to the Note
to reply to the Note
Add the reply content and save to send the Note to the Technician.
Click Cancel to close the Note
Click Done to return to the Requests list.
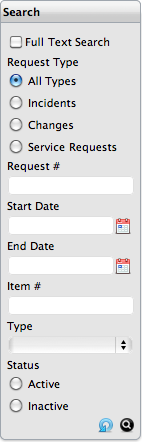
To search for a request, Customers can
use the search option within the Requests list. To conduct a Full Text
Search, the option should be marked and the Search Term completed. (See:
Full Text Search.)
To search for a specific Request Type, select the Incidents, Changes or
Service Requests option. Selecting an option will also display any custom
fields search options that are active for the selected Request Type. The
search parameters can be narrowed by completing the Dates fields, entering
a request or Item number, defining the Item Type or defining if the request
is Active or Inactive in the system.
To close an Open or Pending request:
Click the request
number hyperlink
The request details are displayed.
Click ![]()
The request is closed and the Solution
field is displayed.

Enter details
as to why the request is being closed
If the Cancel option is selected within the Solution field, the request
will move to the default Closed state for the assigned Workflow, with
no Solution recorded for the request.
Click ![]()
The details will be saved as a Note that can be viewed by the User
working on the request. The request status will be changed to the
default Closed state for the assigned Workflow.
Click Done to return to the Requests list.
This option is relevant for Help Desk Customers only.
Customers can re-activate requests after they have been closed, if the Administrator has enabled the option in the system Setup.
To re-open a request that has been closed:
Click on the closed request number hyperlink
Click the Reopen button at the base of the request details screen
Enter information as to why the request is being re-opened
Click Save.
This information provided is converted into a request Note. The User
allocated to the request is notified that the request has been re-opened.