6.0 Upgrading Novell Service Desk Appliance
This chapter contains information about upgrading your existing implementation of Novell Service Desk that runs on the appliance.
NOTE:
-
Ensure that you have a verified backup of your existing appliance, and, if applicable, the external database.
-
The /Livetime folder contains few important files, ensure that you have taken the backup of /Livetime folder for the Appliance before upgrading.
-
If you are using Customized Banners in Novell Service Desk then, take backup of the contents in webapps\LiveTime\images\banners\custom folder before upgrade and later replace it with existing folder after the upgrade.
Scenarios Supported for Upgrade
-
Side-by-Side: This is a scenario where you have two appliances running simultaneously, an existing Novell Service Desk appliance and another new appliance. The Novell Service Desk configuration and data is transferred to the new appliance which then becomes your production environment. Your old appliance is shutdown and no longer used.
Side-by-Side Upgrade
-
Deploy the Novell Service Desk Appliane 7.0 on a VMware ESX Server and configure the network.
-
Connect to the Novell Service Desk Appliance by using the VMware ESX console.
-
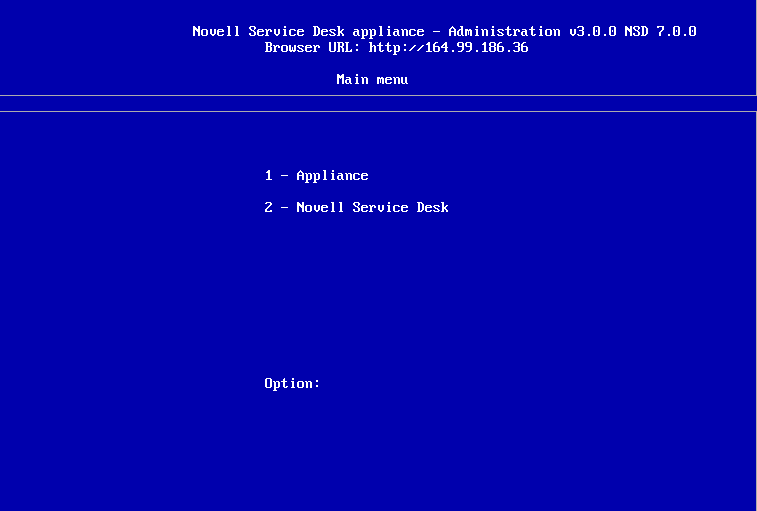
In the Novell Service Desk Appliance 7.0 main menu, select .
-
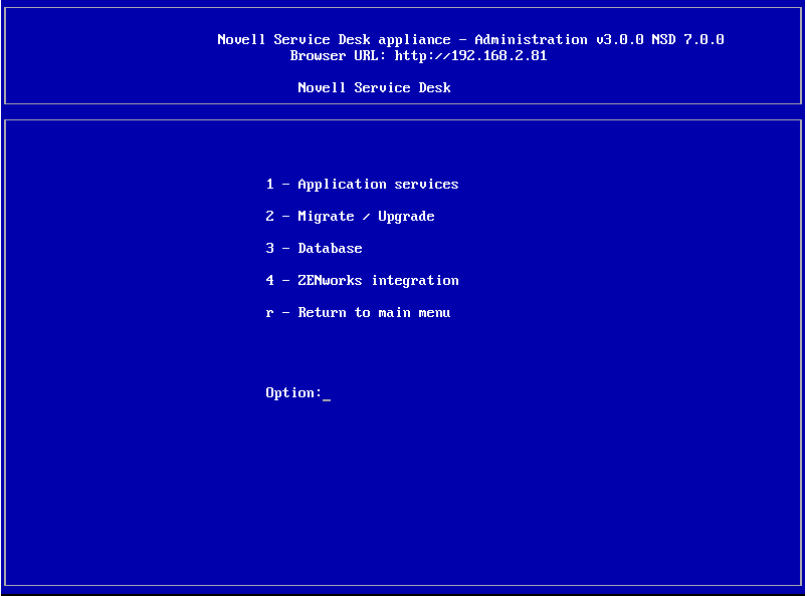
Select .
-
If you are using an external database, select .
Or
If you are using the internal embedded database, select .
-
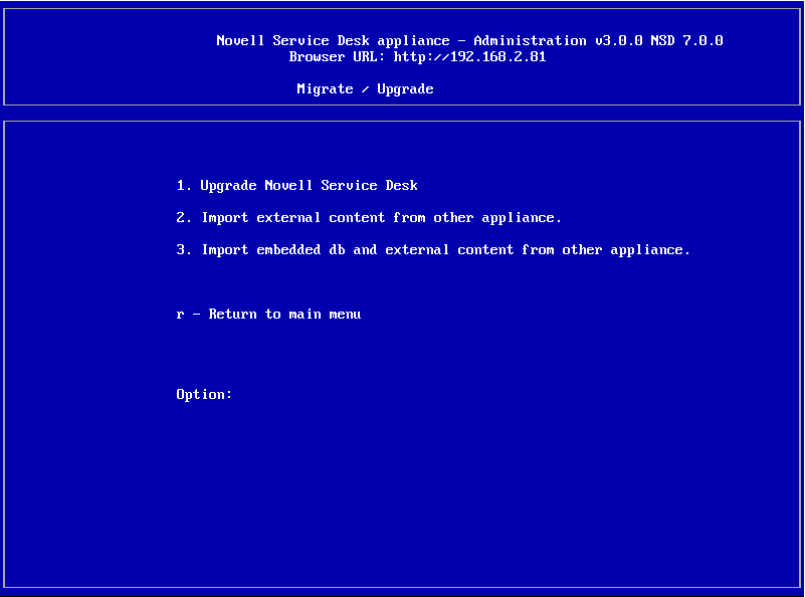
Enter the IP address of your existing Appliance Server.
-
Follow the instructions on the wizard by answering Yes to all questions.
-
After the upgrade is complete, connect to Novell Service Desk Appliance 7.0 and enter your database connection details.
If you are using embedded database, the connection details are as follows:
Parameter
Value
Database Type
PostgreSQL
Server Host
127.0.0.1
Server Port
5432
Database
nsd
User name
nsd
Password
linux
-
Click to ensure that the database connection is correct.
-
Click .
-
Click twice.
-
Click when the migration is complete.
A message informing you to enter a new license appears. You can find these details in NCC.
In-Place Upgrade
-
Deploy the new Novell Service Desk Appliance 7.x on the VMware ESX Server and configure the network.
-
By using the VMware ESX console, connect to the production Novell Service Desk Appliance.
-
In the production Novell Service Desk Appliance main menu, select .
-
Select .
-
Select .
-
Enter the IP address of the new Novell Service Desk Appliance 7.x Server.
-
Follow the instructions on the wizard by answering Yes to all questions.
-
After the upgrade is complete, connect to the production Novell Service Desk Appliance 7.0 and re-enter your database connection details.
If you are using the embedded database, the connection details are as follows:
Parameter
Value
Database Type
PostgreSQl
Server Host
127.0.0.1
Server Port
5432
Database
nsd
User name
nsd
Password
linux
-
Click to ensure the database connection is correct.
-
Click .
-
Click twice.
-
Click when the migration is complete.
A message informing you to enter a new license appears. You can find these details in NCC.