3.5 Running the NSM Migration Utility
This procedure creates the file for exporting your policies and deferred delete events from your Novell Storage Manager 2.5x NSM Engine.
-
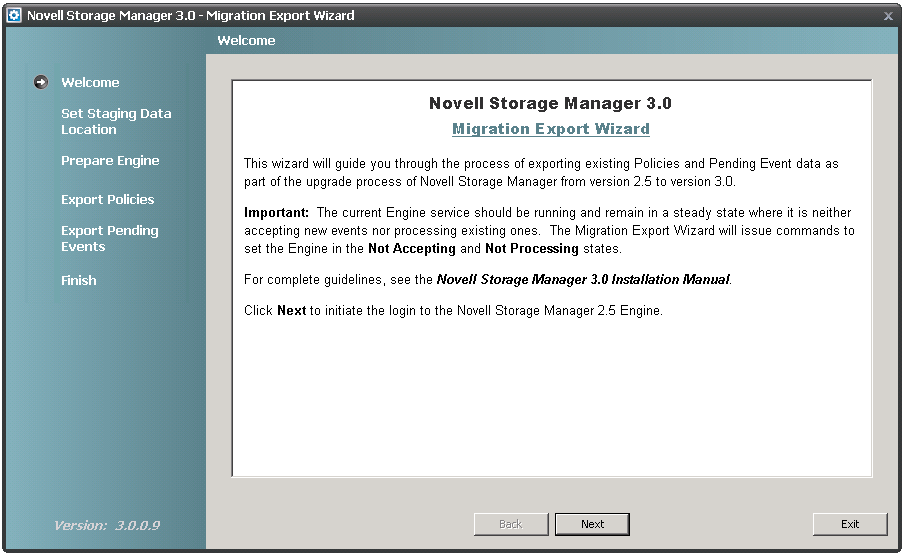
At workstation where you installed NSMAdmin, click .
This launches a migration wizard.
-
Read the text and click .
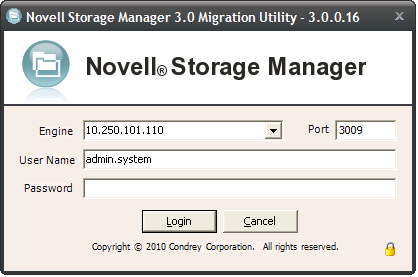
The following login window appears:
-
Log in to the server hosting the Novell Storage Manager 2.5x NSM Engine by specifying the server’s DNS name or IP address in the field, specifying the port number, administrator name, and password, then clicking .
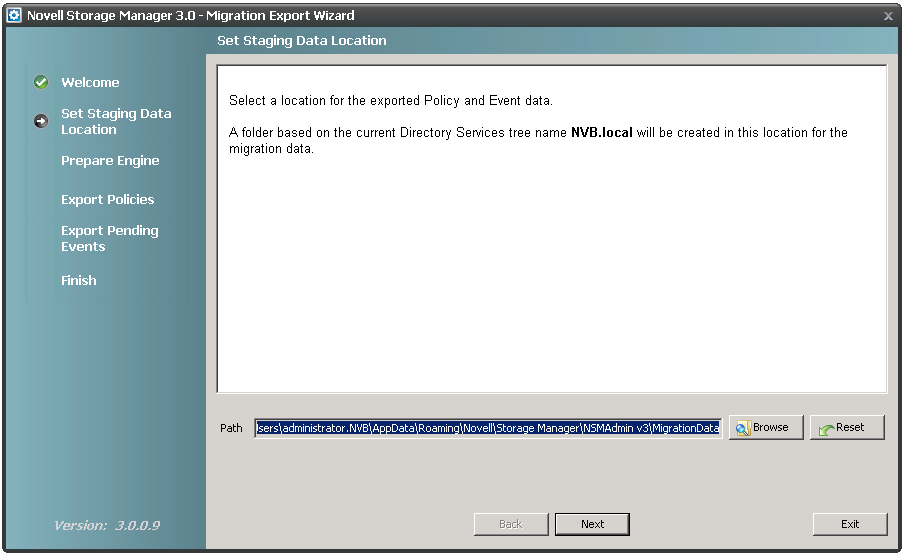
The following page appears:
-
Accept the path where the migration file will be stored, or indicate a new one by using the button, then click .
Unless you change the default path, the path appears automatically when you import the migration file through the NSMAdmin Setup Wizard.
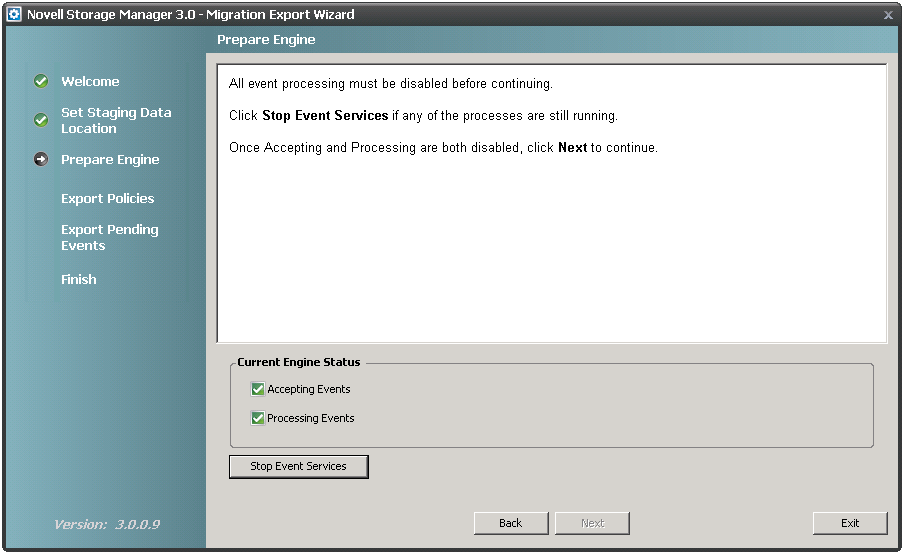
The following page appears:
-
Click , then click .
This stops the Novell Storage Manager 2.5x NSM Engine from accepting and processing events.
-
Click .
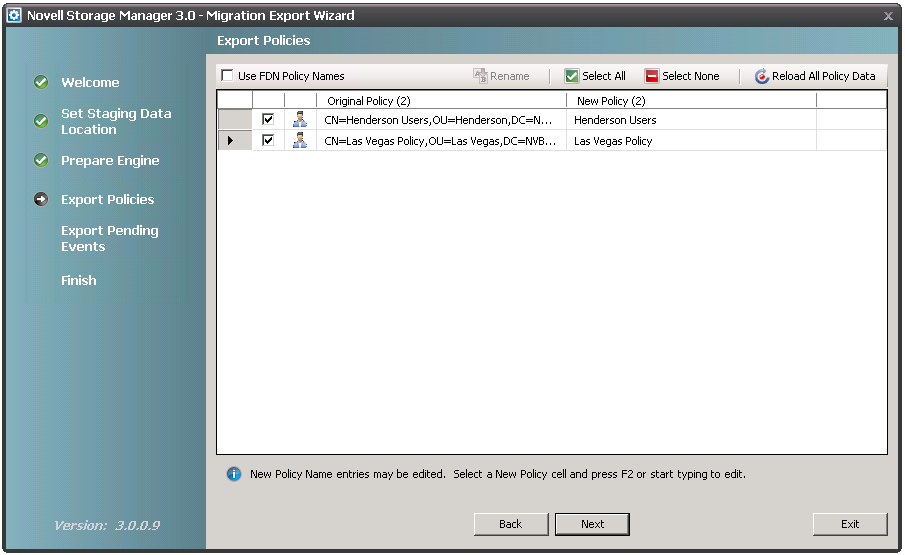
A page similar to the following appears:
-
Indicate the Novell Storage Manager 2.5x policies you want migrated by leaving the corresponding policy check boxes selected.
You can rename a policy before migrating it by editing the name listed in the column. Clicking the check box displays the fully distinguished name, which you can also edit.
If you have a policy displayed with a red error symbol, this indicates that the policy cannot be exported. Typically, this is due to a missing policy type attribute, possibly from a policy created before the release of Novell Storage Manager 2.5x that was updated but did not properly convert to the Novell Storage Manager 2.5x environment.
Once you have fixed these policies to conform to Novell Storage manager 2.5x standards, you can run the Migration utility again. If the polices do no appear, click .
At this point in the migration, if you quit and restart the Migration utility, any changes or edits (such as policy renames, and selection of policies to import) that have been performed are actually saved and reloaded the next time you run the Migration utility. However, if you add any new policies or fixed any, those changes may not show up on a subsequent run of the Migration utility until you click.
-
Click .
The wizard exports the policies to the migration file and indicates when the export is complete.
-
Click .
The wizard exports the deferred delete events to the migration file and indicates when the export is complete.
-
Click .
A concluding wizard page appears with procedures for importing the migration file to the Novell Storage Manager 3.1.1 NSM Engine.
-
Read the summary of procedures and click .
-
Proceed with Section 3.6, Unloading Novell Storage Manager 2.5x Event Monitor Components.