3.16 Configuring an NSM Agent
-
From the server where you installed the NSM Agent, launch a terminal session by selecting .
-
Type nsmagent-config and press Enter.
The console is updated and looks similar to the one below.
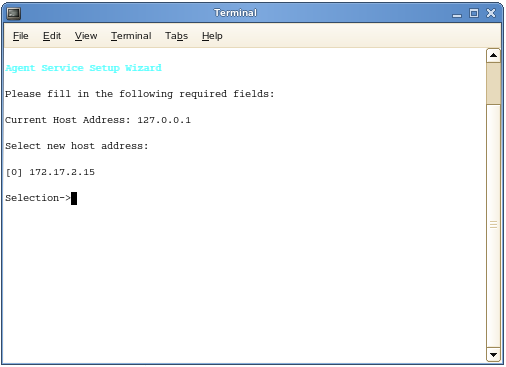
If your server has multiple NIC cards, multiple IP address options are listed.
-
Specify the IP address option you want (such as 0 in the example above) and press Enter.
-
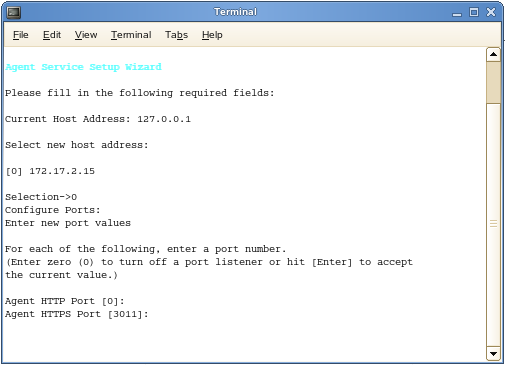
When the HTTP Port [0] option appears, type 0 and press Enter.
The console is updated and looks similar to the one below.
-
Accept the port setting of 3011 by pressing Enter.
-
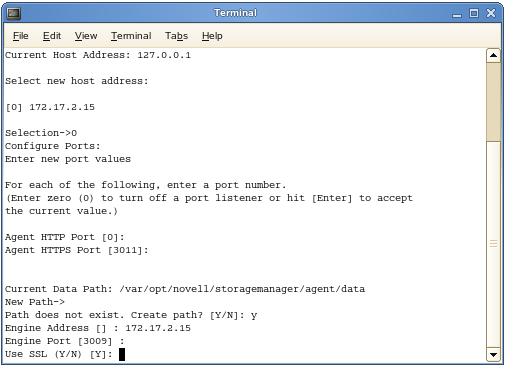
Accept the default data path by pressing Enter.
-
When you are asked if you want to create the new data path, press y for yes.
-
When you are prompted for the engine address, specify the IP address for the server hosting the NSM Engine.
-
Accept the 3009 port setting for the NSM Engine by pressing Enter.
The console is updated and looks similar to the one below.
-
When you are asked if you want to use SSL, press y for yes.
-
When you are asked if you want to start the service, press y for yes.
This starts the NSM Agent.
-
Press Enter to continue.
The console is updated and looks similar to the one below.
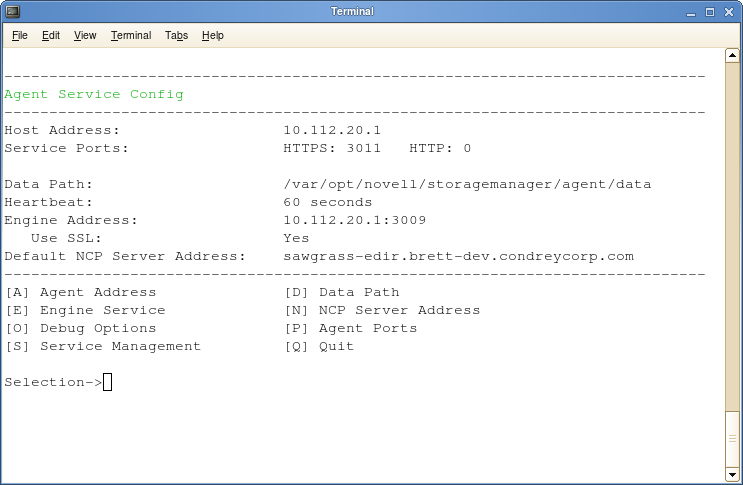
At this point, you can navigate through the menu to see how to perform management tasks when necessary.
-
Press q to quit.