8.2 Setting Up Login Restrictions
Login restrictions are limitations you set on user accounts in order to control access to the network. These restrictions can be set in Novell iManager for each user and include the following:
-
Requiring a password. You can specify its minimum length, whether it must be changed and how often, whether it must be unique, and whether the user can change it. You can also require strong passwords. See Section 6.0, Managing Passwords.
-
Setting the number of logins with an expired password and the number of incorrect login attempts allowed.
-
Setting account limits such as an account balance or expiration date.
-
Limiting disk space for each user by specifying the maximum blocks available for each user on a volume.
-
Specifying the number of simultaneous connections a user can have.
-
Specifying (by node address) which workstations users can log in on.
-
Restricting the times when users can log in (you can assign all users the same hours, or you can restrict users individually).
When a user violates login restrictions by entering an incorrect password or by exceeding the number of logins with an expired password, the account is disabled and no one can log in using that username. This prevents unauthorized users from logging in.
To manage user login restrictions:
-
Launch iManager by entering the following in the field of a network browser:
http://server_IP_address/iManager.html
-
Log in using your username and password.
You will have access only to those features you have rights to. To have full access to all Novell iManager features, you must log in as Supervisor/Administrator of the tree.
-
Make sure you are in the Roles and Tasks view by clicking
 on the top button bar, then select in the navigation panel on the left.
-
Type the name and context of the User object you want to modify, or use the search feature to find it, then click .
-
Click the tab (or drop-down list, depending on the browser you are using).
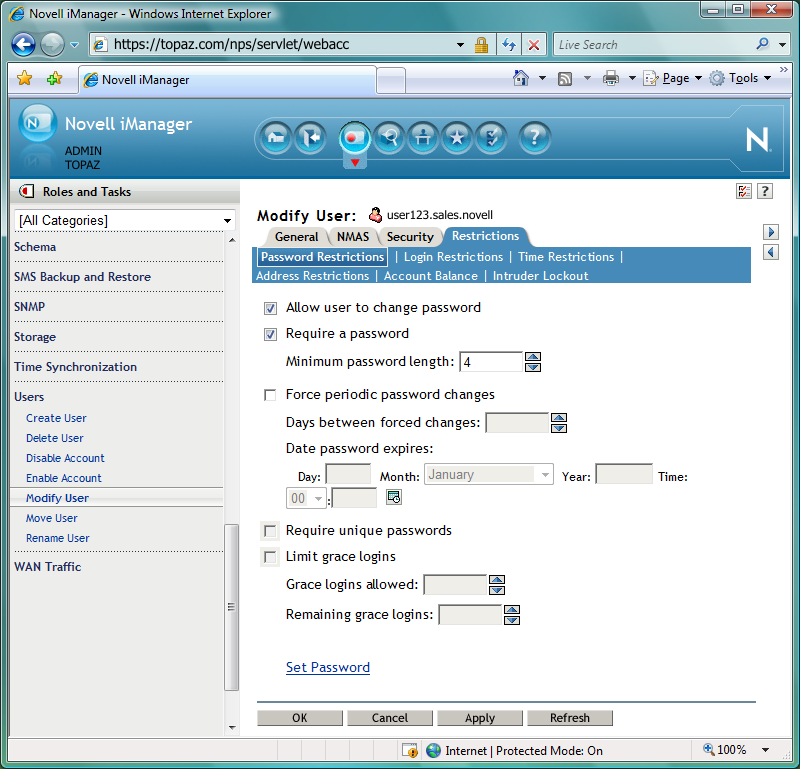
The following options appear. They open pages that display various properties:
-
Password Restrictions
-
Login Restrictions
-
Time Restrictions
-
Address Restrictions
-
Account Balance
-
Intruder Lockout
-
-
Make your changes, then click to preview or to save.