2.4 Enabling Single Sign-On with Windows
Users authenticate to both the ZENworks PBA and the Windows operating system. You can enable single sign-on so that the user logs in to the ZENworks PBA and the PBA handles the login to the Windows operating system. This, of course, requires that the user’s PBA and Windows credentials are the same. Single sign-on applies to both authentication methods (user ID/password or smart card).
If you are using ZENworks login to enable policies and bundles to be applied to users as well as devices, and you have configured ZENworks login for single sign-on with your Windows login, single sign-on works for all three logins. When a user logs in to the ZENworks PBA, the credentials are passed to the Windows login and then the ZENworks login.
Refer to the following sections for information on enabling single sign-on.
NOTE:With managed Windows 7 devices, the user may be required to press Ctrl+Alt+Del within one minute after authenticating with PBA for single sign-on to work. For security reasons, single sign-on might not authenticate the Windows login on some devices with Windows 7 operating systems without taking this measure. In this scenario, the user can still log in with their Windows credentials if single sign-on is skipped.
2.4.2 Configuring Windows Login
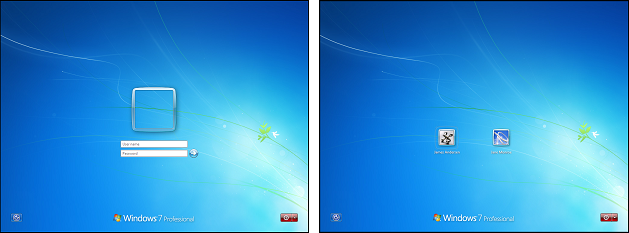
Single sign-on supports both the classic Logon screen mode (left screen shot) and the Welcome screen mode (right screen shot). As long as a device is using one of these two modes, single sign-on works as soon it is activated in the policy and the policy is applied to the device.
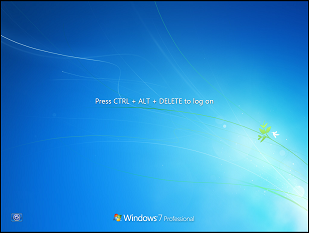
Single sign-on also supports Secure Logon (shown below) in both of these modes. However, as with the standard Windows login process, the user must press Ctrl+Alt+Delete to dismiss the Secure Logon screen before the single sign-on process can continue.
If single sign-on is failing on a device, we recommend that you set the device to use the classic Logon screen without Secure Logon. In addition, we recommend that you set the option to Enabled so that the Logon screen is not automatically populated with the user name of the last person to successfully log in.
To configure these settings locally on a Windows device, log on to the device as an administrator and do the following:
-
Set the classic Logon screen mode:
-
Click , and enter gpedit.msc in the search box to open the Local Group Policy Editor.
-
In the editor, expand > > > > .
-
Double-click .
-
Select , and click .
-
-
Disable Secure Logon:
-
Click , and enter netplwiz in the search box to open the User Accounts dialog box.
-
Click the tab.
-
In the Secure logon section, deselect if selected, and click .
-
-
Enable the Do Not Display Last User Name setting:
-
Click , and enter secpol.msc in the search box to open the Local Security Policy.
-
Go to > .
-
Double-click
-
Select , and click .
-
Windows 8
-
Set classic Logon screen mode:
-
Right-click , and select to open the Search pane.
-
Enter gpedit.msc in the search box to open the Local Group Policy Editor.
-
In the editor, expand > > > > .
-
Double-click .
-
Select , and click .
-
-
Disable Secure Logon:
-
Enter netplwiz in the search box to open the User Accounts dialog box.
-
Click the tab.
-
In the Secure logon section, deselect if it is selected.
-
Click .
-
-
Enable the Do Not Display Last User Name setting:
-
Enter secpol.msc in the search box to open the Local Security Policy.
-
Expand > .
-
Double-click .
-
Select , and click .
-
Windows 10
-
Set classic Logon screen mode:
-
Enter gpedit.msc in the search box on the Taskbar to open the Local Group Policy Editor.
-
In the editor, expand > > > > .
-
Double-click .
-
Select , and click .
-
-
Disable Secure Logon:
-
Enter netplwiz in the search box on the Taskbar to open the User Accounts dialog box.
-
Click the tab.
-
In the Secure logon section, deselect if it is selected.
-
Click .
-
-
Enable the Do Not Display Last User Name setting:
-
Type secpol.msc, and then click to open the Local Security Policy.
-
Expand > .
-
Double-click .
-
Select , and click .
-