7.3 Create a Custom Patch
The Patch Wizard assists in selecting existing patch bundles and modifying patch details to create a custom patch. If you are not using an existing bundle, you will need to create a bundle of the patch contents before creating a customized patch. For more information, see Creating Bundles
in the ZENworks Software Distribution Reference.
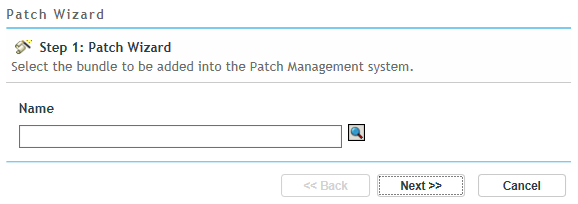
When you select the menu item on the Patches page or Recently Released Patches panel, the Patch Wizard appears as shown below:
To create a customized patch:
-
Click the menu item on the Patches page to open Step 1 of the Patch Wizard.
-
Click the icon and navigate to the desired bundle in the Browse for Folder dialog box.
-
After selecting the desired bundle, click to confirm the bundle selection and then click .
NOTE:You can associate only one bundle with a patch.
-
Click Next to advance the Wizard to Step 2 to where you can add or modify details about the patch. Any of the fields can be modified.
-
Add new details and modify existing details about the patch if required, and click Next.
-
Step 3 of the Patch Wizard displays the patch name and a summary about the patch. Click Finish if you are satisfied with the new patch.
NOTE:After creating a new patch, you cannot immediately deploy it to the applicable devices. A subscription update is required to complete after the custom patch is created in ZENworks Control Center. After the subscription update, a new Discover Applicable Updates (DAU) bundle version is created with the custom patch information. Applicability of the new custom patches to the managed devices will be based on their bundle system requirements evaluation after the DAU bundle is successfully applied and patch scan is completed.