1.6 Organizational Units
Customers can be assigned to a Company within the system. This can be refined by allocating the Customer to a Department, and if relevant, to a specific Room. This information is stored within the Organizational Unit details.
NOTE:Companies can exist without Departments, but Departments and Rooms can only be created as part of Company information.
Technicians can also be assigned to service specific Organizational Units.
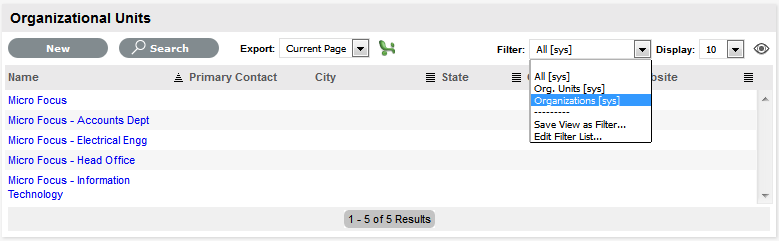
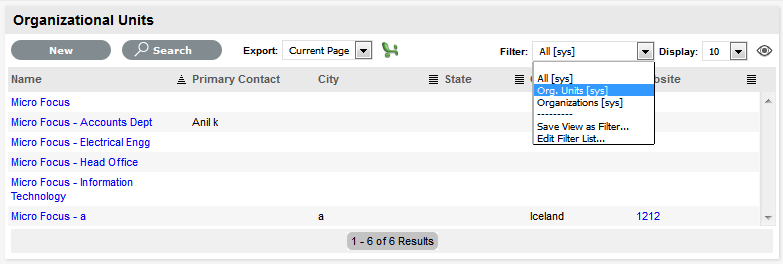
1.6.1 Organizational Unit Filters
The Organizational Unit list can be filtered to display the following views:
|
System List Filters |
Description |
|---|---|
|
Organizations |
Shows the Companies supported by the service desk. |
|
Org. Units |
Lists all Departments included within Companies. |
|
All |
Lists complete Org Units, with Company and Department names. |
To change the List View, select the relevant option from the Filter list.
1.6.2 Organizational Units and External Authentication
Organizational Unit relationships can also be mapped from an authentication server. By default this is not enabled. To activate Customer Organizational Unit mapping, as an Administrator go to the Advanced tab for the selected authentication server within Admin>Setup>Authentication. Select Yes for the Import Customer Organizational Units option.
NOTE:The details of the Org. Units are not populated upon this synch, only the Org Unit names. For the Org Unit details to be assigned to Customer or User Information, create the Org Unit in the Supervisor>User>Org Units tab and ensure the Org Unit name is identical to what is stored in the authentication server. If the details are not identical, the system will create another Org. Unit.
1.6.3 Details Tab
Use the Details tab to create an Organizational Unit.
Creating an Organizational Unit
To create an Organizational Unit:
-
Select User>Organizational Units
-
Click New
-
Complete the Organizational Unit Name
-
Select Organizations or Org. Units within the Filter drop-down list
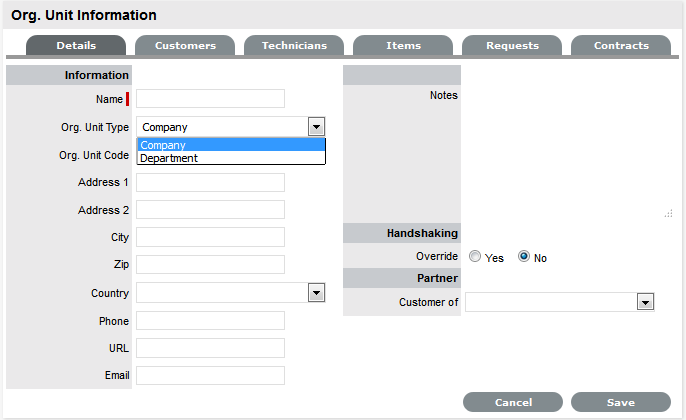
-
Enter other details, if required
-
Select Handshaking override option, if relevant
If the System Default Handshaking Close Action days is to be adjusted for the Org. Unit, select Yes in the Handshaking Override field. Enter the number of Days to lapse before a request will close if the Customer does not respond to the handshake email notification.
-
If appropriate, set the Partner Organization
(The Partner Organization is an external service provider that includes Partner Users who can manage requests logged with the system for Customers associated with the Company or Department being created.)
-
Click Save.
Primary Contact
When multiple Customers are assigned to an Organizational Unit, a Primary Contact person can be allocated for the Org Unit. This is the preferred person the Service Desk will contact for issues relating to the Org Unit.
To assign a Primary Contact:
-
Select User>Organizational Units
-
Select an Org Unit Name
The Details tab is displayed. If Customers have been assigned to the Org Unit a Primary Contact field will be visible.
-
Within the Details tab, click Edit
The Find Customer box is displayed. (Note that this search is only visible when Customers have been assigned to the Org. Unit)

-
Search for the Customer
To view all available Customers click Search without entering a Customer last name in the search field.
-
Click the Customer name to assign them as the Primary Contact
-
Click Save.
Default Item
When an Organizational Unit owns multiple Items, within the Default Item field an Item can be used as the one to be automatically applied to all requests created via email for the Organizational Unit.
To assign a Default Item:
-
Select User>Organizational Units
-
Select an Org Unit Name
The Details tab is displayed with the Default Item visible at the bottom of the first column.
-
Within the Details tab, click Edit
The Find Item box is displayed.
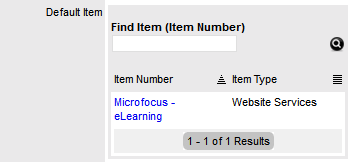
-
Search for the Item
To view all available Items click
 without entering an Item Number in the search field.
 -
Click the Item Number link to assign it as the Default Item
-
Click Save.
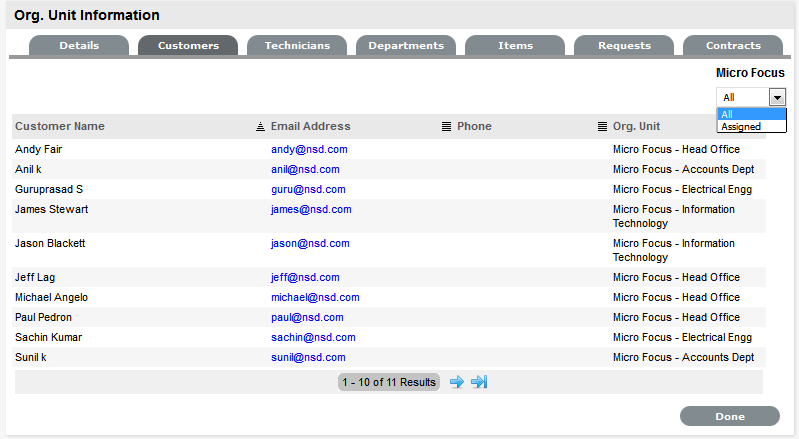
1.6.4 Customers Tab
This tab displays all Customers assigned to the Organizational Unit. Customers cannot be added within this screen, as they are allocated to Org. Units when they are created or through the User>Customer>Customer Information screen. The list can be filtered based on Customers directly assigned to the Org. Unit, or all Customers associated with Company Org. Units including those associated with related Departments.
1.6.5 Technicians Tab
The Technicians tab allows support technicians to be assigned as key support staff for an Org. Unit. This means when requests are created, the system checks if the Item’s Organizational Unit has Technicians assigned to service its request. If so, the request is routed to a Technician assigned to the Org. Unit.
Assigning a Technician to an Organizational Unit
To assign a Technician to an Organizational Unit:
-
Select User>Organizational Units
-
Select Org Unit Name
-
Move to the Technicians tab
-
Click Edit
-
Click New
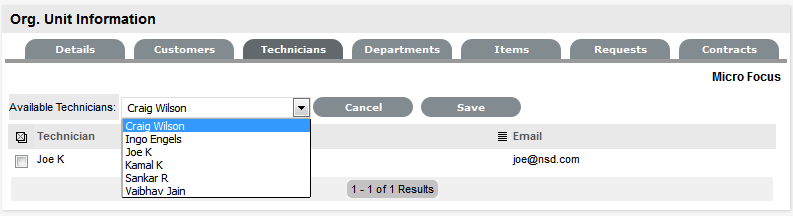
-
Select a Technician name from the drop-down list
-
Click Save
-
Select Done.
Deleting a Technician Assignment
To delete a Technician assignment:
-
Select User>Organizational Units
-
Select the Org Unit Name
-
Move to the Technicians tab
-
Click Edit
-
Tick the checkbox next to the Technician name
-
Click Delete
-
Click Done.
1.6.6 Departments Tab
The Departments tab allows Company group information to be refined. Departments are created for a Company within the Departments Tab.
Creating a Department
To create a Department:
-
Select User>Organizational Units
-
Select Org Unit Company Name
-
Move to the Departments tab
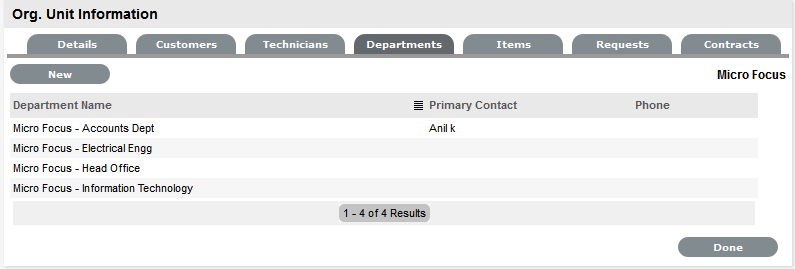
-
Click New
-
Enter the Department Name
-
Enter other details, if required
-
Select Handshaking override option, if relevant
If the System Default Handshaking Close Action days is to be adjusted for the Org. Unit, select Yes in the Handshaking Override field. Enter the number of Days to lapse before a request will close if the Customer does not respond to the handshake email notification.
-
Click Done
The system will move to the Department Editor, to allow Rooms to be added to the Department.
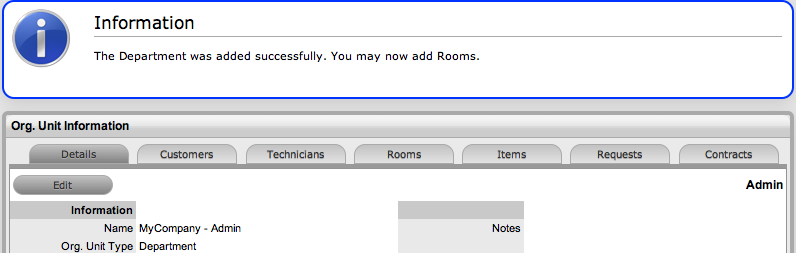
-
Select the Rooms tab if Rooms are to be added immediately
-
Click Edit
-
Select New

-
Enter the Room details
-
Click Save
-
Click New to add another Room or select Done.
Edit a Department
Department details are edited through theOrg. Units Filter of the Organizational Unit list.
To edit a Department:
-
Go to User > Org Units
-
Select the filter option Org.Units (sys)
-
Select a Department from the list provided
-
Click Edit
-
Modify the details as necessary
-
Select Save
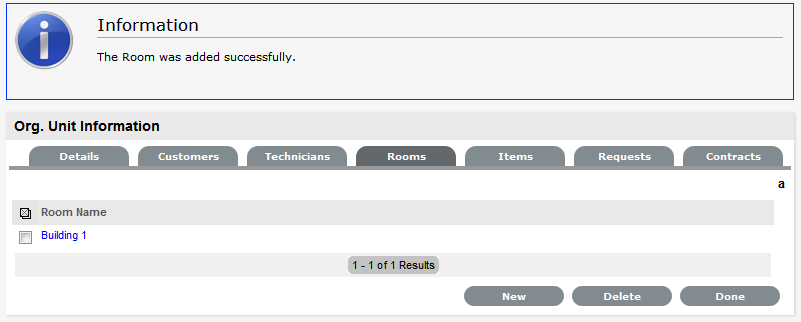
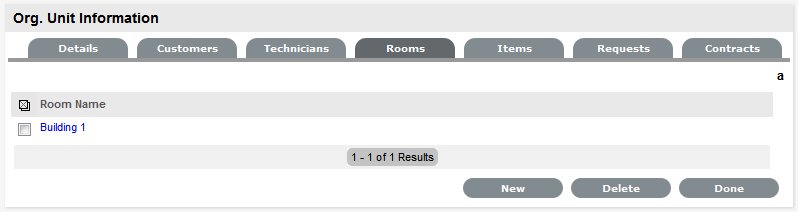
1.6.7 Rooms Tab
To expand Department details, Room locations can be created. This allows Customers to be assigned to specific locations within an Organizational Unit. The Rooms tab is only visible for Department Org Units that are accessed through the Org.Unit filter of the Org Unit list.
Adding a Room to a Department
To add a Room to a Department:
-
Within the Organizational Units list select the Org.Units filter
-
Select the relevant Department/Org.Unit link
-
Move to the Rooms tab
-
Click Edit
-
Click New
-
Enter the Room Name
-
Click Save
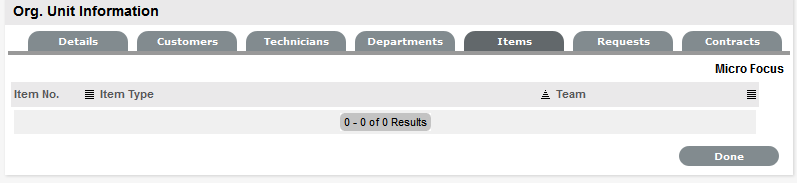
1.6.8 Items Tab
This tab lists all the Items that have been assigned to the Organizational Unit.
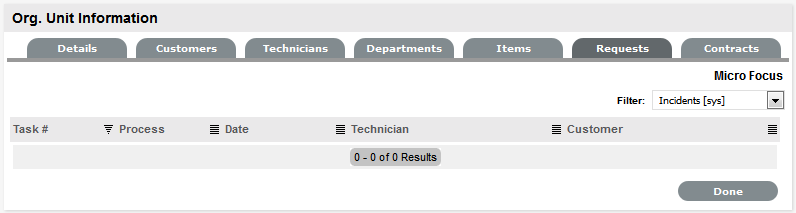
1.6.9 Requests Tab
This tab lists all requests generated by the Organizational Unit. To view or modify a request, select the Task# hyperlink.
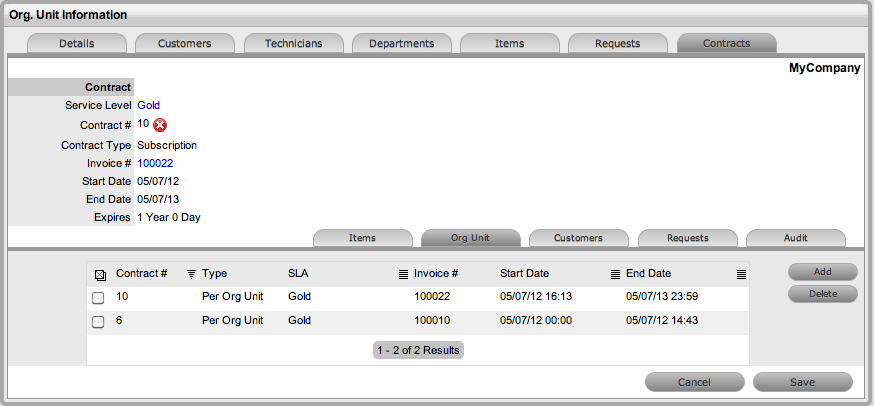
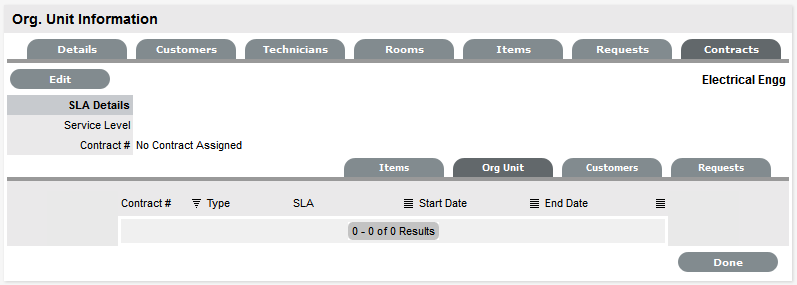
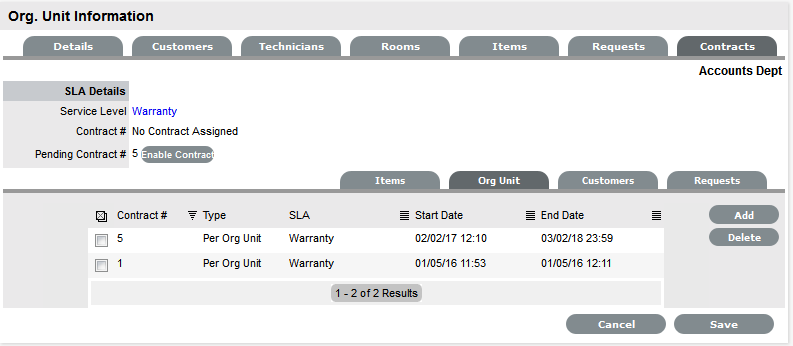
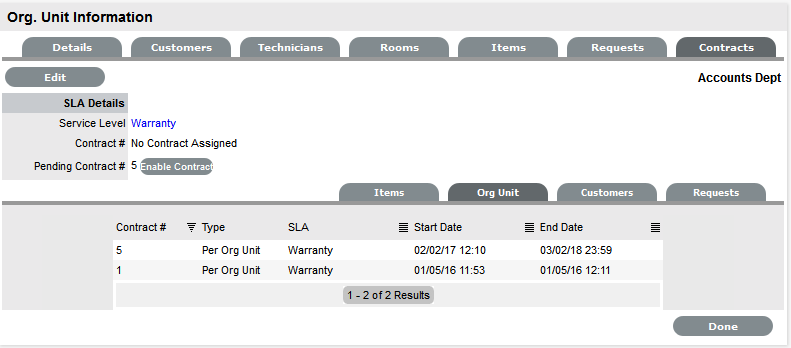
1.6.10 Contracts Tab
The Contracts tab displays an Organizational Unit's current contract status. An Organizational Unit can be assigned an SLA or, when Billing is enabled, a Contract that manages the period of time the SLA applies to the Org Unit. When Contracts are enabled, an Organizational Unit can have only one active Contract in the system at any one time and must have an assigned Primary Contact.
To update the Service Level assignment when Contracts are disabled:
-
User>Organization Units
-
Select the required Org Unit
The Org Unit Information screen will open.
-
Select the Contracts tab, click Edit
-
In SLA Details, using the drop-down menu, select the SLA
-
Select Save
When Contracts are in use throughout the application, timeframes are set for Service Levels and Contract history is displayed within the Contracts tab. It is also possible to assign a Service Level and/or Contract within the Contracts tab.
To create a new Contract for an Organizational Unit:
NOTE:To assign a Contract to an Org Unit, a Primary Contact must be nominated for the Org Unit or the system will prompt the User to assign a Primary Contact during the Contract assignment process. This means, prior to creating the Contract assign at least one Customer to the Org Unit and then designate a Customer as the Primary Contact. To assign a primary contact:
-
Select User>Organizational Units
-
Select an Org Unit Name
The Details tab is displayed. If Customers have been assigned to the Org Unit a Primary Contact field will be visible.
-
Within the Details tab, click Edit
The Find Customer box is displayed. (Note that this search is only visible when customers have been assigned to the org unit)

-
Search for the Customer. To view all available customers click Search without entering a customer last name in the search field
-
Click the Customer name to assign them as the Primary Contact
-
Click Save
To create a new Contract for an Organizational Unit:
-
Select User> Organizational Units
-
Select the Organizational Unit's Name
-
Move to the Contracts tab
-
Click Edit
The Add and Delete buttons become available with the Contracts>Org Unit tab.
-
Click Add
If a Primary Contact has not been assigned to the Org Unit a system prompt will notify the User to create a Primary Contact. See: Primary Contact.
-
Select a Service Level from the list
When selected, the screen expands to display start and end date fields.
-
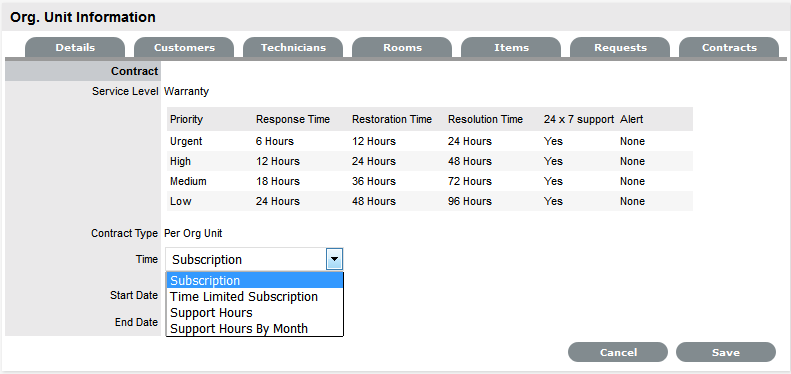
For the Per Org Unit Contract Type the Time Period for the Contract can be defined as one of the following:
Subscription if selected, the Start and End Dates are automatically set to a year from the date of creation, but can be edited if required.
Time Limited Subscription if selected, the Support Hours field is displayed and the number of support hours purchased by the Customer should be entered. Also, the Start Date and End Date fields should be completed manually by entering the length of time for the subscription period, or the system will default to entering a year from the date of creation.
Support Hours if selected, the number of support hours purchased by the Customers should be entered.
Support Hours by Month if selected, set the number of hours purchased per month and define which day of the month contract is to rollover to start the new month. The Total Support Hours will automatically be calculated based on the Start and End Dates set for the Contract.
(If a Contract is forward dated with a Start Date set in the future, the Pending Contract status is assigned. See Pending Contracts.)
-
Click Save
-
Click Next to continue
The system reverts to the Contracts summary screen, if the contract is forward dated and another contract is not already active, the Enable Contract option button will be available. Select this button if the contract is to commence prior to the set Start Date. Alternatively, other contracts can be queued for the Org Unit by selecting the Add button.
-
Click Save
To process the contract before the set Start Date select the Enable button.
-
Click Done.
A success message is displayed.


-
NOTE:If Invoices are enabled, a new invoice is automatically saved within the Finance>Invoices screen for the newly created Contract. If payment is required, a Pending Invoice Number is displayed and once processed, the Contract will be listed in the Org.Unit Information>Contracts>Org.Unit tab.
To delete a current Contract, as a Supervisor User, select  next to the Contract Number. Alternatively, to delete a current or queued Contract, within the Contract>Org Unit tab check the field next to the relevant Contract # and select the Delete button.
The Items and Customers tab within the Org Unit>Contracts screen is used to list all the Items and Customers Contracts that are associated with the selected Org Unit.