ZENworks Service Desk Customer Portal Reference
The information in this guide pertains to the new customer (end-user) portal. This guide provides an overview of the tasks that an customer can perform in this new customer portal.
1.0 Overview
The new customer portal enhances the overall user experience. Using this new customer portal, customer can view and request a Store Item, view all Requests, create requests from any page, view items and services and can create requests from the Item Details and Service Details page. Customers can also view Outages, Planned Outages and Self Help. Most of the features can be viewed and accessed from the Home page.
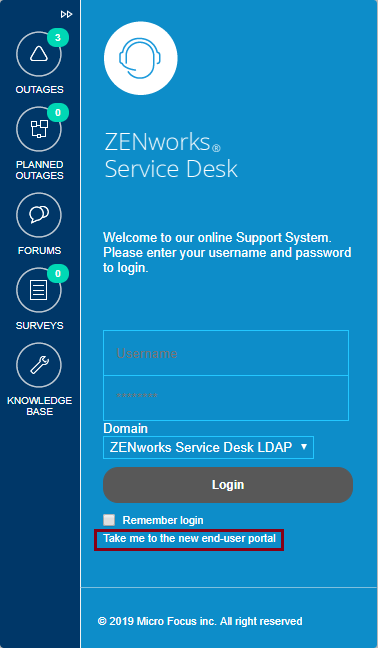
To access the new customer portal, you can perform any one of the following actions:
-
In the ZENworks Service Desk login page, click the link.
-
Use the following URL:
https://<zenworks_service_desk_server>/servicedesk/
The new customer portal can be accessed through any devices such as desktops, mobiles, tablets.
2.0 Home
The home page displays most of the information that a customer can perform in ZENworks Service Desk.
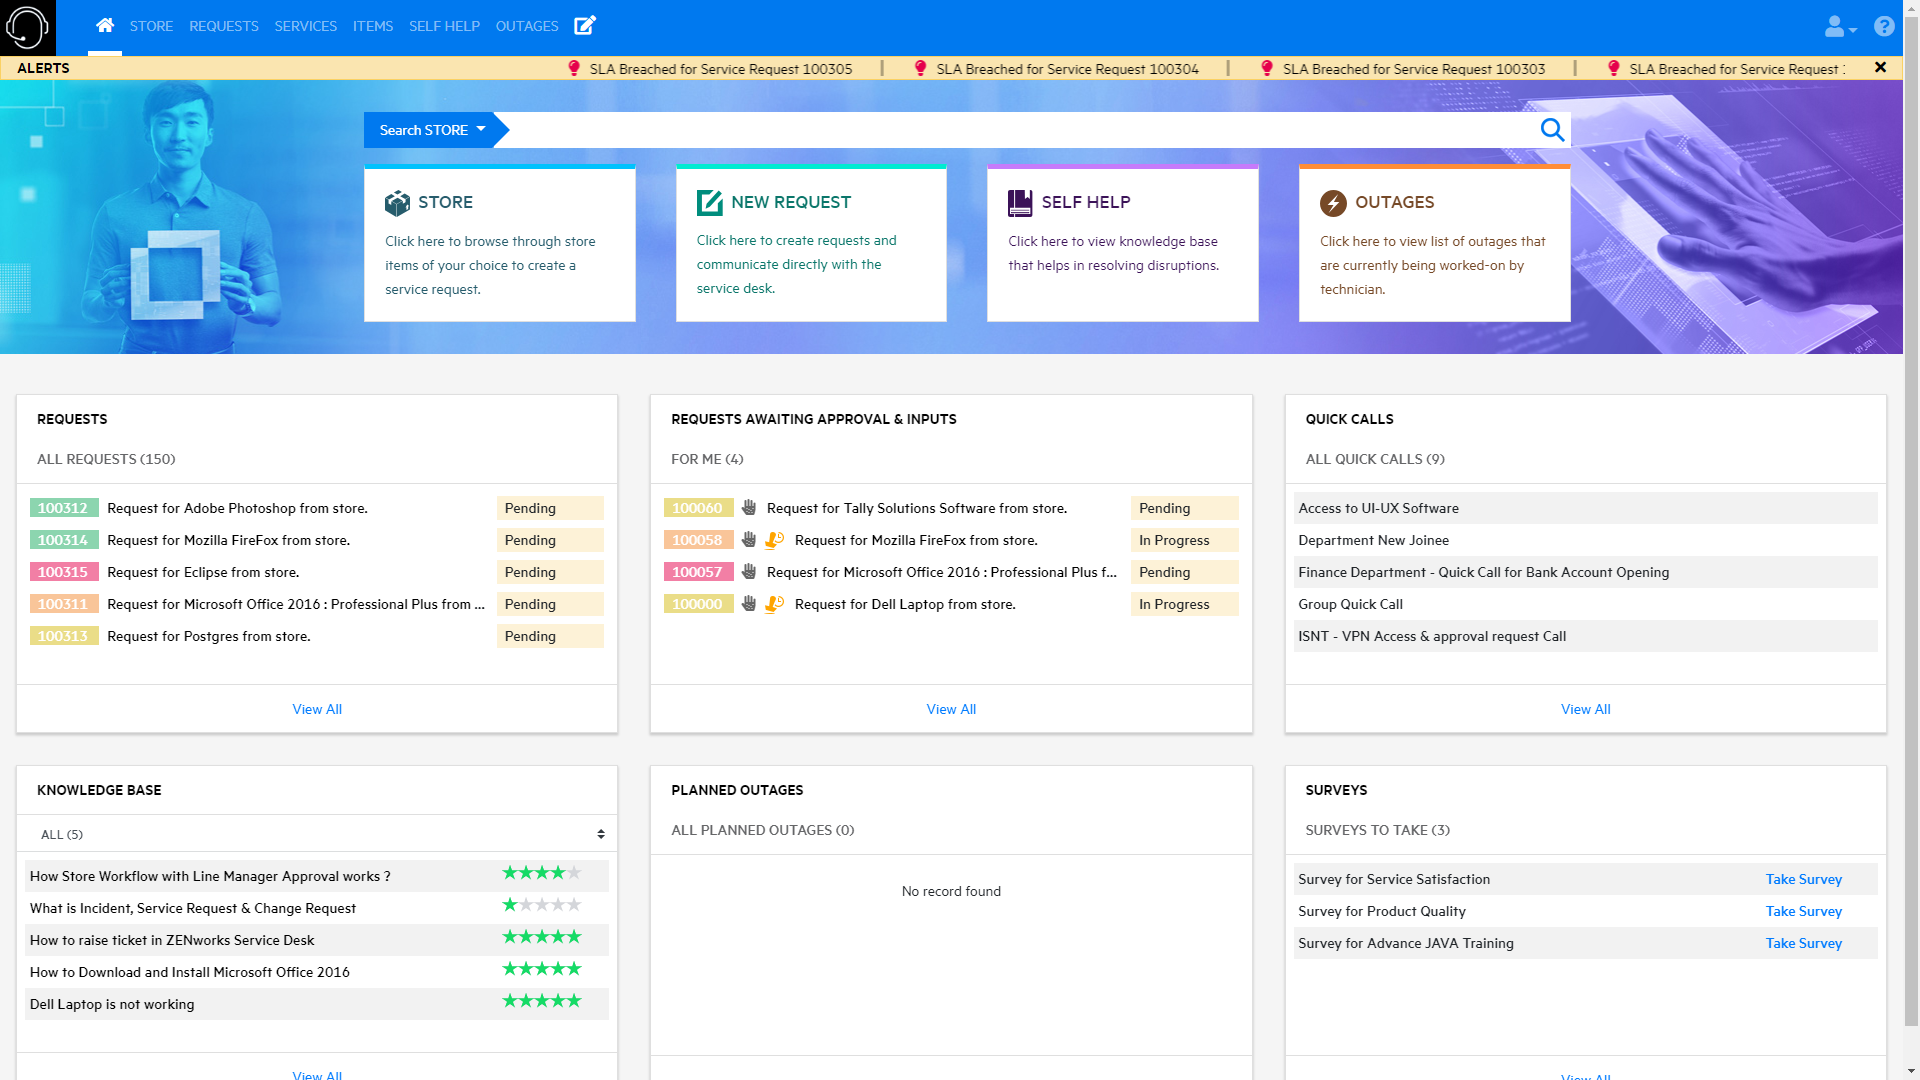
The newly designed Home page includes the following features:
-
Alerts are displayed on the top in the marquee style. Alerts can be differentiated with the icons that are associated with the severity (Information, Warning and Urgent) of the alert. In the Desktop view, hover on an alert displays the description of the alert as a tool tip.
To view additional information, click the alert. A pop-up is displayed with the alert information.
-
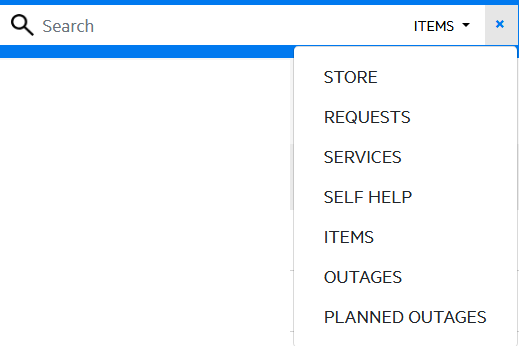
Using the centralized search, you can search for any object in the Service Desk by selecting appropriate option.

-
Easy navigation
Based on privileges, Store, New Request, Self Help and Outages cards are displayed below the search bar. Click on individual card to go that particular page.
Description on the card can be customized by administrators. For more information, see Customizing the New Customer Portal.
-
Dashboard that makes it easy for users to view the most important objects. Each dashlet displays the most recent objects, to view more, click View All. For more information, see Dashboard.
-
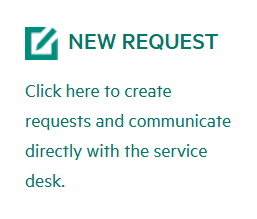
Create requests
For more information, see the Creating a New Request section.
-
To rearrange the dashlets drag and drop the dashlets to the required position. After rearranging, click the save button. To reset or to get back the default dashlet view, click the reset button.
Following are the actions that an end-user can perform in the new end-user portal:
-
View the list of Requests, quick calls, knowledge base articles, outages and survey.
-
Go to Store, Self Help, Outages and new request page by clicking on respective tile.
-
Create Requests.
-
Search for objects.
2.1 Dashboard
The Home page of the new customer portal displays six dashlets. Following is the list of available dashlets.
-
Rearranging Dashlets: To rearrange the dashlets drag and drop the dashlets to the required position. After rearranging, click the save button. To reset or to get back the default dashlet view, click the reset button.
-
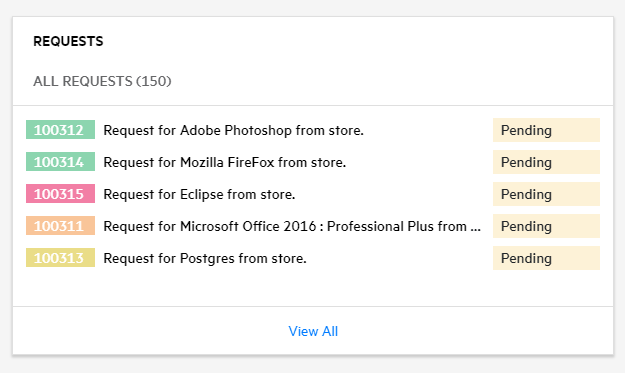
Requests: Lists the top requests for the user. To view a request, click the required request and to view all request, click View All. Number on top of the dashlet displays the total number of requests.
The color code associated with request ID represents the priority of the request:
-
 Urgent
 -
 High
High -
 Medium
 -
 Low
Low
To open a request in a new tab, right-click on the Request and click Open in New Tab.
For more information on request, see the Requests section.
-
-
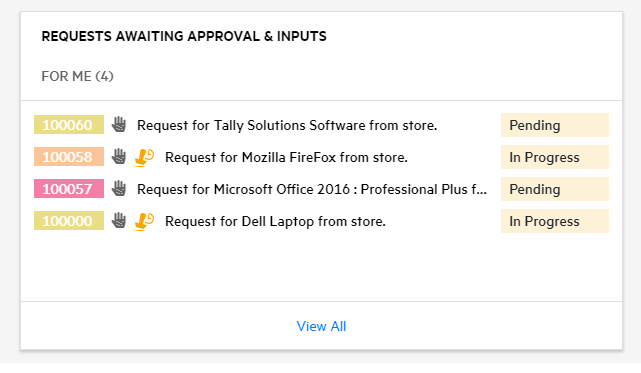
Requests Awaiting My Approval & Inputs: Lists the most recent requests that are under awaiting inputs (need-info) and awaiting approval. Number on top of the dashlet displays the total number of requests that are under awaiting approval and inputs. Click View All to view all the requests that are awaiting approval and awaiting inputs. To open a request in a new tab, right-click on the Request and click Open in New Tab.
-
 This icon represents Awaiting Approval.
 -
 This icon represents Awaiting Inputs (need-info).
NOTE:The Team Manager approval is not listed as requests awaiting my approval.
For more information, see Requests.
-
-
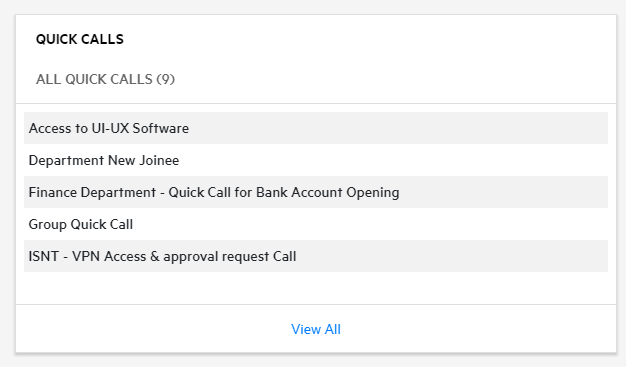
Quick Calls: Lists the most recent quick calls associated with the user. To view all the quick calls associated with the user, click View All. After clicking View All, CREATE NEW REQUEST page is displayed that includes a QUICK CALL TEMPLATE section. On click of individual quick call, a pop-up is displayed and a request can be created. For more information, see Creating Request using the Quick Call or Group Quick Call.
-
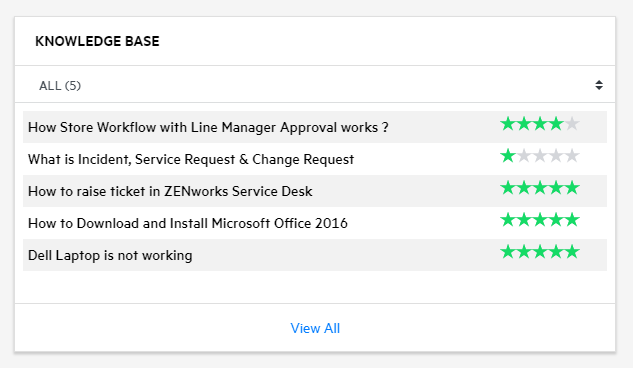
Knowledge Base The Knowledge Base dashlet lists the most recent knowledge base (articles, FAQs and Solutions). Click View All to view all knowledge base.
For more information, see Self Help.
-
Planned Outages The Planned Outages dashlet displays all the outages planned by the technician. To view all the outages, click View All.
For more information, see Planned Outages.
-
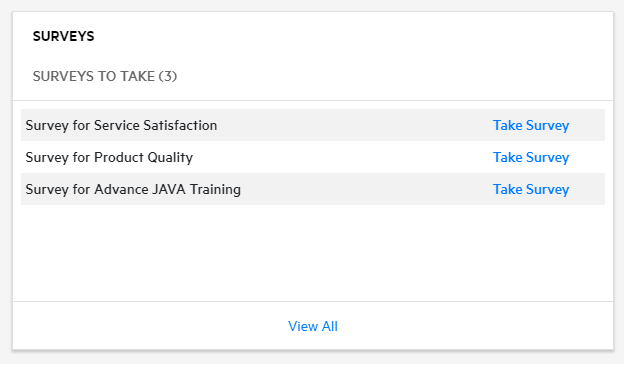
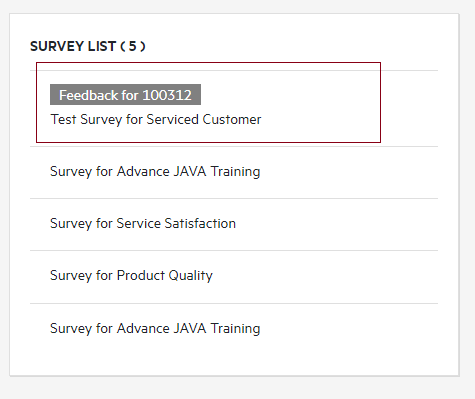
Survey: The Survey dashlet lists all the assigned surveys. To take a survey, click the required survey. By submitting the Survey, the count of the Survey will reduce and that particular survey will disappear from the list.
In Desktop view, the Survey page displays the list of surveys on the left panel side and the right panel displays the survey questions.
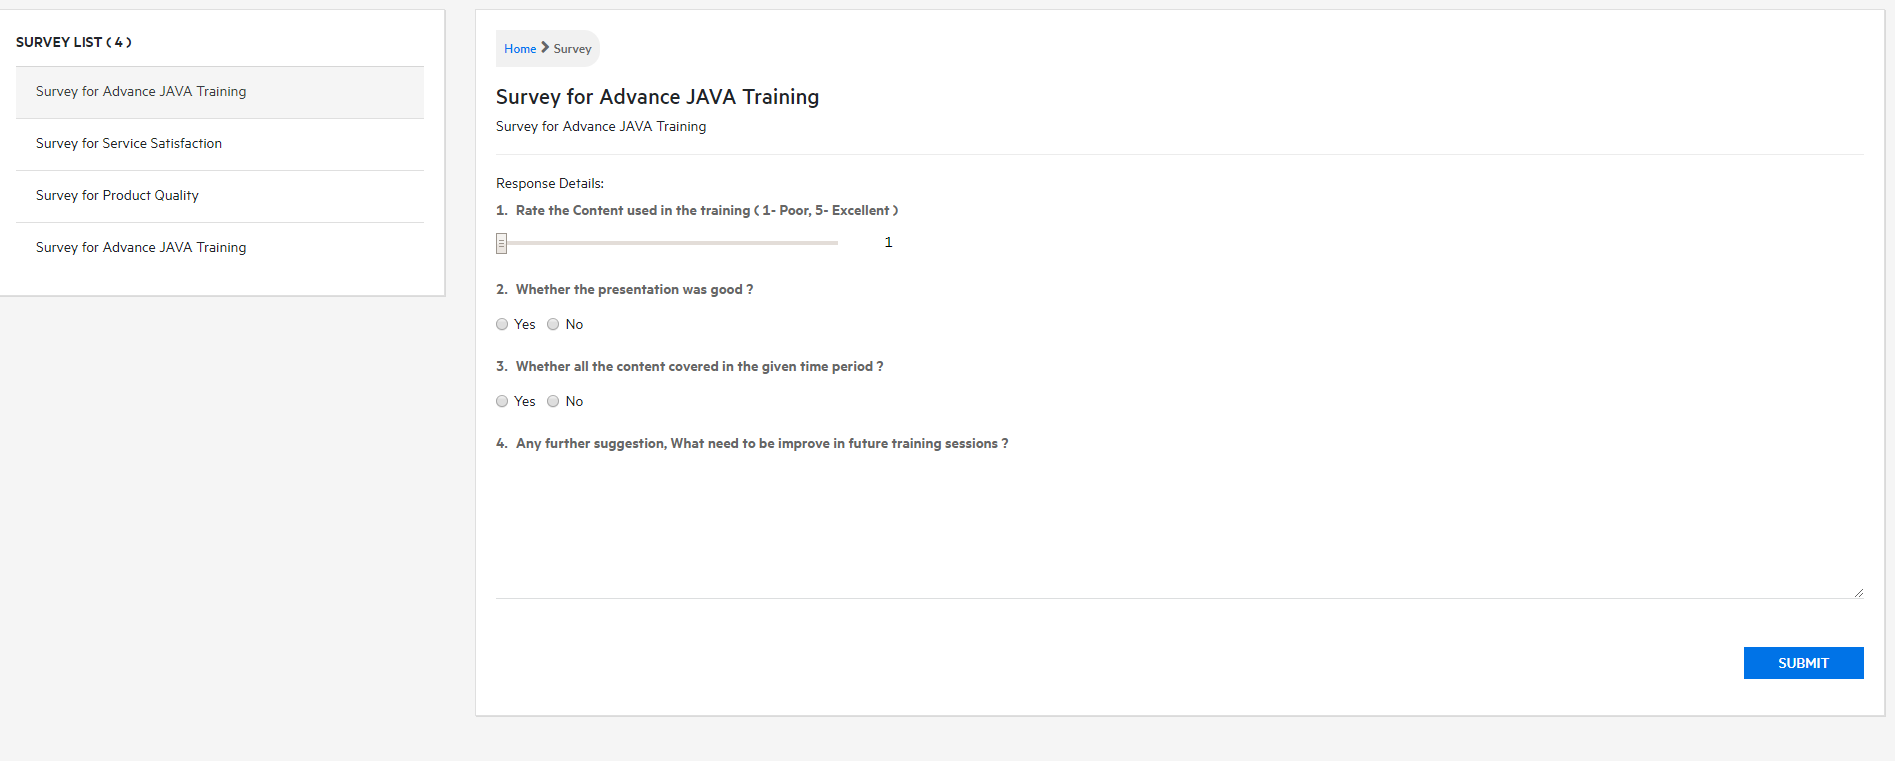
In case if any survey is for Serviced Customer, then to differentiate with other survey, Request Number along with the Survey is displayed in the Survey List.
3.0 Store
The Store page enables you to view and request store items.
3.1 Requesting a Store Item
To request a store item, click an available store item, specify the following information, and then click .
-
Request Description: Specify a description to define the request.
-
Additional Details:
-
Line Manager: This field is an auto-populated field. User cannot edit this field.
-
Location: Specify the location from where this request is created.
-
Preferred Contact Type: Select the preferred contact type. This field includes Phone and Email.
-
Email: If you select as the , then specify email address in the adjacent field.
-
Phone: If you select as the , then specify contact details and in the respective fields.
-
-
-
Attachment: If you want to provide any attachments with this request, you can either drag and drop the attachment or click the Attachment field, and then upload the required fields.
Any number of attachments can be added to a request, but each file should not exceed 100 MB in size.
NOTE:The Additional Details section can be enabled or disabled in > > > .
3.2 Searching or Filtering Store Items:
To search or filter required Store Item, you can either use the filter or search option.
Searching Store Items
To search a store, perform the following steps:
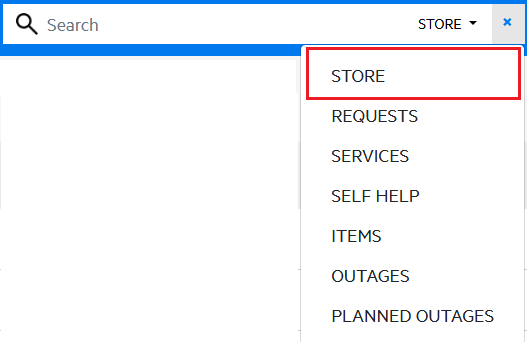
-
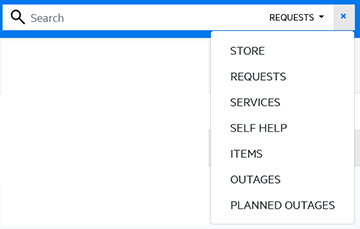
On the upper-right corner the page, click the magnifying glass icon.
-
Click the drop-down, and then select Store.
-
Specify the search keyword, and then hit Enter.
If required, you can search other objects in the portal by selecting the required option, and then enter the search keyword.
Filtering Store Items
To filter Store items, in the left hand side of the store page perform the following actions to filter the Store Item:
-
Select the required store item, whether its , or .
-
In the section, select the categorization to which the store item belongs.
This field is populated based on Categorization available in > .
-
In the Item Type section, select or search for the type of the store item.
This field is populated based on types available in > .
-
After specifying all the fields, click .
NOTE:Filter can be applied on the searched store items.
4.0 Requests
The Requests page displays all the requests. In the request page, you can perform following actions:
4.1 Creating a New Request
In the customer portal, you can create a request in multiple ways.
To create a request, you can perform any one of the following ways:
-
In the menu bar, click the
 icon
icon -
In the Home page, click the tile
After performing any one of the above action, CREATE NEW REQUEST page is displayed.
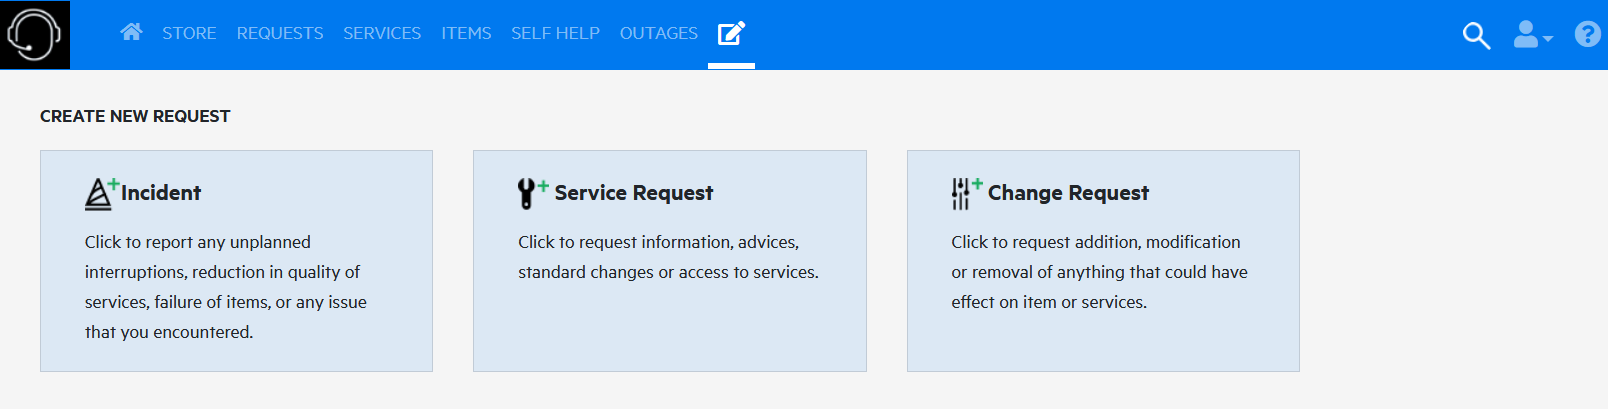
Based on your privileges, you can create Incident, Service or Change request.
Description on each card can be customized. For more information, see Customization.
After clicking a tile, a pop-up window is displayed. Specify the required information, if required, you can add an attachment by clicking the attachment field, or drag and drop the file, and then click CREATE.
After clicking CREATE, a confirmation pop-up is displayed. If any proposed solutions are available, then in the confirmation pop-up Propose Solution Found is displayed. To view the proposed solutions, click View Proposed Solutions. For more information, see Proposed Solutions.

To view the requests page, then click Go to Request Page.
Proposed Solutions
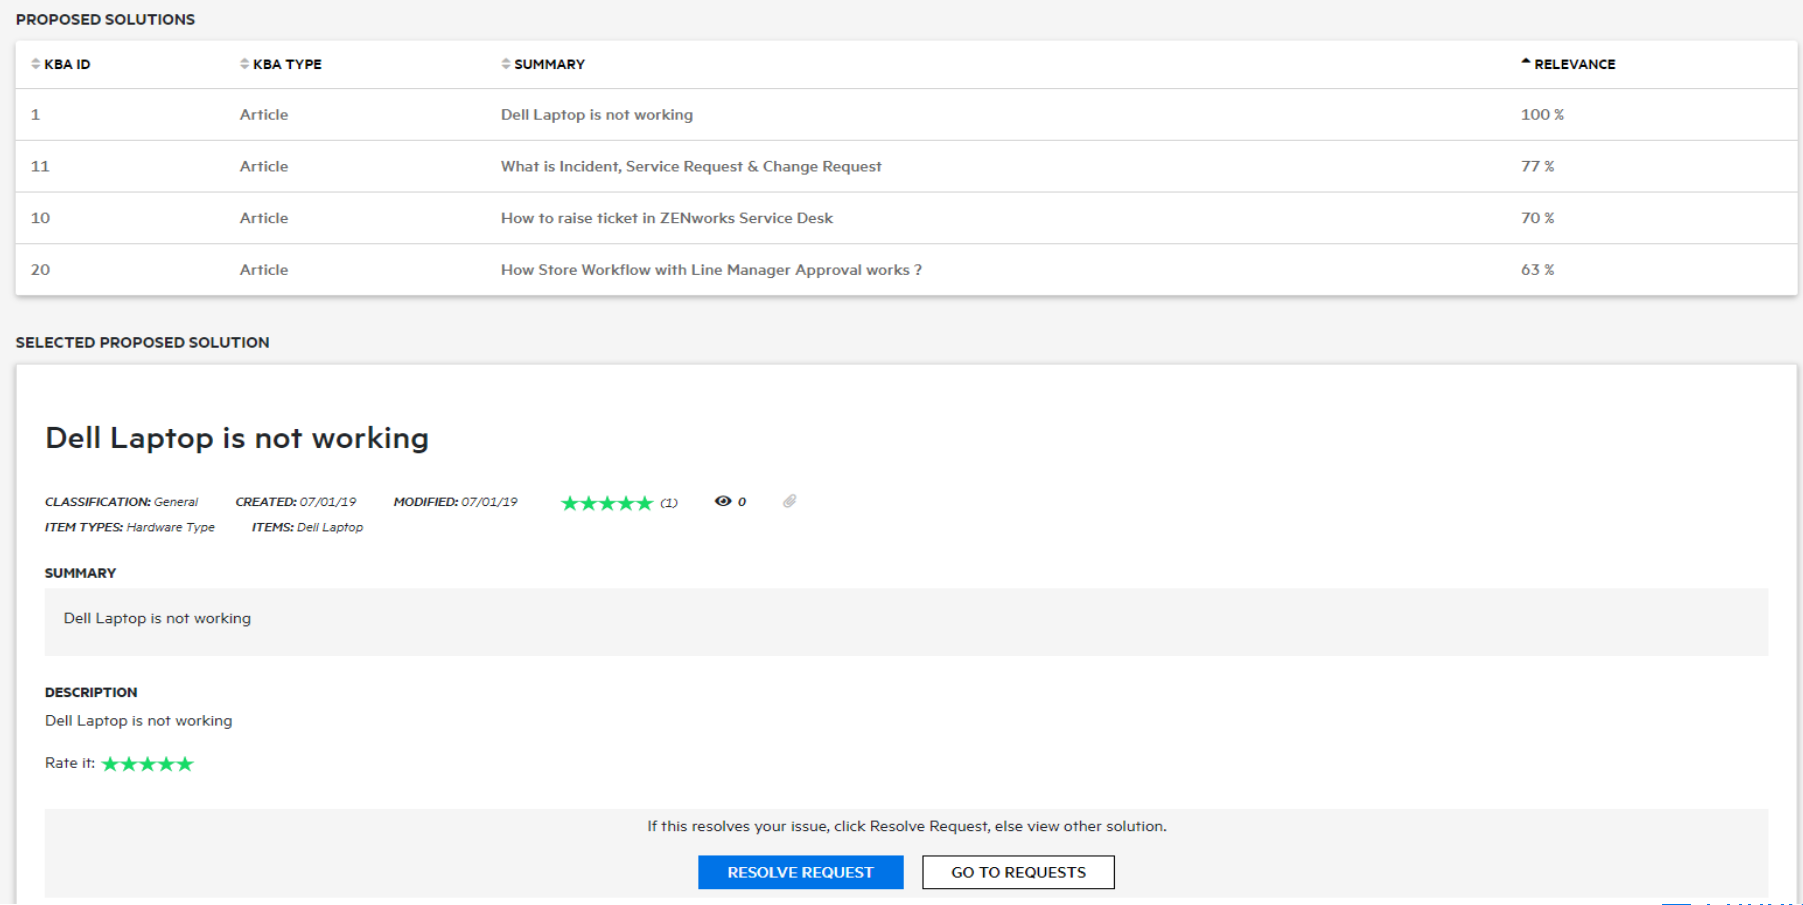
After clicking View PROPOSED SOLUTION, a list of solutions relevant to the request is displayed.
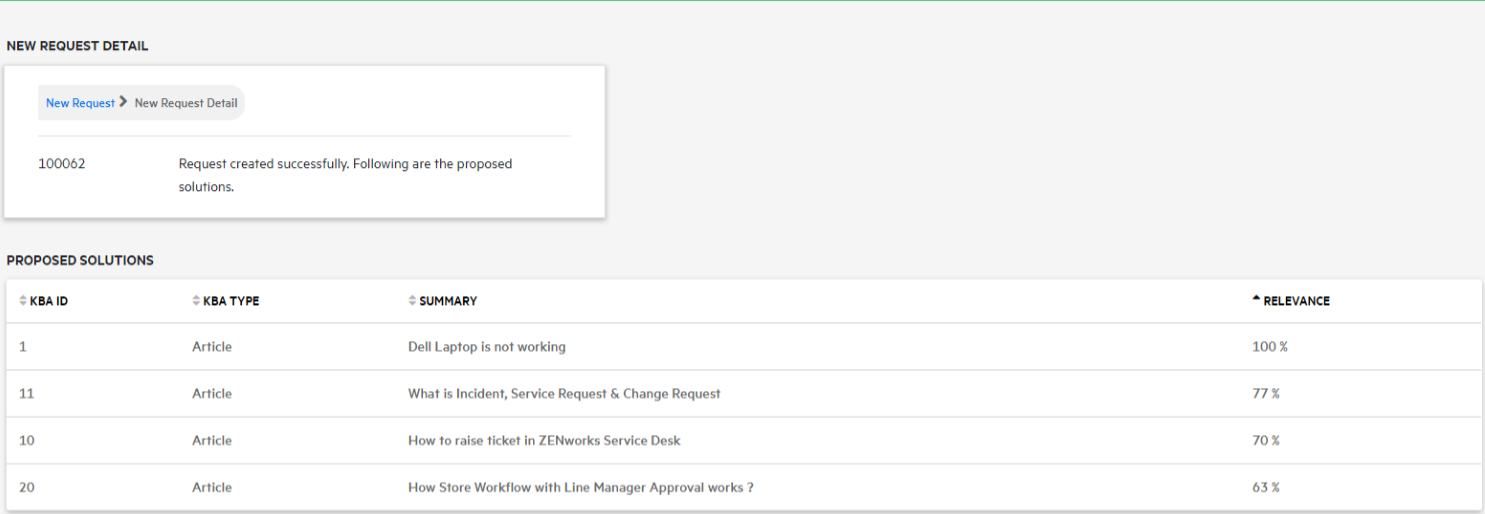
Open the required proposed solution. If any of the proposed solutions provides a resolution for your request, then click Resolve Request, else click Go To Request.
Creating Request using the Quick Call or Group Quick Call
The CREATE NEW REQUEST page also lists the quick call and group quick call templates created by technician.
To create a request from the quick call or group quick call temple, click the required quick call or group quick call. Specify the required information, and then click CREATE.

4.2 Viewing Request Details
To view details of any request, click the request that you want to view. Depending on the device type and resolution, following details are displayed:
-
Subject: Displays the subject of the request that was specified while creating the request. This is an configurable field that can be enabled or disabled. To enable or disable Subject, login as a Admin, click > > > .
-
Request: The request ID and request type icon. The request can be Incident, Service or Change.
-
Item Type: The Item Type on which the request was created.
-
Item: The item number for which the request was created.
-
Created On: The time stamp when the request was created.
-
Status: The current status of the request.
-
Technician: The name of the technician to whom this request is assigned. This is an optional field that can be enabled or disabled. To enable Technician field, login as a Admin, click > > > .
Expanding a Request:
Click the request to expand it. Following are the fields that are displayed after expanding a request:
-
Open Date: The timestamp when the request was opened.
-
Closed Date: The timestamp when the request was closed.
-
Priority: The priority of the request. A request can have high, medium or low priority.
-
Classification: Displays the to which class this request belongs.
-
Item Category: Displays to which item category this request belongs.
-
Room: Room assigned to the Customer.
-
Requested By: Displays who created this request.
-
Description: Description that was specified while creating the request. Click more to view the complete description.
-
Notes: Notes added for this request. Multiple notes can be added for a request.
4.3 Action on a Request
Depending on the privileges and roles, any of the following actions can be performed:
-
Add Note
-
Approve
-
Reject
-
Escalate
-
Deescalate
-
Resolved
-
Reopen
To reopen a request, the privileges must be set to in Customer Privileges.
NOTE:To perform actions on a request, the privileges must be set to or
To perform an action on a request:
-
Click
 , and select the required action.
 -
(Optional) In the field, specify an email ID to whom you want to notify. This field auto suggests email IDs based on the specified characters.
-
Specify a reason in the field.
NOTE:
-
While approving or resolving a request, Note is an optional field.
-
All the notes on a request are stacked, and the latest note is displayed on top of the list.
-
After collapsing the request, all the attachments in a request can be downloaded by clicking the attachment icon.
4.4 Searching, Sorting and Filtering Requests
There are a few actions that you can perform, which will help you find and pinpoint request in a list. These actions include search, sort and filter.
Searching a Request
To search a request in the Request page, perform the following steps:
-
On the upper-right corner the page, click the magnifying glass icon.
-
Click the drop-down, and then select Request.
-
Specify the search keyword, and then hit Enter.
-
If required, you can search other objects in the portal by selecting the required option, and then enter the search keyword.
Sorting Request
To sort items in the Request page, click or tap the element name to sort the list either in ascending or descending order.
You can sort the Items based on the following elements:
-
Request
-
Item
-
Created
-
Updated
-
Status
Filtering Requests
The left-hand side of the Items page displays the filter panel. Using this filter panel, you can filter items based on , , and .
Along with these options, you can filter Requests based on , , and .
NOTE:The Team Manager approval is not listed as requests awaiting my approval.
Customized Filter
: On the right-hand side of the Request page, another filter is displayed. Click  , select the required option.
The available filter options are:
-
All: Displays all the Requests.
-
Last 7 Days: Displays the Requests that were added in the last 7 days.
-
Last 30 Days: Displays the Requests that were added in the last 30 days.
-
Custom: Based on the requirement, you can search for Requests that were added between two specific dates.
The Custom drop-down filters for requests between two specific dates. To filter Requests between two specific dates, select Custom from the drop-down select the required dates, and then click Apply.

5.0 Services
The Services tab enables you to access My Services and Service Catalog, based on privileges that are assigned.
-
My Services: This tab displays services that are assigned to a customer or an Organizational Unit.
-
Service Catalog: This tab displays all the services offered by Service Desk, regardless of the ownership status. Using the Service Catalog page, you can request access to available services.
The tab is displayed only when the privilege is enabled in the privileges in the User portal.
The tab is displayed only when the and privileges are enabled in the privileges in the User portal.
In the Services tab, you can perform the following:
5.1 Viewing Service Details
To view details of a service, click the My Service or Service Catalog tab, and then select the required service.
Following are some of the information displayed in the Service Details page:
-
Category
-
Status
-
Item Type
-
Service Level
-
Device Type
-
Service Level Targets
On the right-hand side of the Service Details page, requests that are related to this request is displayed. This field is displayed only in the Desktop view.
5.2 Creating Request from the Service Details Page
If you have access to multiple items, a new request can be created by selecting a request within the Service Details page.
To create request from the Service Details page, click My Services or Service Catalog tab, and then select the required service.
In the Service Details page, based on your access rights, you can create any of the following request by clicking the respective icon:
-
To create an Incident request, click

-
To create a Service Request, click

-
To create a Change Request, click

After clicking an icon, a pop-up window is displayed. By default, most of the information is pre-populated. If required, you can add or modify the fields and then click CREATE.
After clicking CREATE, a confirmation pop-up is displayed. If any proposed solutions are available, then to view the proposed solutions, click View Proposed Solutions. For more information, see Proposed Solutions. To view the requests page, then click Go to Request Page.
5.3 Searching, Sorting and Filtering Services
There are a few actions that you can perform, which will help you find and pinpoint services in a list. These actions include search, sort and filter.
Searching a Service
To search a service, perform the following steps:
-
On the upper-right corner the page, click the magnifying glass icon.
-
Click the drop-down, and then select SERVICES.
-
Specify the search keyword, and then hit Enter.
If required, you can search other objects in the portal by selecting the required option, and then enter the search keyword.
Sorting Services
To sort items in the Services (My Services or Service Catalog) page, click or tap the element name to sort the list either in ascending or descending order.
You can sort the Items based on the following elements:
-
Service
-
Service Type
-
Status
-
Service Level
Filtering Services
The left-hand side of the Items page displays the filter panel. Using this filter panel, you can filter items based on and .
6.0 Items
The Item tab allows you to view all items that you own directly, shared or through Organizational Unit ownership.
The Items tab lets you review the catalog of items that are currently available for creating requests. Some of the items in the list are assigned to you or to your Organizational Unit. You can also view the items that you directly own, and which are registered with the support service.
6.1 Viewing Items Details
To view details of an item, click the required item.
The details page displays various item details such as Category, Item Type, Status, Service Level, and other related information. Along with details of the items, on the right-hand side of the Item Details page, requests related to the item are displayed.
In the Items Details page, click Cancel to go to Items page.
On the right-hand side of this page, requests that are related to this Item is displayed. This field is displayed only in the Desktop view.
6.2 Creating Request from the Item Details Page
If you have access to multiple items, a new request can be created by selecting a request within the Item Details page. Based on your access rights, you can create any of the following request by clicking the respective icon:
-
To create an Incident request, click the
-
To create a Change Request, click
After clicking an icon, a pop-up window is displayed. By default, most of the information is pre-populated. If required, you can add or modify the fields and then click CREATE.
After clicking CREATE, a confirmation pop-up is displayed. If any proposed solutions are available, then to view the proposed solutions, click View Proposed Solutions. For more information, see Proposed Solutions. To view the requests page, then click Go to Request Page.
6.3 Searching, Sorting and Filtering Items
There are a few actions that you can perform, which will help you find and pinpoint items in a list. These actions include search, sort and filter.
Searching an Item
To search an item, perform the following steps:
-
On the upper-right corner the page, click the magnifying glass icon.
-
Click the drop-down, and then select Item.
-
Specify the search keyword, and then hit Enter.
-
If required, you can search other objects in the portal by selecting the required option, and then enter the search keyword.
Sorting Items
To sort items in the Items page, click or tap the element name to sort the list either in ascending or descending order.
You can sort the Items based on the following elements:
-
Item Name
-
Item Type
-
Status
-
Service Level
Filtering Items
The left-hand side of the Items page displays the filter panel. Using this filter panel, you can filter items based on and .
7.0 Self Help
The Self Help tab enables you to have single-point access to the knowledge base.
The All tab lists all the knowledge base that include, Articles, FAQs and solutions. For ease of access, a separate individual tab can be used to access the following:
-
All: Lists all the assigned knowledge base (Articles, FAQs and Solutions).
-
Articles: Lists all the assigned articles.
-
FAQ: Lists all the assigned FAQs.
-
Solutions: Lists all the assigned solutions.
7.1 View Self Help Details
To view details of Self Help, click any of the tab (Articles, FAQs and Solutions) in the Self Help page.
The details page displays classification, created date, modified date, rating, number of views and attachments (if any). If the attachment icon is enabled, click the icon to view the attachments associated with the self help.
On the right-hand side of this page, related knowledge bases are displayed. This field is displayed only in the Desktop view.
7.2 Searching, Sorting and Filtering
There are a few actions that you can perform, which will help you find and pinpoint services in a list. These actions include search, sort and filter.
Searching the Knowledge Base
To search a knowledge base, perform the following steps:
-
On the upper-right corner the page, click the magnifying glass icon.
-
Click the drop-down, and then select .
-
Specify the search keyword, and then hit Enter.
If required, you can search other objects in the portal by selecting the required option, and then enter the search keyword.
Sorting Knowledge Base
In any of the list in the new customer portal, tap or click the element name to sort the list either in ascending or descending order.
You can sort the Items based on the following elements:
-
Title
-
Classification
-
Created
-
Views
-
Rating
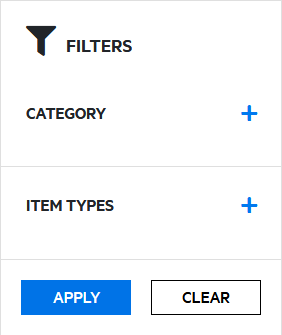
Filtering the Knowledge Base
To filter the knowledge base, you can either use the filter available on the left-hand side or the filter option available on the right-hand side of the Knowledge Base page. Same operations can be performed in the Articles, FAQs and Solutions pages.
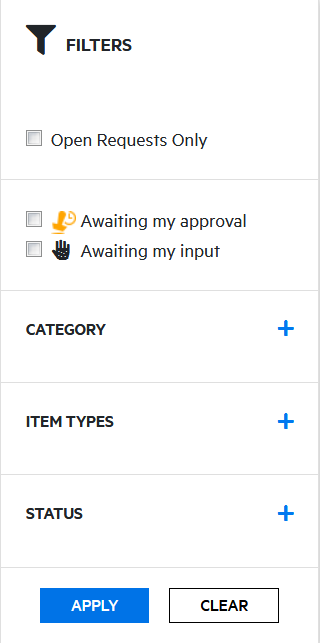
Filtering knowledge base using the Filter panel : The left-hand side of the Knowledge Base page displays the filter panel. Using this filter panel, you can filter knowledge base based on and .
Figure 1 Filters
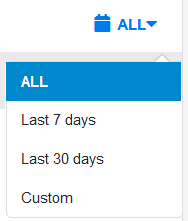
Customized Filter
: On the right-hand side of the outages page, another filter is displayed. Click , select the required option.
The available filter options are:
-
All: Displays all the knowledge base.
-
Last 7 Days: Displays the knowledge base that were added in the last 7 days.
-
Last 30 Days: Displays the knowledge base that were added in the last 30 days.
-
Custom: Based on the requirement, you can search for knowledge base that were added between two specific dates.
The Custom drop-down filters for knowledge base between two specific dates. To filter knowledge base between two specific dates, select Custom from the drop-down select the required dates, and then click Apply.
Figure 2 Custom Filter
8.0 Outages
The Outages tab displays both current outages and planned outages. A number is associated with each tab, which indicates the number of Outages or Planned Outages.
The Outages tab is displayed only when Outages Page privilege is enabled in the User portal.
To enable or disable the Outages tab, perform the following:
-
Log into the User portal using administrator or supervisor credentials.
-
Click Setup.
-
In the Setup page, click the Setup tab, click Privileges, and then click System.
-
In Outages Option, depending on the requirement, select either Yes or No, and then click Save.
8.1 Outages
An outage is a period when some service is not available or when equipment is closed down due to expected or unexpected events. For example, an Item is out-for-repair or is faulty. Outages includes two tabs Outages and Planned Outages.
This page lists all the current outages that are associated with the user.
Viewing the Outages Details
To view information of an outage, click any outage.
Following are some of the information displayed in the outages page:
-
Category
-
Status
-
Item Type
-
Service Level
-
Device Type
On the right-hand side of this page, requests that are related to the outage is displayed. This field is displayed only in the Desktop view.
8.2 Planned Outages
Planned Outages are used to manage Items' proposed unavailability. This is useful for informing Customers and Users about planned changes to infrastructure that may cause an Item to be taken offline or out of service.
To enable or disable the Planned Outages tab, perform the following:
-
Log into the User portal using administrator or supervisor credentials.
-
Click Setup.
-
In the Setup page, click the Setup tab, click Privileges, and then click System.
-
In Planned Outages Option, depending on the requirement, select either Yes or No, and then click Save.
Viewing the Planned Outages Details
To view information of a planned outage, click any outage.
Following are some of the information displayed in the planned outages page:
-
Category
-
Status
-
Item Type
-
Service Level
-
Device Type
On the right-hand side of this page, requests that are related to the outage is displayed.
8.3 Searching, Sorting and Filtering
There are a few actions that you can perform, which will help you find and pinpoint services in a list. These actions include search, sort and filter.
Searching the Outages
To search an outage, perform the following steps:
-
On the upper-right corner the page, click the magnifying glass icon.
-
Click the drop-down, and then select .
-
Specify the search keyword, and then hit Enter.
If required, you can search other objects in the portal by selecting the required option, and then enter the search keyword.
Sorting Outages
In any of the list in the new customer portal, tap or click the element name to sort the list either in ascending or descending order.
You can sort the Outages based on the following elements:
-
Item Name
-
Category
-
Item Type
-
Status
-
Inactive Time
You can sort the Planned Outages based on the following elements:
-
Start Date
-
End Date
Filtering the Outages
To filter the Outages, you can either use the filter available on the left-hand side or the filter option available on the right-hand side of the Outages page.
Filtering knowledge base using the Filter panel : The left-hand side of the Outages and Planned pages displays the filter panel. Using this filter panel, you can filter Outages based on and .
Customized Filter
: On the right-hand side of the Planned Outages page, another filter is displayed. Click , select the required option.
The available filter options are:
-
All: Displays all the knowledge base.
-
Custom: Based on the requirement, you can search for outages that were added between two specific dates.
The Custom drop-down filters for outages between two specific dates. To filter outages between two specific dates, select Custom from the drop-down select the required dates, and then click Apply.