3.1 Initiating a Scan
-
Make sure that all USB devices you want to scan are connected to the computer.
Some devices, such as the Compaq iPAQ and Palm OS devices, must be powered on in order to be detected. If you perform a scan and a device is not detected, turn on the device and scan again.
If you have more USB devices to scan than your computer has USB ports, you can connect one set of devices, scan them, replace them with new devices, and scan the new devices. Scans are additive, meaning that the device data from each scan is added to any device data that is already in the Device List. You can also add a device to the list manually instead of scanning it. See Section 4.4, Adding a New Device for more information.
-
Click the menu > > > > > to launch the scanner.
or
Double-click ZESScan.exe located in the c:\Program Files\Novell\ZENworks\ZES Device Scanner directory.
-
Click > .
or
Click on the toolbar.
When the scan is complete, all detected USB devices are displayed in the list.
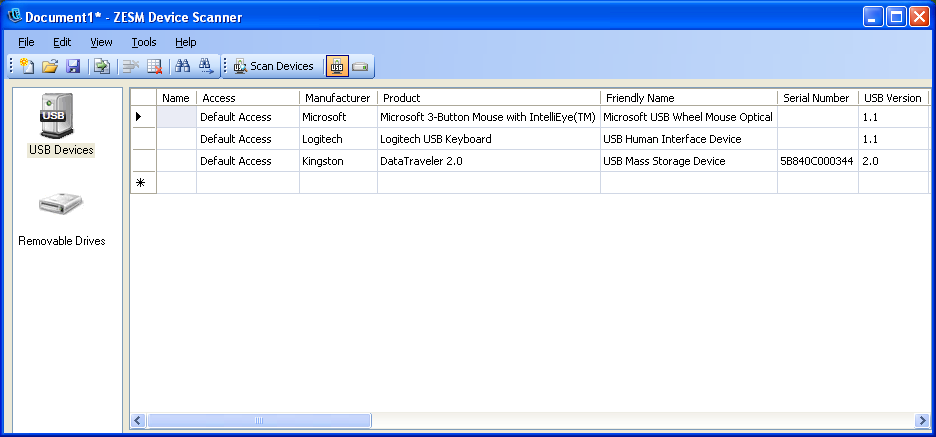
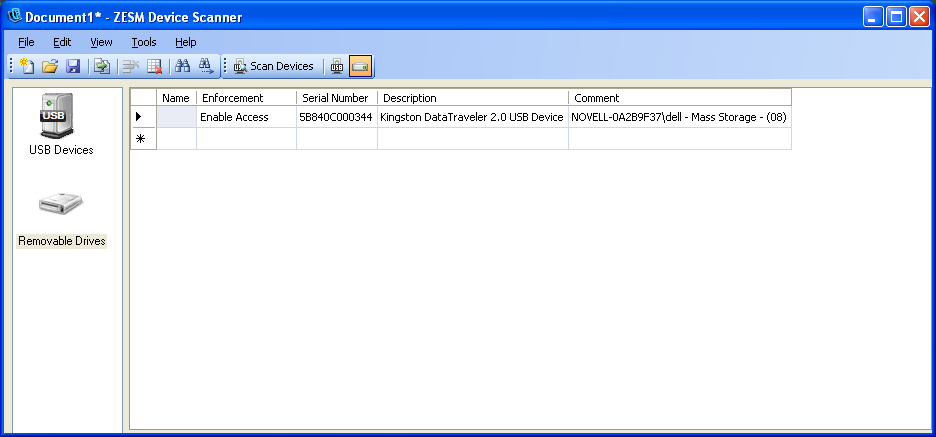
USB devices that are removable storage devices are also displayed in list. To qualify as a removable storage device, a USB device must be a mass storage device and have a serial number.
-
Modify the device data as needed or save the file.
After you perform a scan, you must save the data to a scan file before exiting the Device Scanner, or the data is lost. Likewise, when you modify a file, the changes are not saved until you save the file. For information about modifying or saving the data, refer to the following sections: