11.1 Configuring Inventory History Purge Settings for the Zone
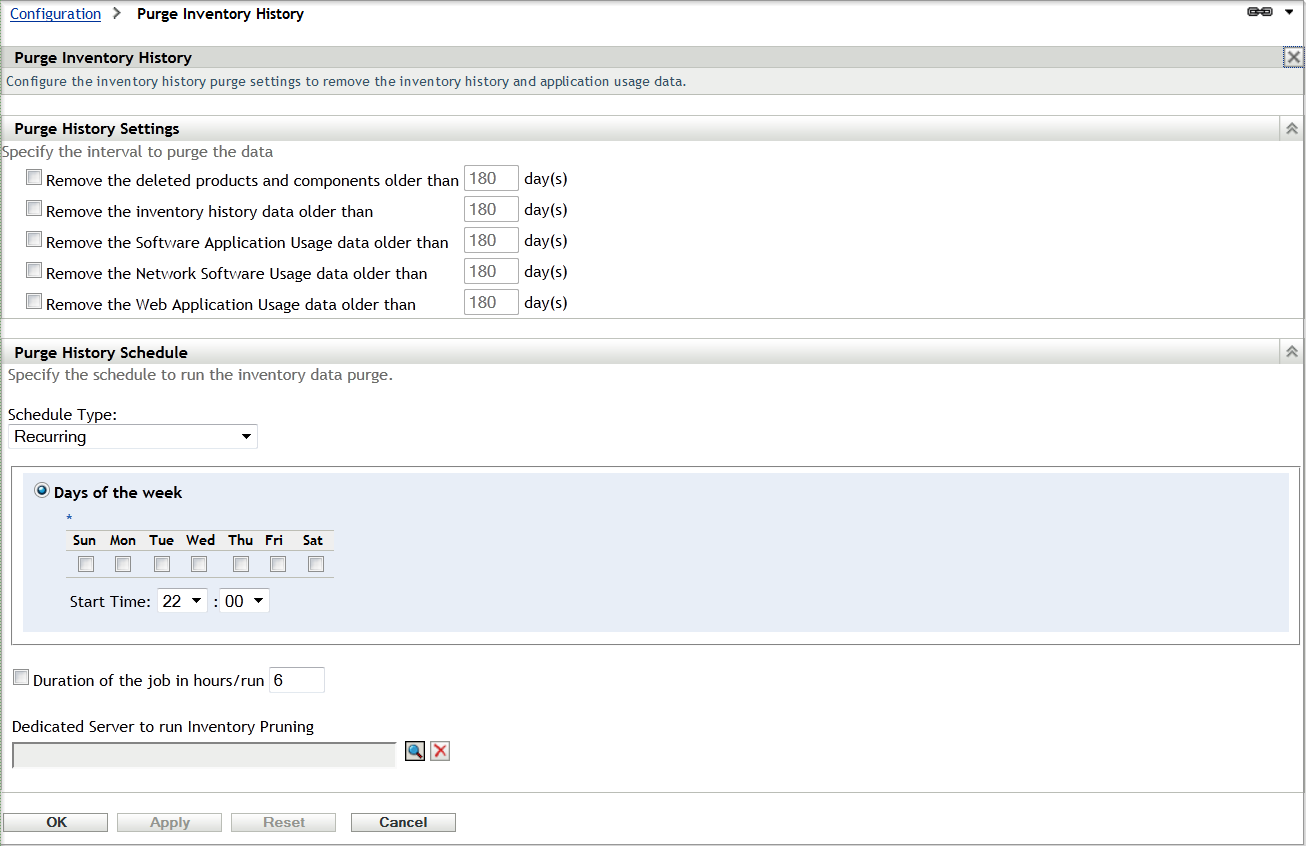
The Purge Inventory History panel allows you to configure settings to delete the inventory history and the usage data. You can remove records from the database for the products and components that were previously marked for deletion and you can also delete software application usage data, network software usage data, and Web application usage data that is older than the value you set. By default, all the data is stored in the database unless this setting is configured. Purge schedule of the Zone is applicable to the devices as well.
-
In ZENworks Control Center, click the tab.
-
Click under .
-
Click .
-
Specify the following purge history settings:
-
Remove the deleted products and components older than x day(s): Specify the number of days after which to purge the deleted product and component data. The default value is 180 days.
-
Remove the inventory history data older than x day(s): Specify the number of days after which to purge the inventory history. The default value is 180 days.
-
Remove the Software Application Usage data older than x day(s): Specify the number of days after which to purge the software application usage data. The default value is 180 days.
-
Remove the Network Software Usage data older than x day(s): Specify the number of days after which to purge the network software usage data. The default value is 180 days.
-
Remove the Web Application Usage data older than x day(s): Specify the number of days after which to purge the Web application usage data. The default value is 180 days.
Example 11-1 For example:
If you enter 190 days as the value, all data older than 190 days is deleted.
-
-
Specify one of the following as the schedule for purging the history:
-
Select to set a schedule that enables the purging process to start at the specified time of the given day.
-
Select if you do not want to purge the inventory data automatically.
-
-
Use the option to specify the total duration in number of hours per run for the purging process
-
In the Dedicated Server to run Inventory Pruning field, browse for and select a Primary Server, then click OK. Pruning takes place on the chosen primary server. If you do not select any, then pruning takes place on any server.
-
Click or to save your settings. Click to return to the default values.