5.3 Working with Filters
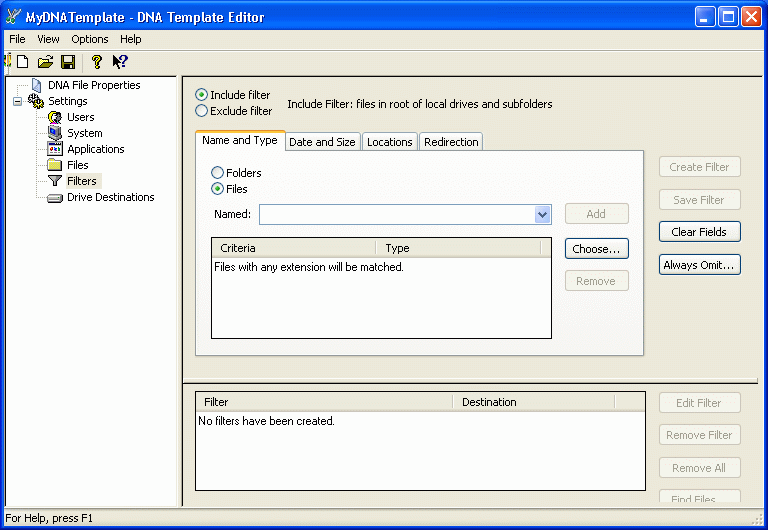
A filter lets you identify file extensions that you want to include in a migration. However, you might want to include those files only if they are stored in a specific folder or if they were created after a certain date. Suppose you want to include some files with a certain extension, but not if they are in a specific directory. Or what if you want to include all the files in a certain folder, but exclude others if they are in a subfolder? Novell ZENworks 7 Personality Migration with SP1 includes advanced filtering that allows you to identify file extensions and folders that you want to include or exclude in a migration. The dialog box lets you create and test an advanced filter to make sure you can find the files and folders you are looking for before you save the filter settings.
ZENworks Personality Migration allows you to create the following types of filters:
-
Include filters specify the files and folders to migrate.
-
Exclude filters specify files and folders you do not want to migrate.
-
Omit filters specify folders that you do not want to include. Files in these folders and the folders themselves are not included in the search. The omit filter criteria is specific to a filter.
-
Always Omit filters lets you identify folders that you never want to include.
To create a filter:
-
Open the DNA Template Editor from the menu.
-
Click in the left pane of the Template Editor window.
-
Click or depending on the type of filter you want to create.
-
Click or depending on which one the filter applies to.
-
Click to display a list of file extensions, or select one from the drop-down list.
Only files and folders added to the list by clicking appear in the drop-down list.
-
Click to display a list of file extensions, or type the extension in the field.
-
Click to put the extension in the list.
If you add an extension to the list and you later want to remove it, select the extension and click .
-
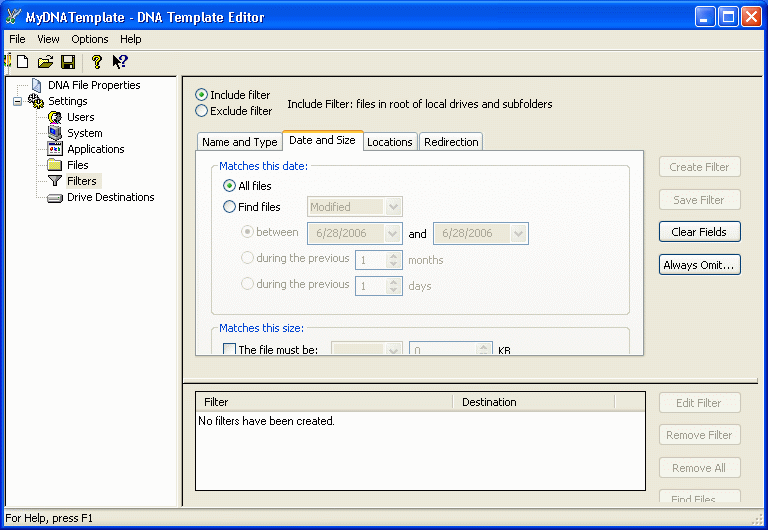
Click the tab.
-
Fill in the fields:
Matches this date. Select whether you want to search for all files or find those created between specified dates.
Matches this size. Select whether you want to filter by file size.
-
Click the tab.
-
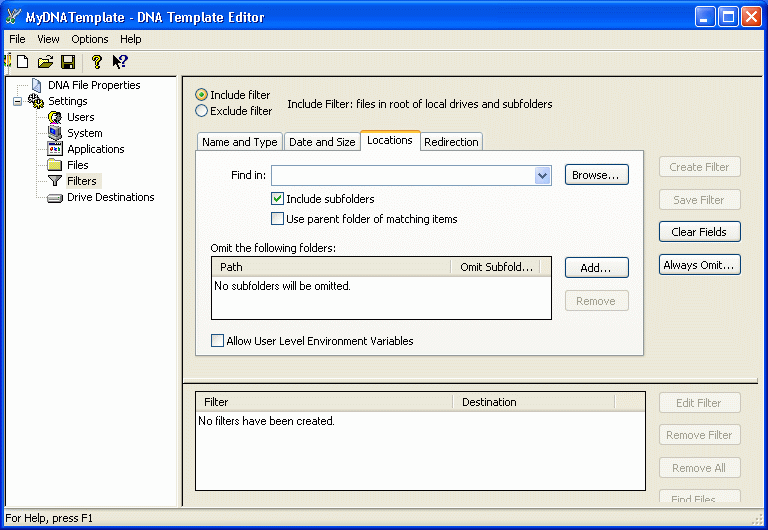
Specify the name of the drive or folder to search in the field, or browse to select a drive or folder to search.
Only drives and folders that you have added to the list by clicking appear when you click the drop-down list. You can also click to specify a drive or folder.
-
Click subfolders to include the subfolders of the selected folder.
-
Click if you want to migrate the entire contents of the folder where the file matching the filter criteria is located.
You cannot redirect filters where you have selected . You can redirect other filters. If you want to redirect the files and folders captured by a filter where you have selected , you need to redirect the folders individually by expanding the file and folder tree.
-
Select whether you want to omit specific folders from individual filter processing or from all filter processing for a migration.
-
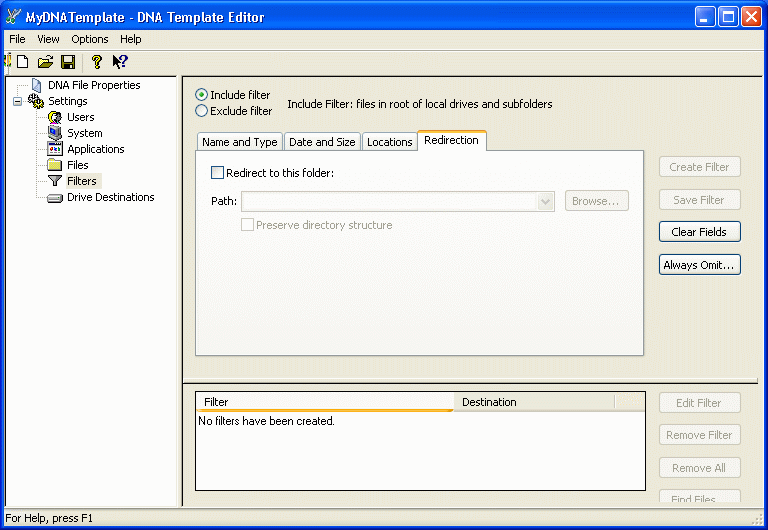
Click the tab.
-
To use redirection, click and type a path, or use the button to select a path.
-
Click
The filter name appears in the pane at the bottom of the screen.
NOTE:Once a filter has been created, you can test it by clicking on the filter name in the pane at the bottom of the screen and clicking .
To edit filters:
-
Click the filter name in the pane at the bottom of the screen.
-
Click .
-
Make the desired changes.
-
Click .