20.4 Assigning Bundles
When you create RPM bundles, file bundles, or bundle groups, you have the choice of assigning the object as part of the creation process, or you can create the object without assigning it.
If you created the object without assigning it, the object was created without assigning devices to it, specifying deployment and installation schedules, setting special flags, and so forth. Before the object can be deployed and installed on assigned devices, you must complete the following steps. If you assigned the object during its creation, you have already performed the following procedure.
-
In the ZENworks Control Center, click the tab, select the desired bundle or bundle group in the list by clicking the box next to its name, click , then click to display the Devices to be Assigned page.
-
Assign the bundle or bundle group to the devices that you want to distribute the bundle or bundle group to.
-
Click to browse for and select the appropriate Server or Workstation objects.
You can also select Folder or Group objects.
-
Click the down-arrow next to or to expand the list, then click the underlined link in the column to select the desired objects and display their names in the list box.
Assigning a bundle to a Folder or Group object is the preferred method of assigning the bundle. Assigning the bundle to a large number of objects (for example, more than 250) might cause increased server utilization.
-
Click .
-
-
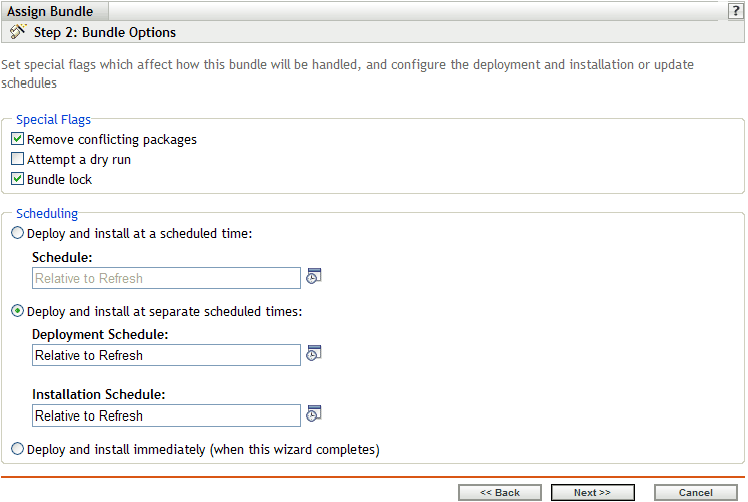
Click to display the Bundle Options page.
-
(Optional) Specify the desired Special Flag options:
-
Remove conflicting packages: Select this option to specify that conflicting packages and files are uninstalled from devices before installing new packages and files. By default, this option is selected, so conflicting packages and files (previous versions of the same package, for example) are uninstalled before the current package or file is installed. If this option is not selected, packages and files are not installed if a conflict is detected. This option is not applicable for File bundles.
-
Attempt a dry run: Select this option to have ZENworks Linux Management perform a test to determine if the RPM bundle or files can be successfully deployed. If there are any issues that could prevent the RPM bundle or file bundle from being deployed, you can look at the log file to troubleshoot the bundle-creation process. The log file is located in /var/opt/novell/logs/zenworks. This option is not applicable for File bundles.
A successful dry run ensures that the bundle can be successfully deployed or installed on assigned devices (packages are available, dependencies are met, etc.).
-
-
Specify the desired Scheduling options:
-
Deploy and install at a scheduled time: Use this option to schedule the deployment and installation of the bundles contained in this bundle group. Click the icon to choose the schedule type.
The following schedules are available. Click the link in the left column in the table below for more information about each schedule type and its options.
-
Deploy and install at separate scheduled times: Use this option to specify an optional deployment schedule separate from the installation schedule. If you select this option, you can set up a deployment schedule and an installation schedule. If you do not select this option, the packages will be deployed and installed on assigned devices according to the schedule. Click the icon to choose the schedule type.
The following schedules are available. Click the link in the left column in the table below for more information about each schedule type and its options.
The option is not set by default. In most situations, there is no need to deploy and install packages inside bundles at different times. You can, depending on your needs, schedule deployment and installation at different times to conserve network bandwidth or to perform the actions at more convenient times for users.
The deployment schedule determines when the packages and files inside the bundle are downloaded from the server to the assigned devices. The packages and files are not yet installed and available for use. The installation schedule determines when the packages and files are installed on assigned devices so the packages will be available for use.
-
Deploy and install immediately (when this wizard completes): Select this option to specify that the packages inside the bundle group deploy and install immediately when the Create New Group Wizard completes, providing that the assigned devices are online. The packages inside the bundle group deploy to and install on devices that are not online when they refresh.
-
-
Click to display the Finish page.
-
Review the information on the Finish page, making any changes to the bundle settings by using the button as necessary. Click to create the bundle as configured per settings on the Summary page.
-
Click .